
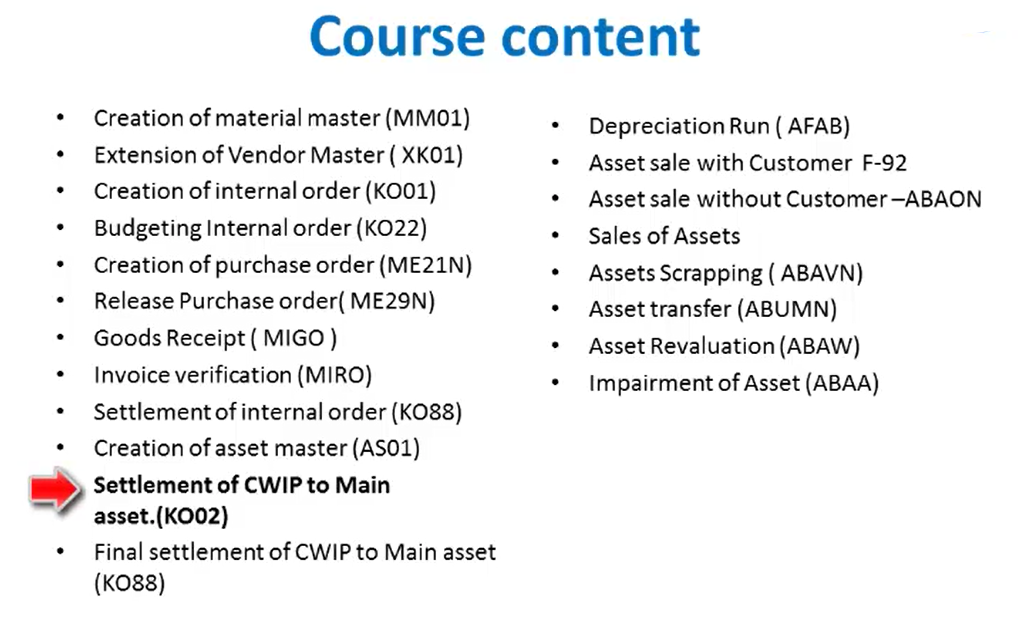
Settlement of CWIP to Main Asset
Next we’ll see how to do settlement of CWIP to the main asset after the creation of an asset master. Now here we’ll use a transaction code called K02. So this is the screen which we’ll get after we enter the transaction code K02.
Thank you for reading this post, don't forget to subscribe!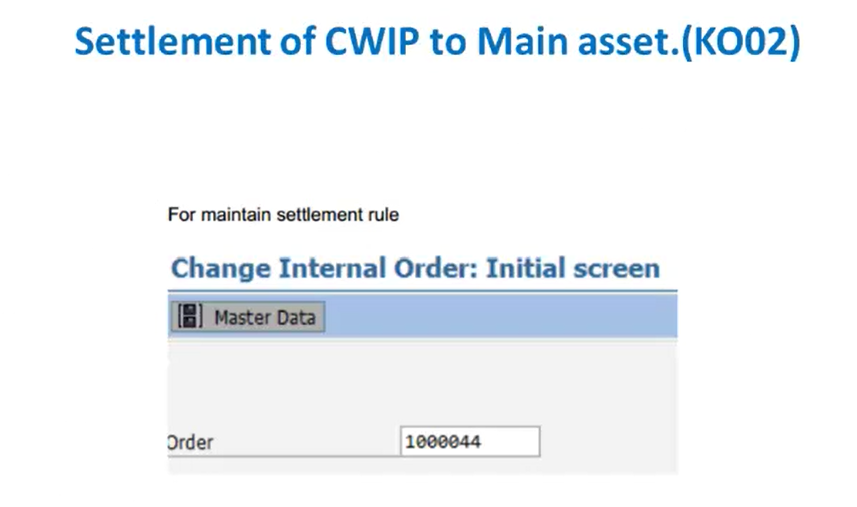
Now here we’ll maintain the settlement rule. So we have to provide an internal order number. So here we’ll use the same order number which we have used for our previous examples. And after that we’ll click on this master data tab. Now here under that we’ll have to maintain the description for this particular order and we’ll have to maintain the plan details, the profit center, the requesting company code, etc. under the assignments tab.
After maintaining all these details we’ll click on this settlement rule tab. So once we click on the settlement rule tab, we’ll get a screen called as maintain settlement rule overview. Now here we’ll provide the values like CAT then settlement receiver. Then we have to provide a percentage to it and other details.
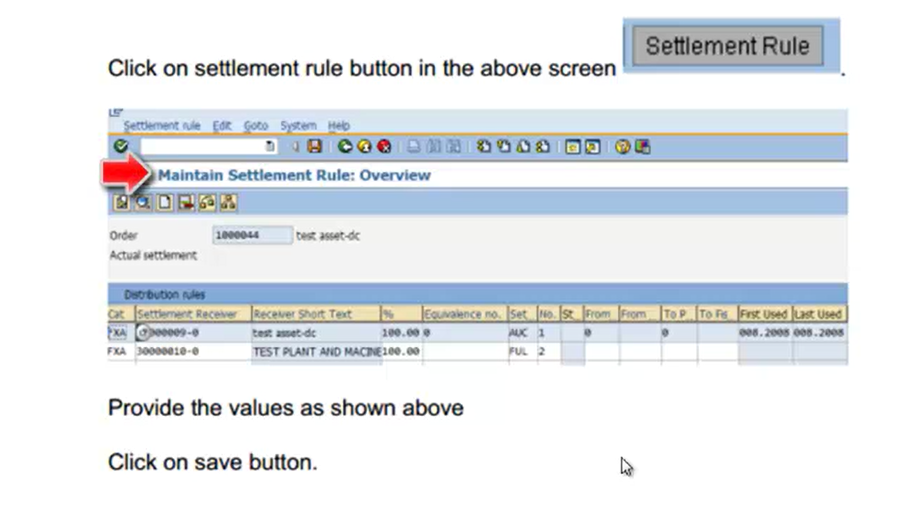
So after providing all these details, we’ll click on the save button. So once we click on the save button, a settlement rule is created. That is we have maintained this particular asset based on a settlement rule.
Next, we’ll see how to do the final settlement of CWIP to the main asset. Now that is done by using a transaction code called K088. So here this is the actual settlement screen. Here we’ll have to provide the order number. So we’ll use the same order number as our previous example.
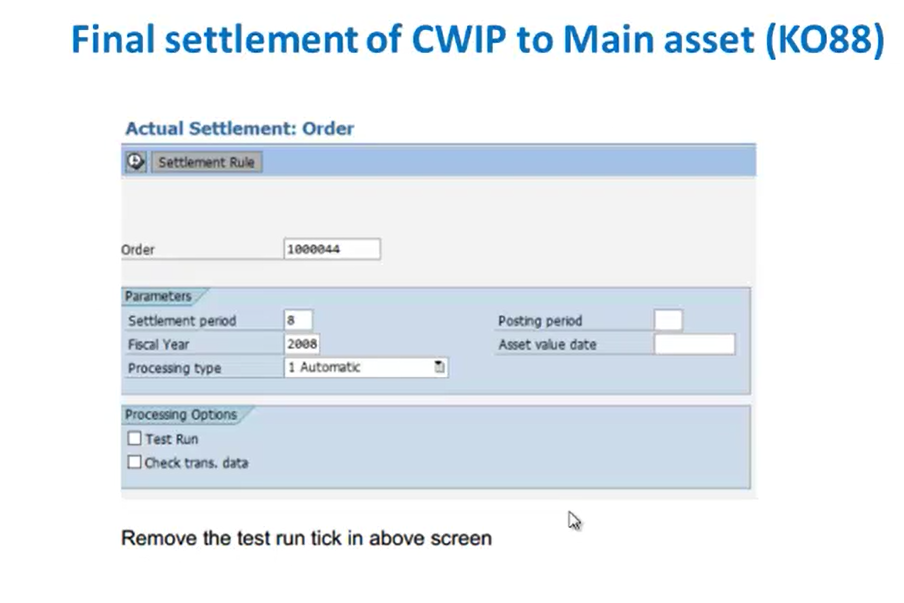
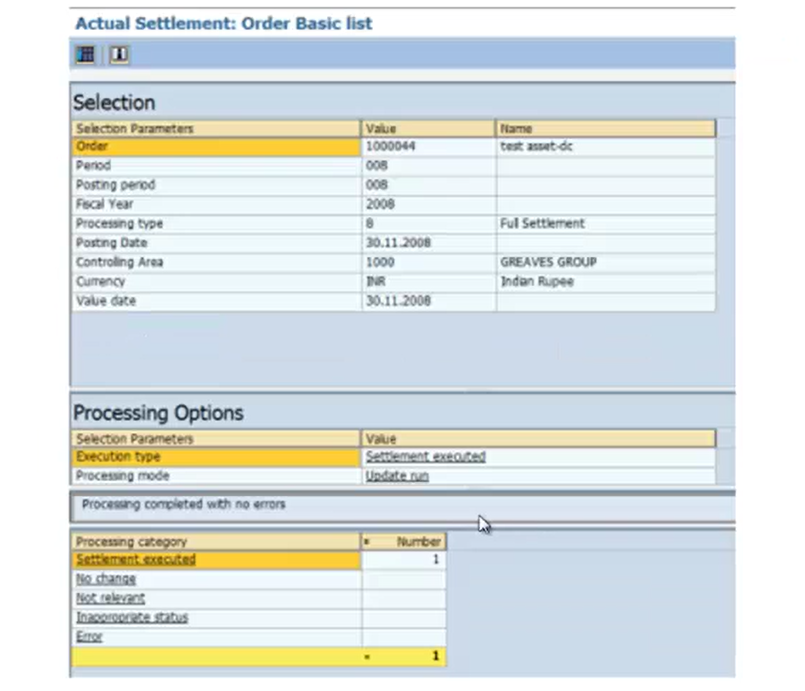
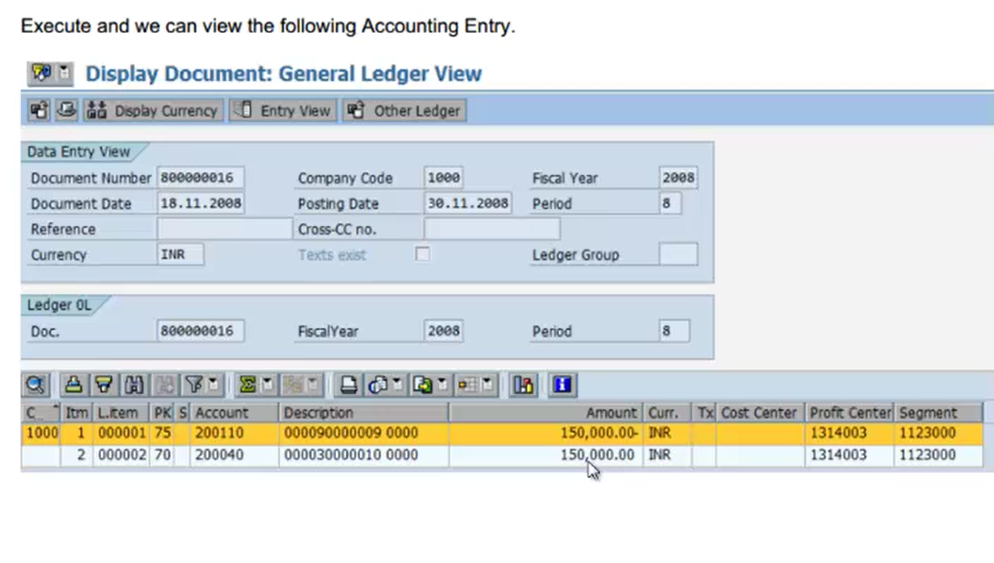
Then we’ll maintain the parameters, like settlement period 8, 2008 as its fiscal year and its processing time. Now this is similar to the creation of a main asset screen. Now here we’ll remove the tick test run, if it is already checked, then after that we’ll get an actual settlement order basic list screen with the selection parameters then processing option parameters and processing category parameters. So after this we’ll click on the execute button and we can view the following account entry.
So these are the account entries for that particular document number and this is the general ledger view for this particular document.
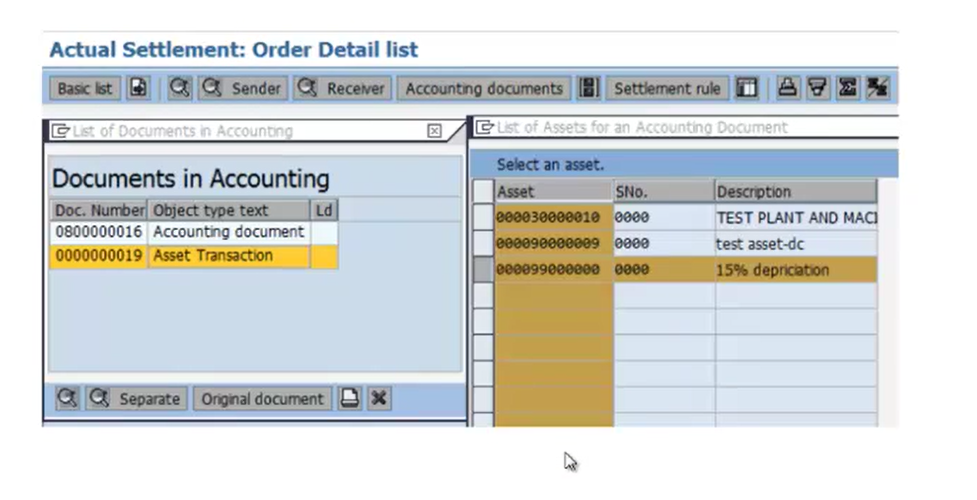
After that we’ll click on the tab for viewing these documents. So here we’ll click our document that is asset transaction. Now once we click on that we’ll get a list where we have to select the assets which we have created. So we’ll select the assets which belongs to us. And after that we’ll click on this particular icon.
Next, we’ll see our depreciation run. Now let us see what is the depreciation run. Here we’ll use a transaction code called AFAB. Now this is the general ledger that is the, SAP menu path for this particular depreciation run. we’ll go to accounting, then financial accounting, then fixed assets, periodic processing.
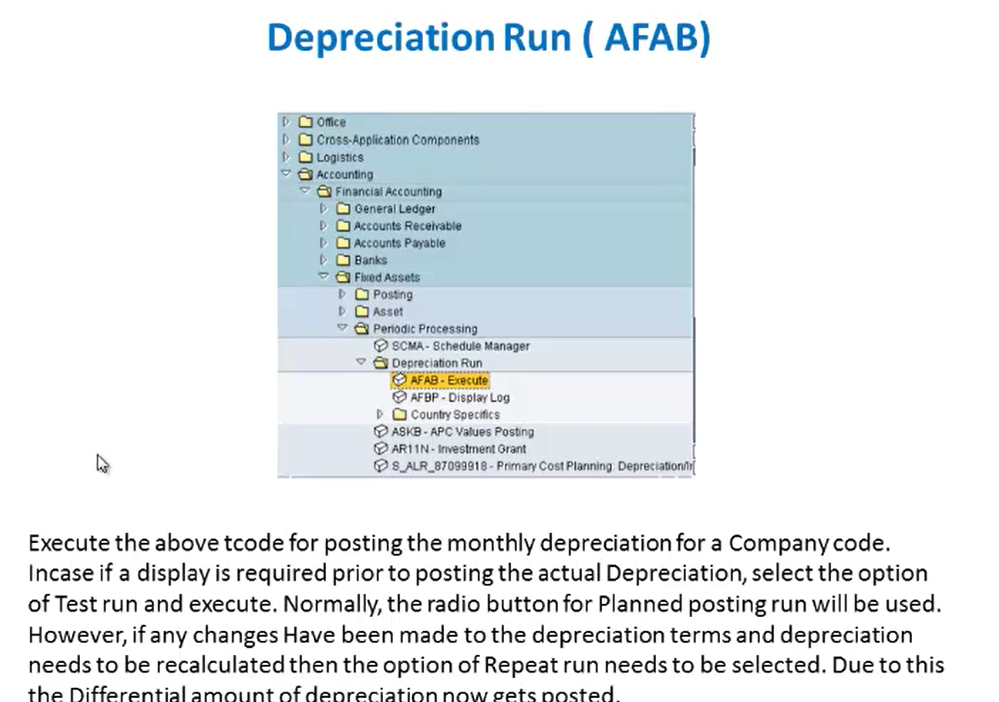
Under that we have depreciation run, and then first we’ll create an AFAB, that is execution of depreciation run Now here we’ll execute this above Transaction code for posting the monthly depreciation for a company code. Then in case if a display is required prior to posting the actual depreciation, we’ll select the option of test run and execute. Normally, the radio button for planned posting run will be used. Here, if any changes have been made to the depreciation terms and depreciation need to be recalculated, then the option of repeat run needs to be select selected. Due to this, the differential amount of depreciation now gets posted. So this is the process of running a depreciation run.
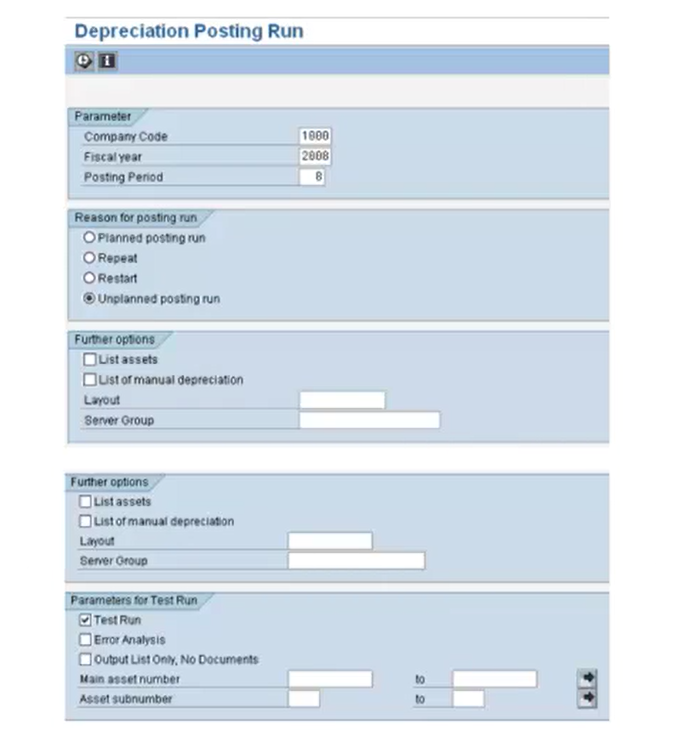
So here, this is the screen which we’ll get after executing AFAB transaction code. Here, we’ll have to provide a company code, the fiscal year and the posting year. Now we’ll tick check this particular checkbox, text run, for displaying, that is for viewing the depreciation run. So we’ll click this checkbox and we click on execute button.
If that depreciation run, that is actual depreciation, is to be displayed before posting, then we’ll select the radio button of planned posting run. And if the depreciation run, that is the depreciation terms, needs to be recalculated. If there are any changes, then we’ll select the option of repeat runs. That is Here we will have to select this reason for posting and we’ll have to select this test run. After maintaining this in case of any number of errors in the depreciation run then the message for successful completion of the test run will be given.
Now an update run for actual posting must always be executed as a background job. So here the accounting entry that gets generated, else the batch input session needs to be run-in the foreground and the errors get rectified. So after we are satisfied with the results, we can run-in the final mode. And the final mode can only be run-in the background. we’ll remove the test run-in the above screen and click on the execute button. Here we’ll select the background option as shown below.
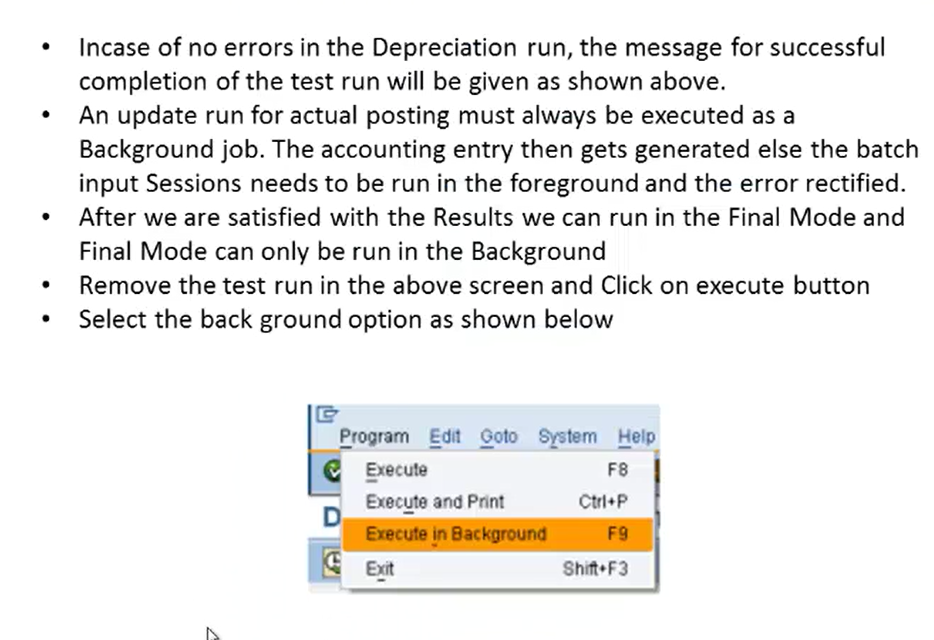
So after that execution of that depreciation terms, we’ll go to program and click on execute in background. So once we click on this execute in background, we’ll get the actual posting done in background. So here, once we click on the background, we’ll get a print parameter screen where we have to maintain the output parameter. So here we’ll put the output device as Lp01 and again we’ll press the enter button. After that we’ll get a screen where we have to maintain the parameters.
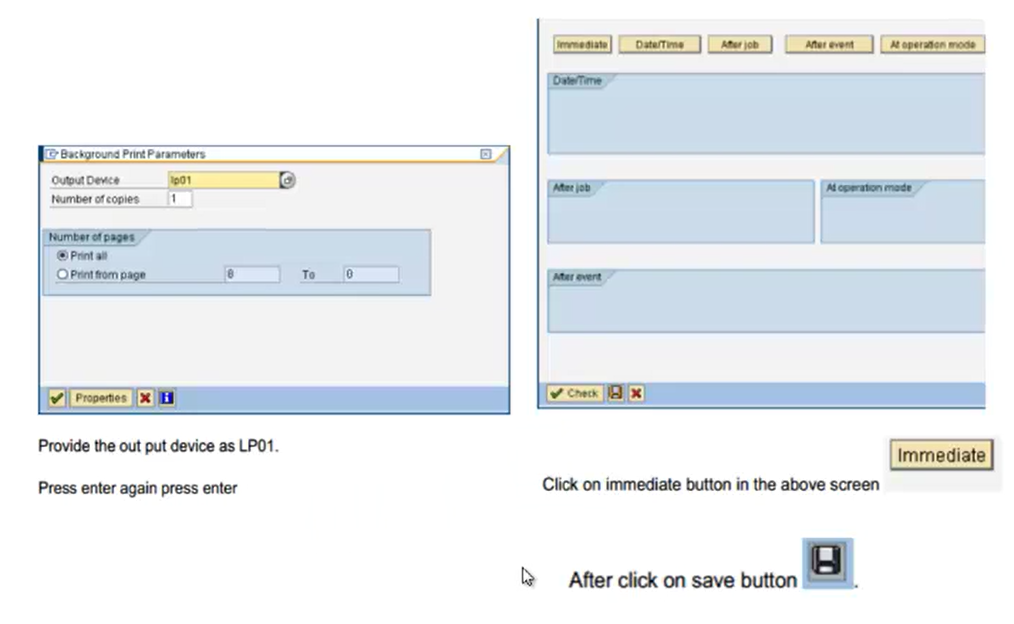
So here we’ll click on the immediate button and we’ll click on this save button Now this was the process for creating the jobs that is for batch job.
Now with another way of creating a batch job is via transaction code SM37 or we can go via an easy access menu screen.
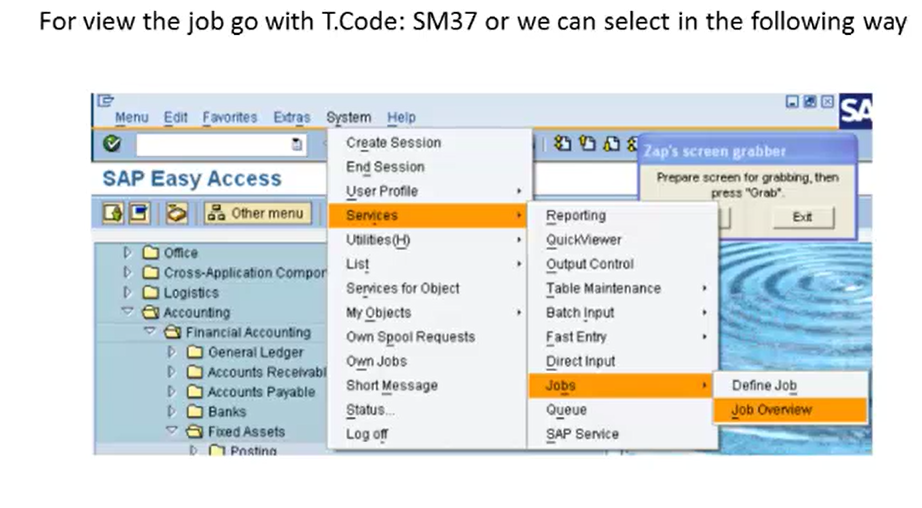
So here we’ll go to system then services then jobs and we’ll click on job over or we can directly go to transaction code SM37. So this is the job selection screen.
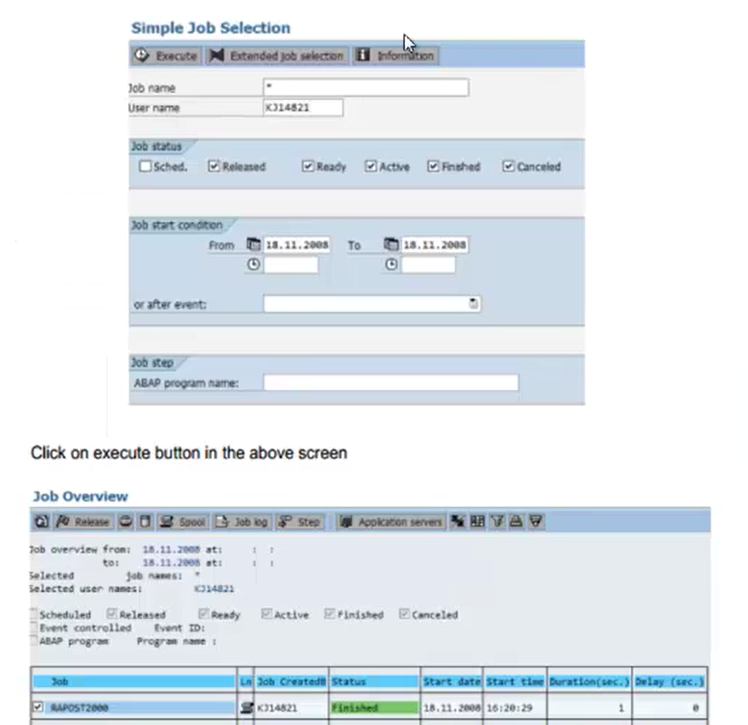
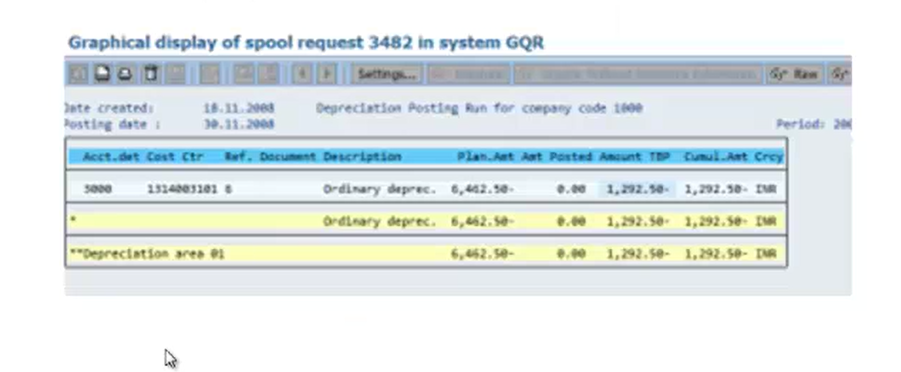
Here we’ll provide the job name and the username and the appropriate start date and end date, after that we’ll click on the execute button. So we’ll get a screen that is job overview screen with our job name and the job created by person name. So this is the job description for that particular job. This is a spool list created for that job, which we have scheduled. So after that, we’ll click on the job spool list. So this is the spool list generated for that particular job, that is depreciation posting run for company code 1000.
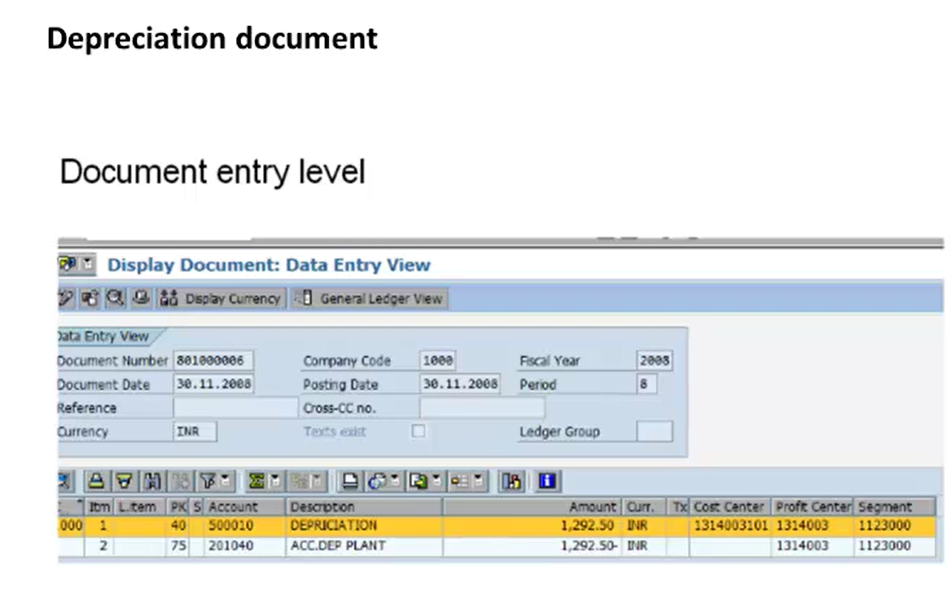
Now next we’ll see how to do a depreciation document. Now first we’ll see for document level entry. So we’ll enter that particular document number and we’ll get a display view for that particular document. This is the document entry view.
And we if we want to view the general ledger view, we’ll click on the general ledger view icon available over here, and we’ll get this general ledger view.
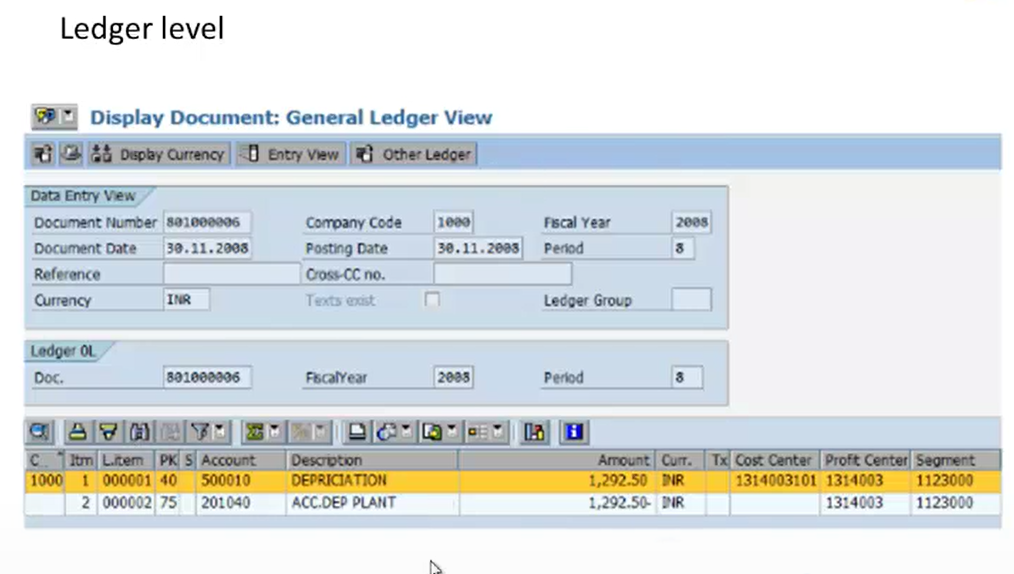
So this is the document depreciation, that is, document view and general ledger view.
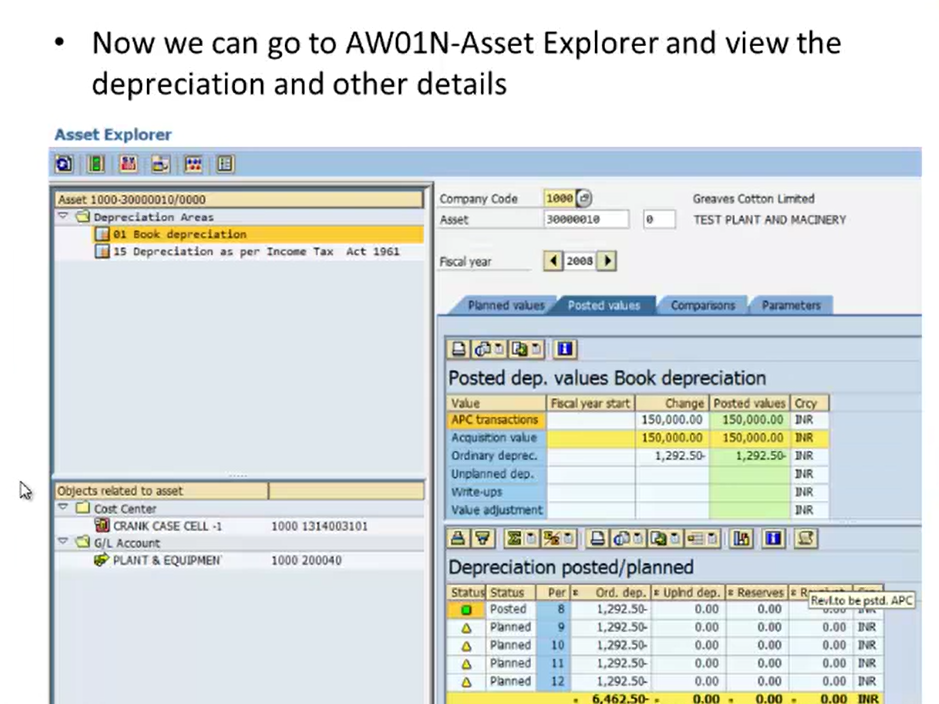
Now here we can go to AW01N, that is asset explorer transaction code and view the depreciation and other details. So once we enter that particular asset explorer, we’ll get our company code in the asset and we can view the depreciation areas. So here we have first details about book depreciation. So these are the details for the booking depreciation.
Now next we’ll see asset sale with customer. Now here we’ll use the transaction code F92. So after depreciation run and viewing of the depreciation areas, we’ll see asset sale with customer.
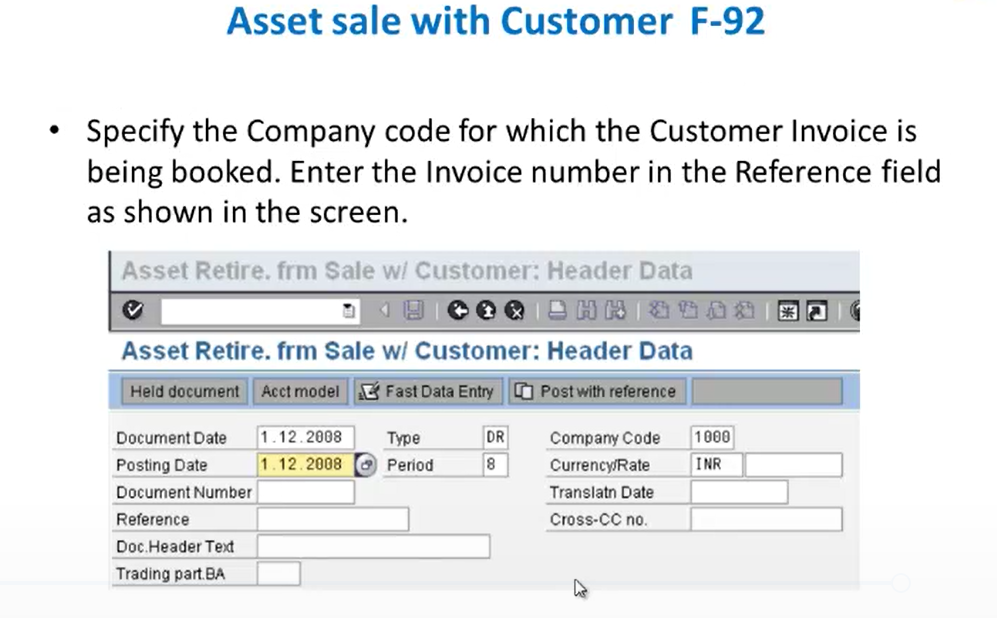
So here in this screen we’ll specify the company code for which the customer invoice is been booked and we’ll enter the invoice number in the reference field. So here we’ll put the document date and posting date. Then we’ll have to provide the company code and the type and period. After that in the next screen we have to provide the posting key and the account number. That is the asset clearing account number. And we’ll use the transaction type as 210. So after maintaining that for the next line item we’ll click on the enter button.
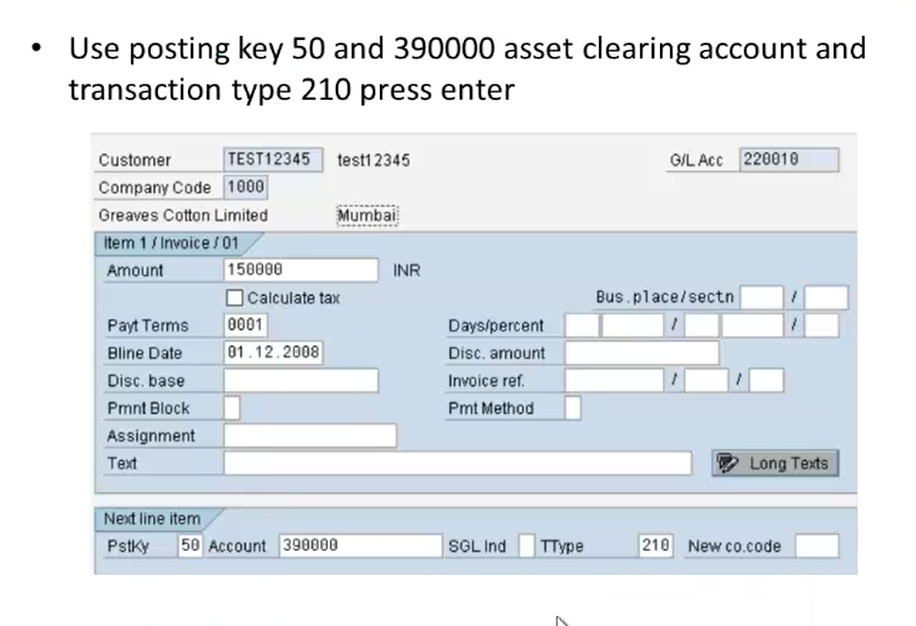
And for the first line item we’ll maintain the amount and the payment terms. Now after that we’ll maintain the amount and the relevant cost center to which the deposed asset belongs to, then next we’ll click on the small checkbox for asset retirement and click on enter.
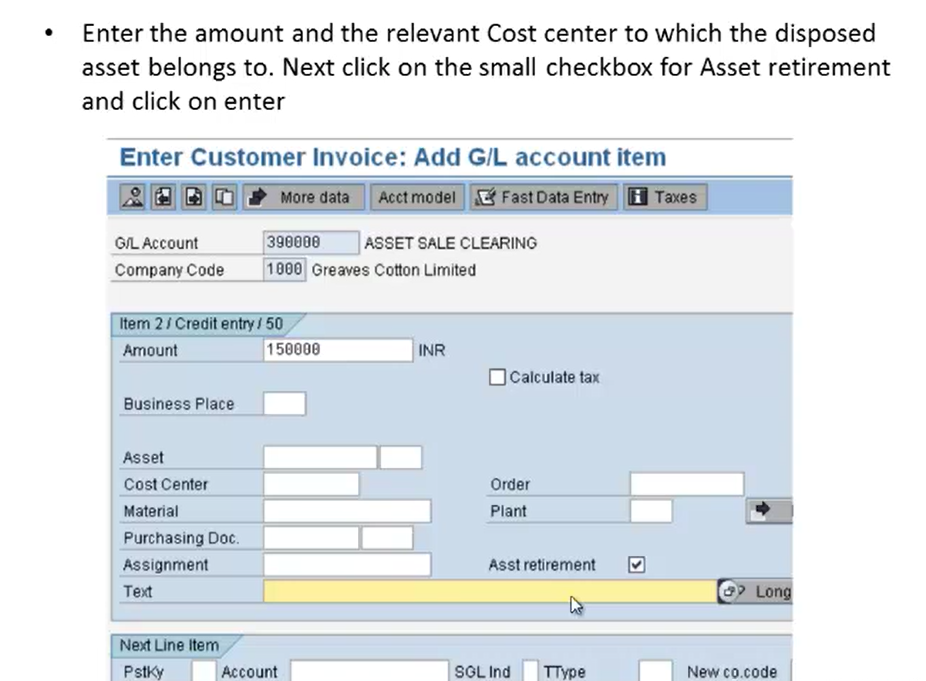
These are the checkbox maintained for asset retirement and this is the setting which we done for item level 2. After that once we press the enter, we’ll get a screen called asset retirement screen.
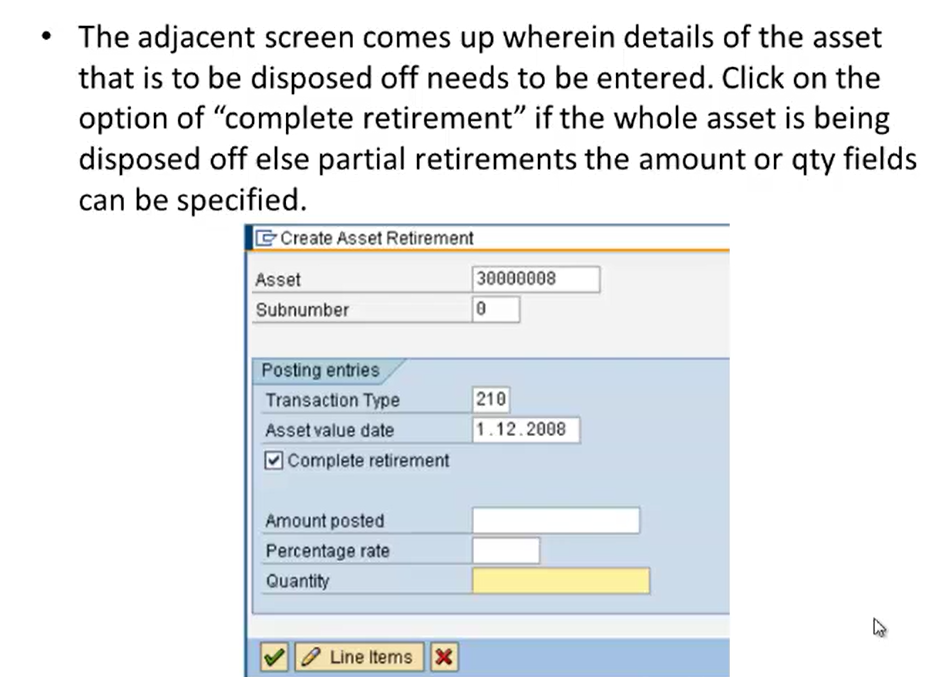
Now here we’ll have to maintain the details of the asset that is to be disposed off and needs to be entered. Now we’ll click on the option of complete retirement checkbox. If the whole asset has been disposed of, else partial retirements, the amount or quantity of lease can be specified. So this is the complete retirement. So, therefore, we’ll click on complete retirement checkbox and we’ll click on the continue button. After that we’ll simulate the document and post it. So it will correct the highlighted lines before posting.
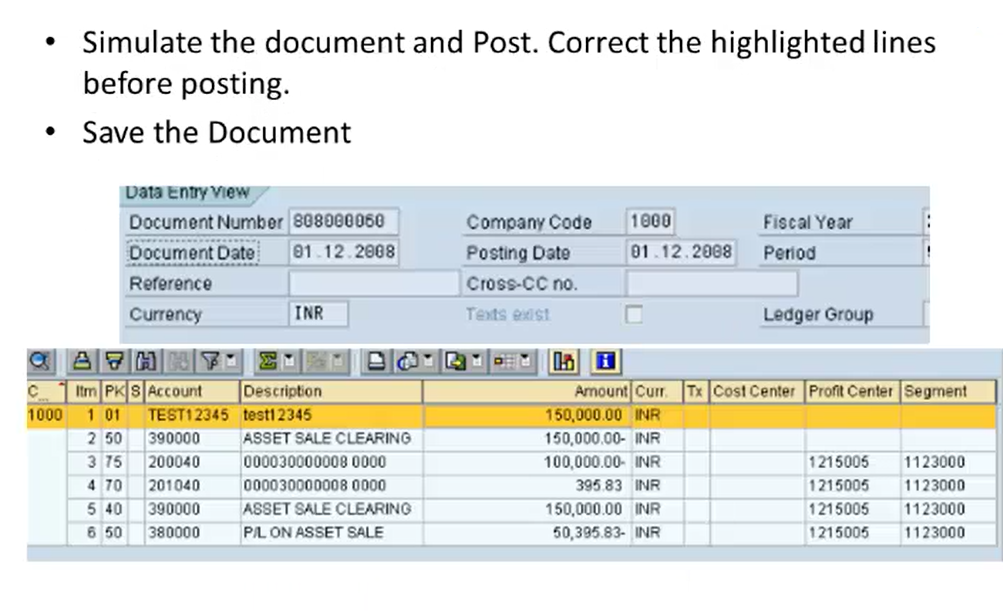
So this is how it will highlight the lines before posting and we’ll click on the save button. So once we click on the save button, it will create a post for this particular document number. So this works, asset sale with customer.
Now we’ll see asset sale without customer.