
Saving Report Layouts
Okay, now we go to saving report layouts.
Thank you for reading this post, don't forget to subscribe!
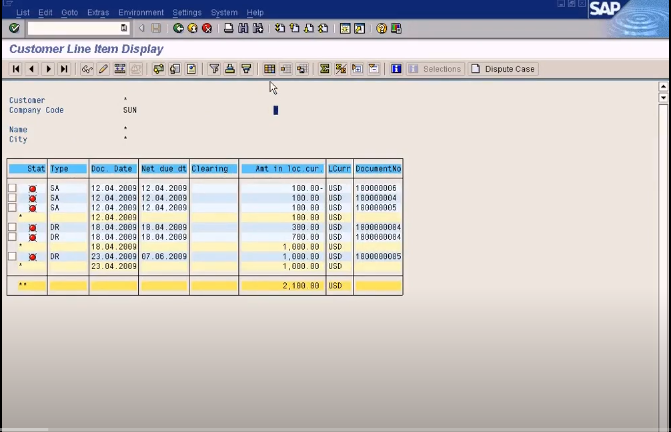
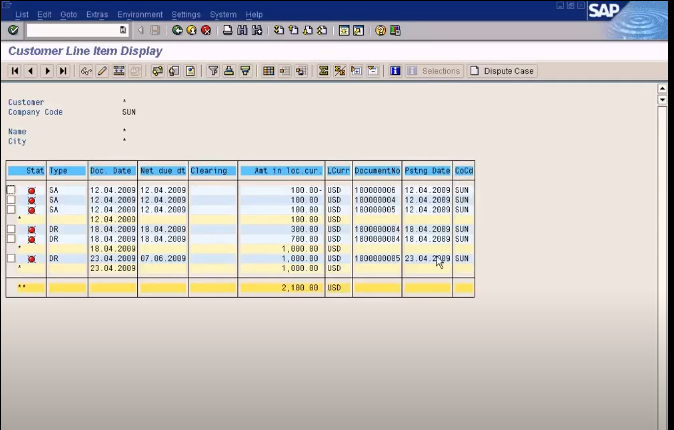
See, this is a report layout, right? If you come here, you have a lot of options here. I choose this button here.
Here, you can actually add more fields. These are the list of fields which is currently shown in the report. These are the available fields in the database. From here you can move more fields to display if it’s required.
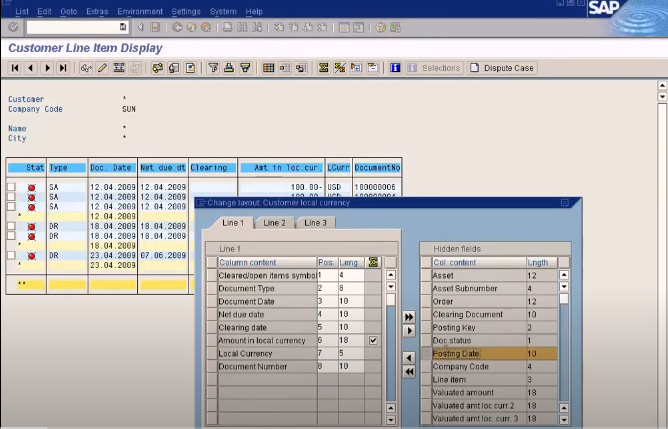
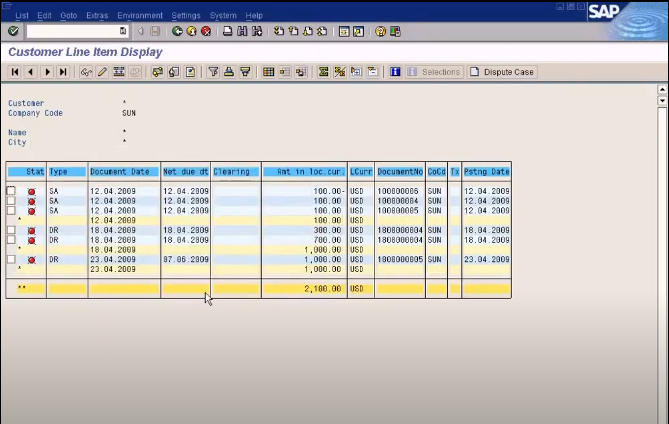
For example, I’m going to choose the posting date. The posting date is not shown here, so if I move it here, then it’ll be shown, and also, the company code. I can choose more than one part like this and move it also, and then, click okay.
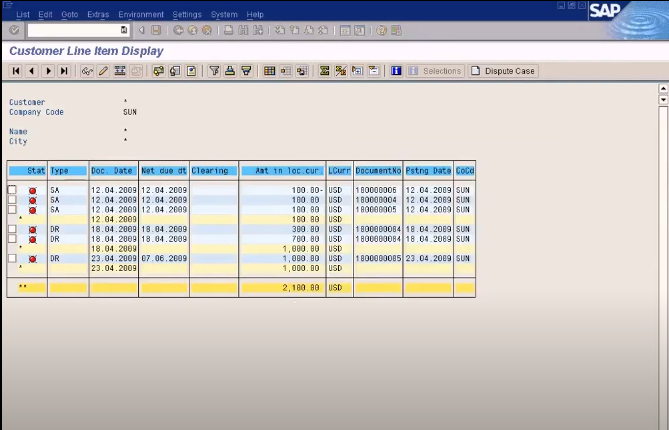
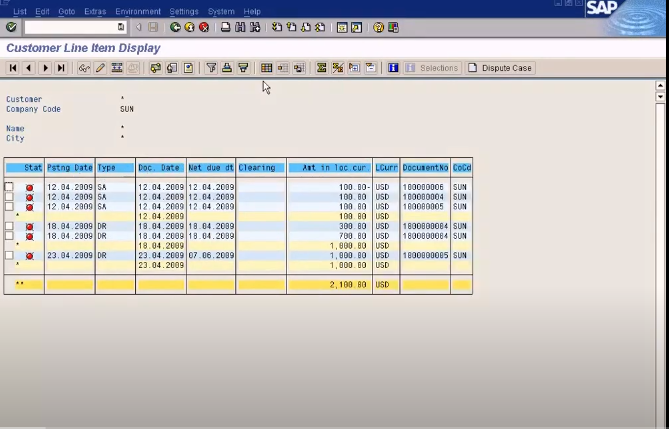
See, posting date and company code is shown.
One more thing. Let’s say if I want to move the posting date to here, before type, what do I do? I select posting date, I cut, and I just come to document type and paste it.
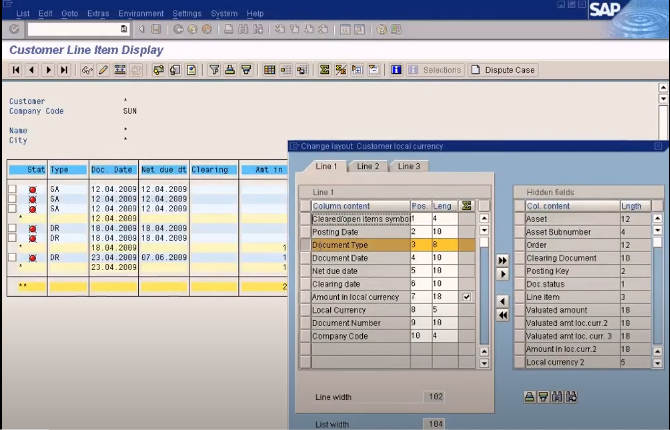
The posting date is moved from here to here. If I click okay, the posting date will come here. That’s how you do it.
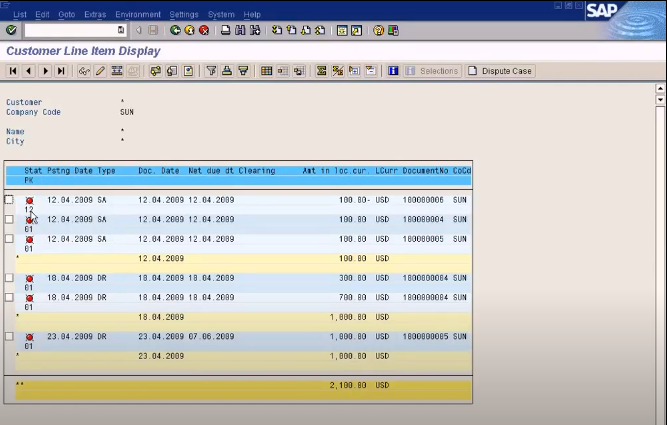
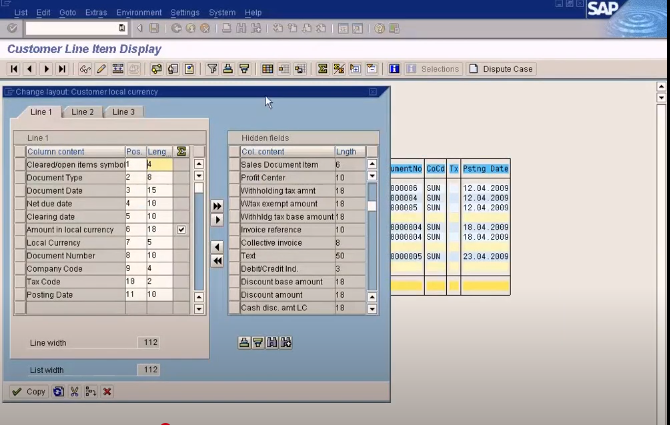
Do you see this tab here, the line 1? Let me show you what you can do in the line 2. I can choose a posting key in the line 2 and click okay to see what happens. See, the system has created one more line to show the posting key because this is useful when you want to select and print a lot of fields where your A4 paper will not be sufficient, the width of the A4 paper will not be sufficient. In that case, you need to create two lines of report heading. So the first line has got this, and the second line has got PK, posting key. So if you look at the first line, you see all these things corresponding to the first line of fields. The posting key comes second. That’s the use of the second line. You can also remove it. Now, the second line will be erased, only you can see the first line, and you can also go up to third line.
If you want to find a field in the list here in your database, you can use this. Let’s say I’m going to find tax code, see, it is taking you to this tax code. You can add it to the system.
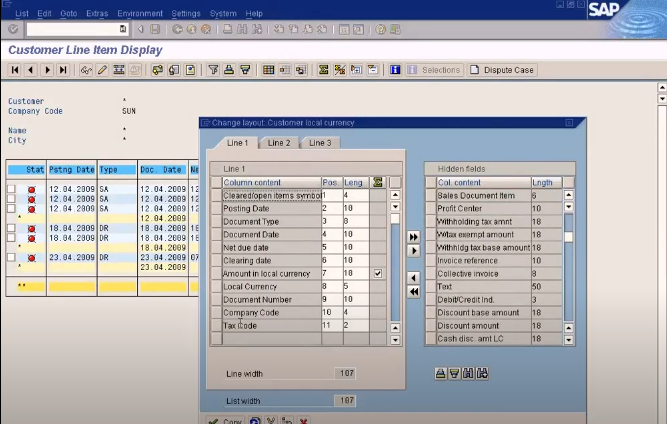
Now, you can also change the position of the columns using this order. Let me change this to 12th, so it will come on the last column there. See, that’s one way of moving the fields, and you can also enlarge the display of the field. That means document date is looking very cramped. Let me just change it to 15th, 15 digits of length. See, you can see extra spaces here. This is to make the report look better.
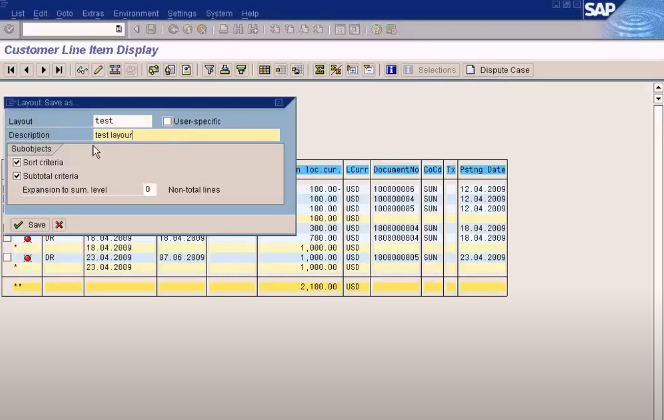
So once you do lots of changes here, within this report layout, what happens if you quit? If you go back, all your report layout will be lost. We’ll go back to the original report layout. You don’t want this to happen, right? You don’t want to do this again and again. That’s why SAP has provided an option for you to save this report layout. Use this option here, save report layout, give a layout name. For example, test layout, and save it. Okay. What the system is saying is that, if you want to use your own report layout, you must give a special sign here, slash, only then the report can be saved as a custom layout. This sign means that it’s a custom layout. Otherwise, if you don’t have this sign, you will treat it as a system layout, original layout. So now, it’s saved. Layout saved.

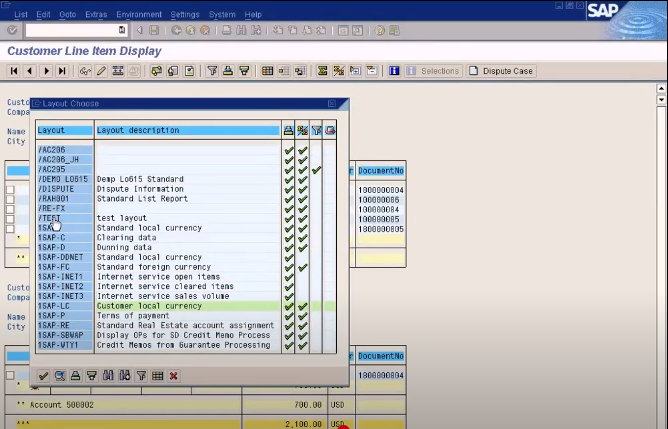
So how am I going to bring back this layout? I go back. I come back. All the layouts that I have mentioned are lost, right? So to bring back the layout, just choose here, the middle button here. Your test layout will be here somewhere. See here? Just choose layout. See, you get back the layout that you did just now.
Okay, there’s one more thing I want to tell you. I save it again, I get the test layout right? You see this checkbox, user specific, this means that, let me just show the help menu, this means that if you tick this checkbox and save it, it means only the user ID which created this layout, which is SAP, currently the user ID is SAP user, this is the guy who can see this layout and no other users in the system cannot see this layout or do any changes.

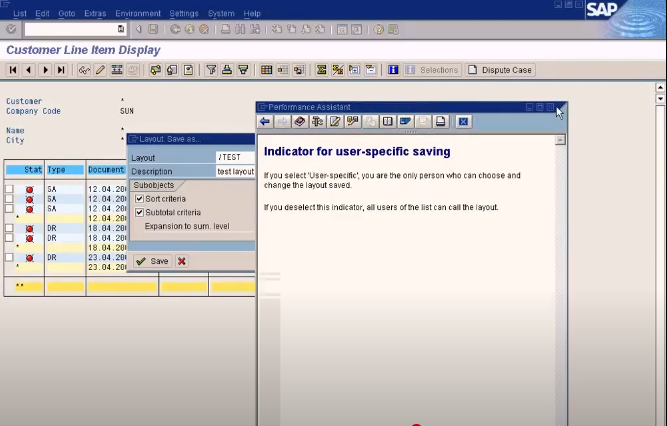
Okay. If I choose this and save, then if I select layout, this will be displayed only for the SAP user. No other users can see this layout if they go to the select layout. That’s the advantage of it.
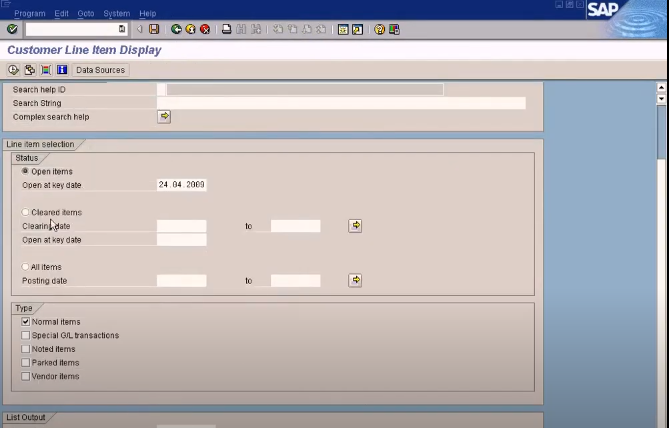
Okay. There’s one more thing. Alright, let me go back here. In the selection screen, you see this list output here, you can actually choose the layout that you created just now, so that when you run it, you can actually call your report layout. You don’t have to come here and get the report layout, you can do this in the selection screen itself, and the other advantage of mentioning the layout here is that you can save it as a report variant, so that when you choose the variant, this information is also loaded. Alright, you can do that.

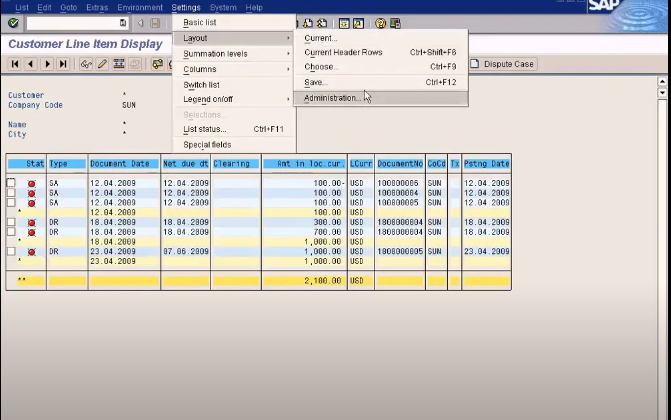
And the other thing is that, go here, come here, this is the layout menu here, there’s an extra option here which is administration. We go here, you see this checkmark here? This means a default layout. That means whenever you run this report, the default layout is this. This is a standard layout which is created by SAP. Our layout that we created just now is over here. So if you want to make sure that whenever you run this report, this layout to be defaulted you just have to double-click here, so the checkmark will come here.

Or, let me go back here. You can use this option here, define default settings, so it comes here. You have to point to that layout and then press this, so it will come here. If you click one more time, the default layout is gone, and then, it comes here.

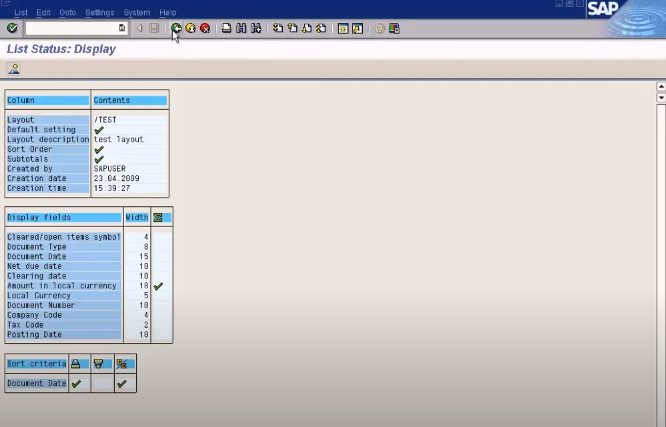
And then if you want to see what are the fields available in this layout, you just zoom in to see the details of the fields listed in this layout, and the sort criteria is sorted by document date. And this checkbox here says that the report is subtotaled by the document date. This sign is a subtotal, and the report also sums up the amount in local currency. You see this sign here, this report layout is created by SAP user on this date, on this time. All these are available when you zoom in.
So the advantage of making this a default setting is that once you do this, you don’t even have to mention the layout here. The moment you run it, since the default setting is the test layout, you will get the test layout. Currently, I have not saved the test. Let me just show it to you. I’m going to save it. Okay, I’ll come back. I haven’t selected the layout, test. Let me just execute. See, I get the test layout by default. This is a test layout, right? See the document date is 15 character, and I also selected the posting date all because the test layout has been set as default settings, so I don’t even have to mention here, or I come here and select the layout. It’s defaulted. By default, I will select the layout. So let me put back to the SAP default because I don’t want to change, and I will also delete the layout.
How to delete? Just go to administration, choose the layout, press delete, end screen, and the layout is gone. You won’t be able to see the layout anymore. That’s gone.