

Creation of Vendor Master Codes
After creation of primary cost elements and secondary cost elements, next we’ll see creation of vendor master codes. Now, for vendor master code creation, first we’ll enter the transaction code FK01 in the command field and press enter.
Thank you for reading this post, don't forget to subscribe!
After that, we will have to specify the company code and the account group in the above screen, in which the vendor codes need to be created. Based on the account group selected, here our account group is ZSER. Now all these details, like company code and account group, are being set by the client. So after maintaining the account group, the number range gets decided, and it may be an internal or external numbering sequence. Now here, after maintaining this company code account group for that vendor, we’ll click on enter. And in the next screen, we will maintain the address details for the vendor. 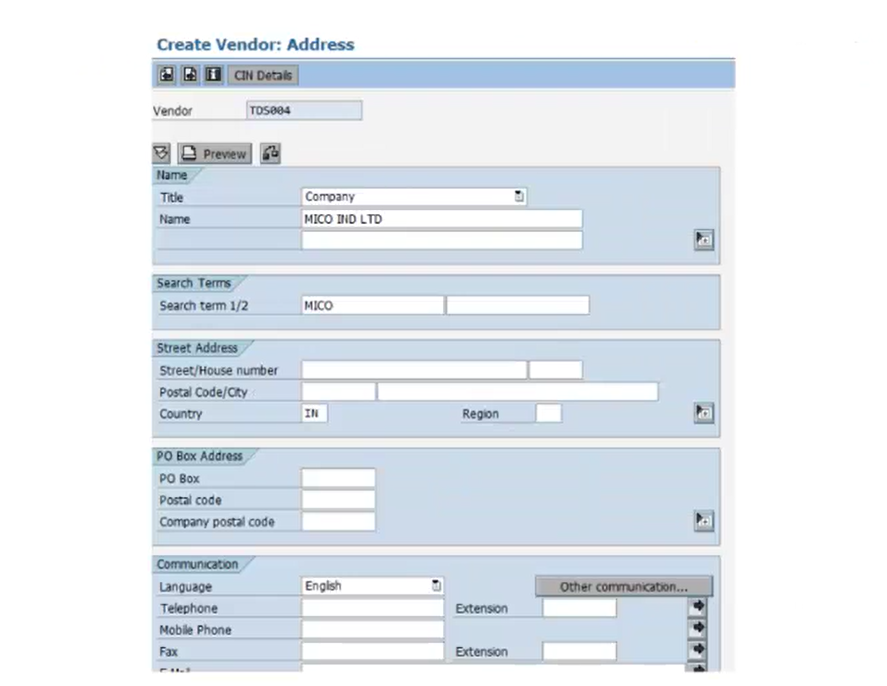
Now here we will maintain the address details for this particular vendor, that is, TDS004. Now here we will maintain the company name, that is the title, the name of the company, then the country code, the PIN code, language, PO box address, etc. So after maintaining the settings for that particular vendor, we’ll click on the CIN details tab. Now here we will click on the CIN Details tab for maintaining the settings.
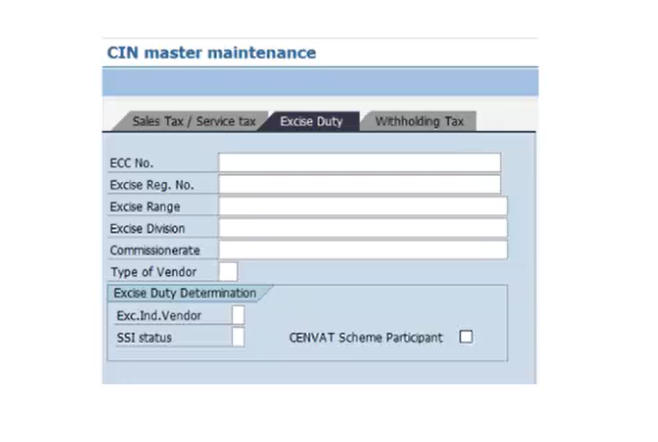
So here we will maintain the CIN Master data, that is the Excise Duty data, like ECC number, excise registration number, excise range, excise division, commissioner rate, etc. So we will maintain these settings in the CIN Master maintenance. Now here, we will go back to the previous screen where we have maintained the vendor data.
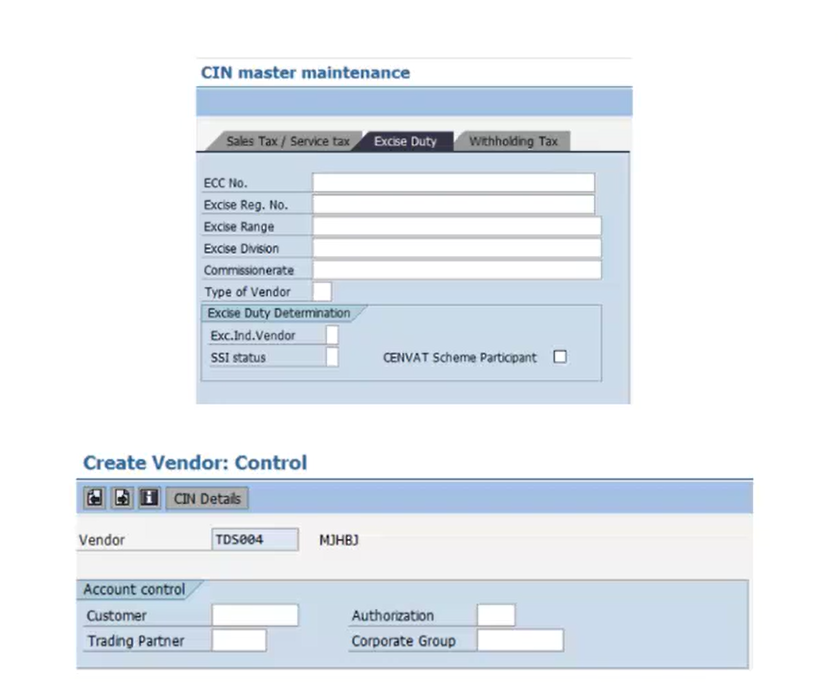
Now here we will have to maintain the other settings for the account control data.
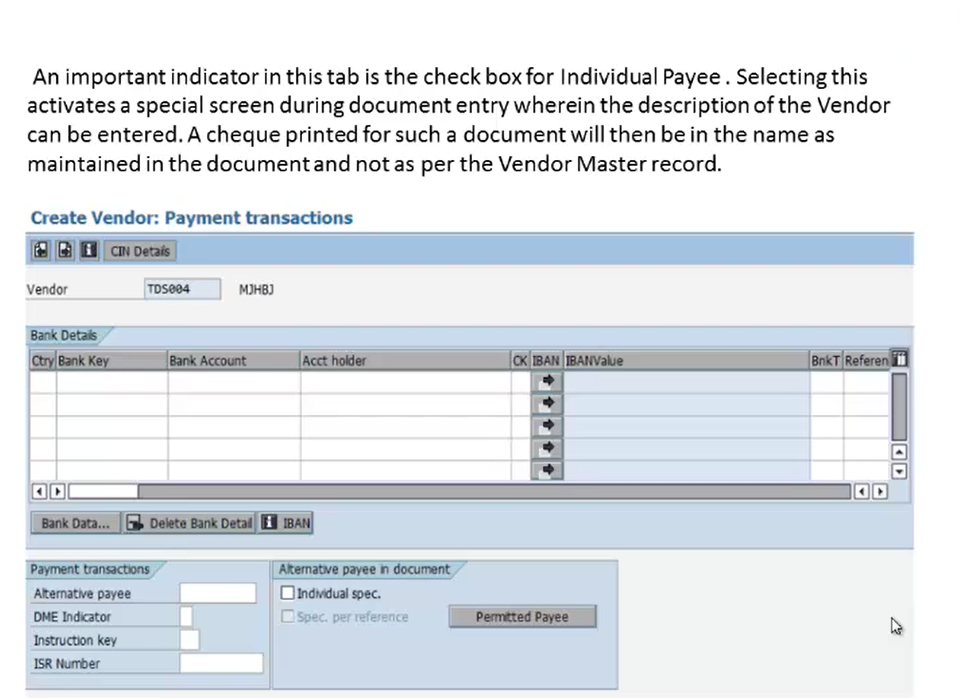
After that, we will maintain the bank details. So here we have an important indicator in this tab, it is a checkbox for the individual payee. So here in this particular area for the individual payee, selecting this activates a special screen during document entry wherein the description of the vendor can be entered. So here a check printed for such document will then be in the name as maintained in the document and not as per the vendor master record. So if we maintain this individual payee checkbox then we will get a special screen where a description for the vendor can be entered. And whenever a check is printed for such types of documents, then there will be the name, which is maintained in that document instead of the data that is maintained in the vendor master record. So this is the importance of this particular checkbox, that is, individual payee.
Now after maintaining this bank details setting, we’ll go to the Payment Transactions tab.
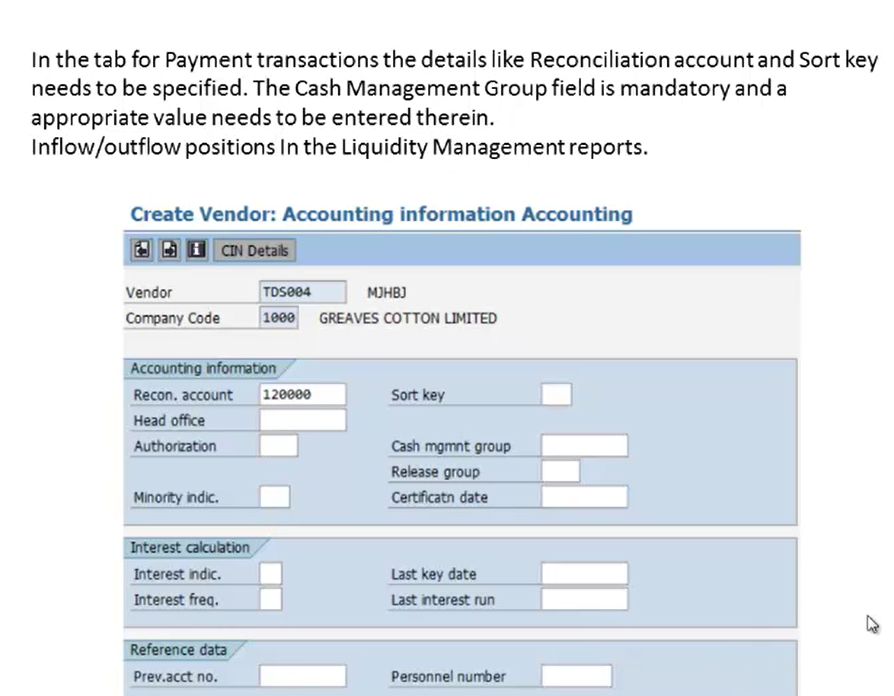
So in the payment transaction tab, we will maintain the details, like, reconciliation account. Then we will maintain the sort key. Then we will maintain the cash management group key, which is mandatory. And our appropriate value will be set in this particular cash management group field. Then we have inflow and outflow positions in the liquidity management reports. So we’ll maintain this accounting information settings for this particular vendor, and then we will proceed further. Now in the next screen, we will maintain the payment terms and payment methods conditions.
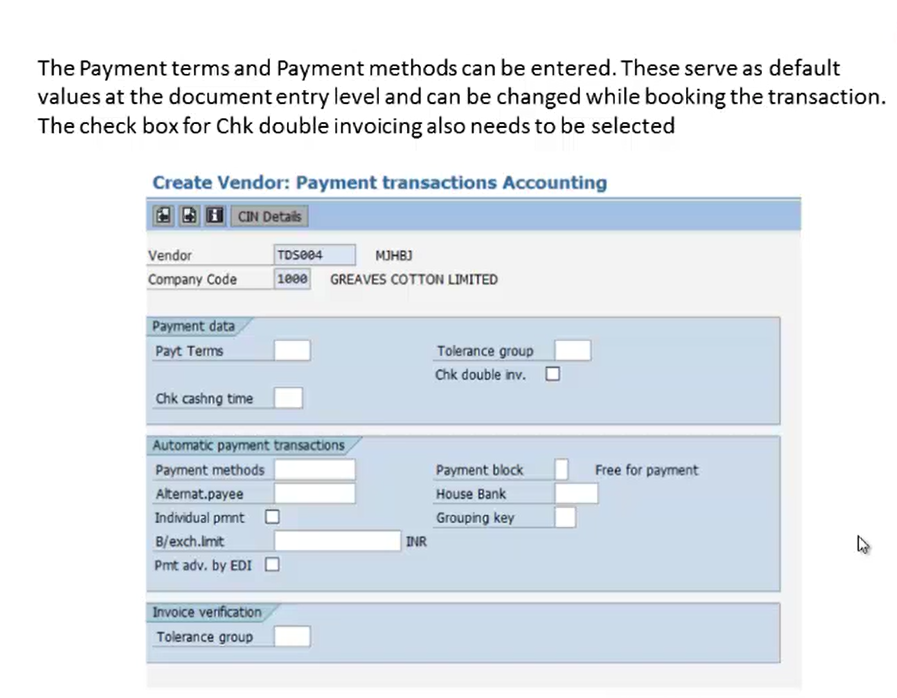
So here in payment data, we’ll maintain the payment terms and in accounting payment transactions, we’ll maintain the payment methods. Now this serves as default values at the document entry level and can be changed while booking the transaction. Now, here the checkbox for “Chk double invoicing” also needs to be selected while we maintain the payment data. So this is how we maintain the payment data and accounting payment transaction details. Then in the next tab, we have the correspondence tab.

So here we’ll specify a value in the field for account statement. Now this helps in generating the account statement correspondence. So in the next correspondence tab, we will maintain the account statement details for that particular vendor. Now after that, we will get a screen where we will have to maintain the withholding tax information, that is it specifies the TDS section under which tax is to be deducted from the invoice payments.
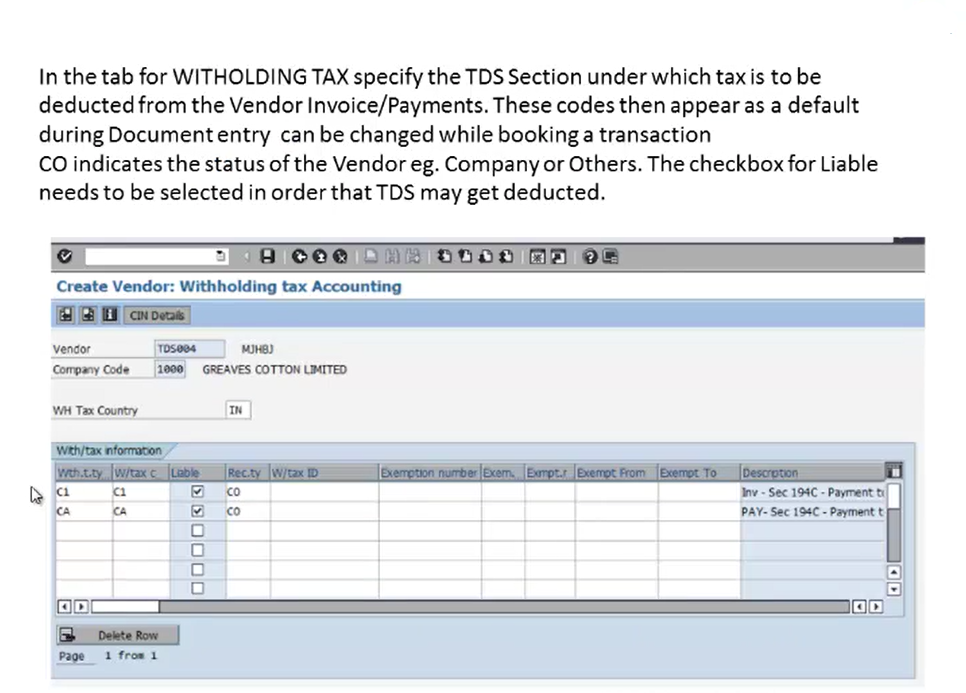
Now we have seen that the salary which we get has something called as withholding tax which comes under the TDS section So the salary which we get has the TDS section deducted, that is, the tax which is deducted from the payments which we get. So, in the similar way, the vendors which we are creating will have a tax in which the TDS will be deducted. Now these codes then appear as a default during document entry and can be changed while booking a transaction. So here, we’ll maintain the TDS data under this withholding tax information section.
Now here, we have controlling (CO), that is, it indicates the status of the vendor. Now, here the checkbox for liability needs to be selected in order that TDS may get deducted. So, here we have a checkbox where once we tick that checkbox, it indicates that the TDS needs to be deducted. So, this is how we maintain the vendor, that is, we’ll create the vendor master records where we’ll maintain all the settings, including the account information, the payment methods, the payment type, the account types, the tax information, etc. So this is the creation of a vendor master record.