
Controlling Configuration (Part 1)
So, there are two things we are doing. First thing we are doing is we are creating a controlling area. Let me go here.
Thank you for reading this post, don't forget to subscribe!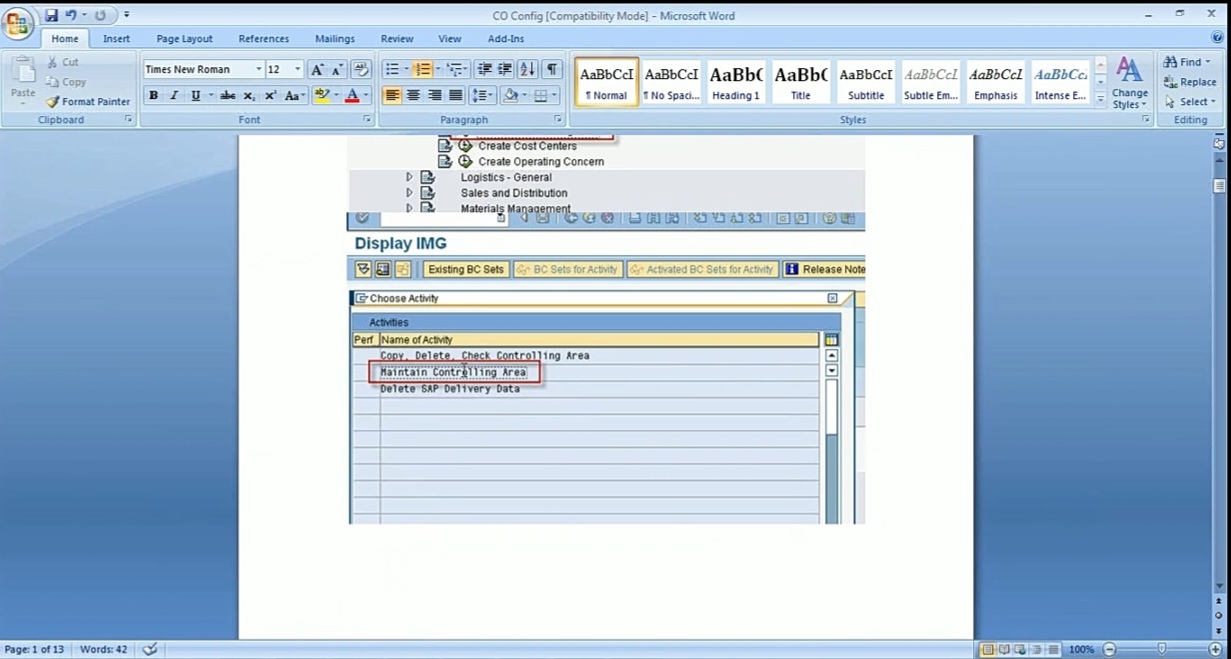
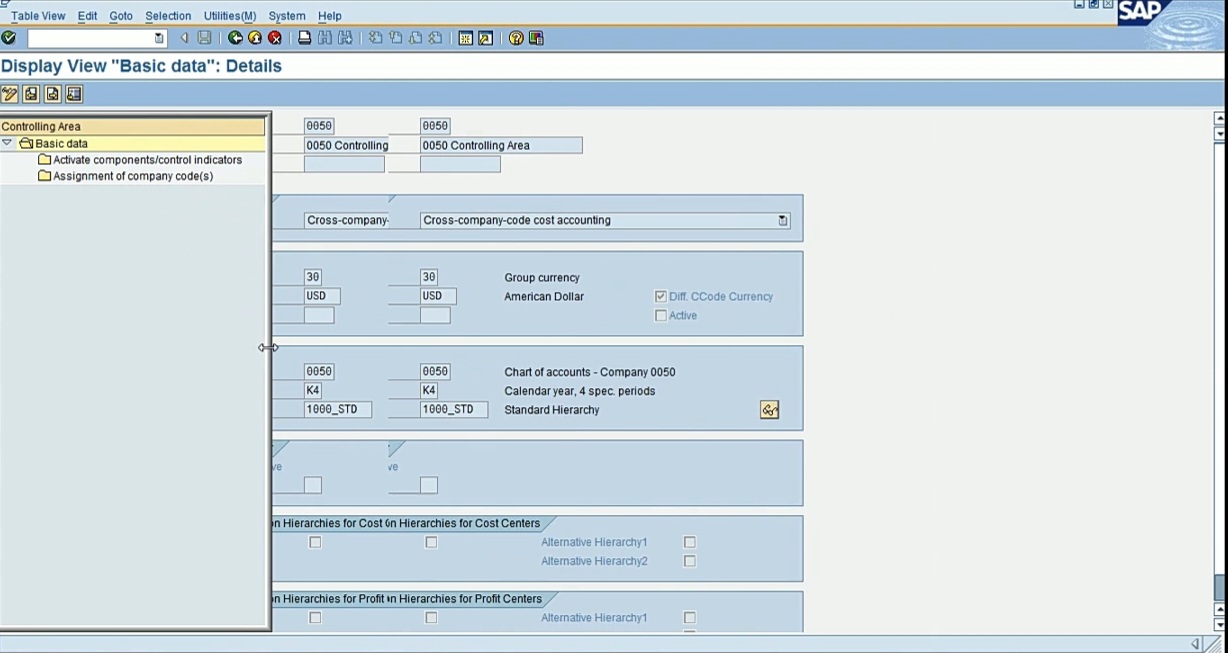
So, in this first step, I’m clicking maintain controlling area, and I’m creating a controlling area. So, in this case, 0050 is my controlling area. So, I’m creating it. And in the next step, I’m assigning my company code to the new controlling area that I created.
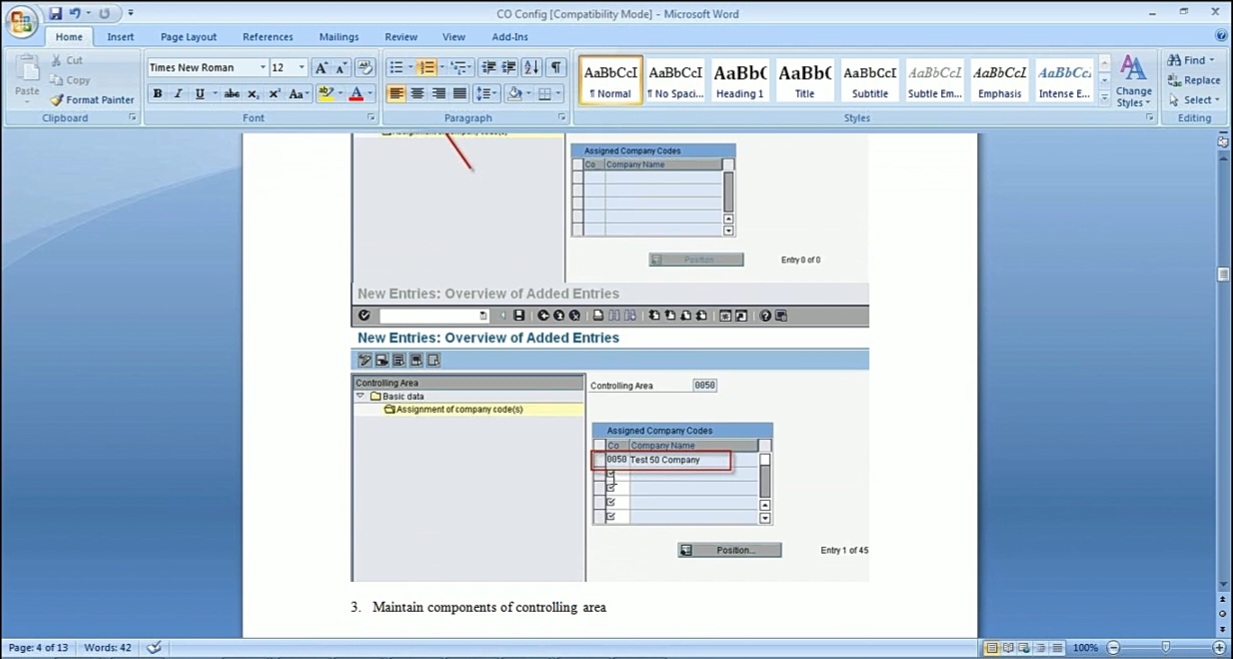
That’s my company code. I’m assigning my company code to the new controlling area. So, in one transaction, we have two or three steps: Create controlling area, assign it to the company code, and also activate components. One way of doing it is you can do it from here.
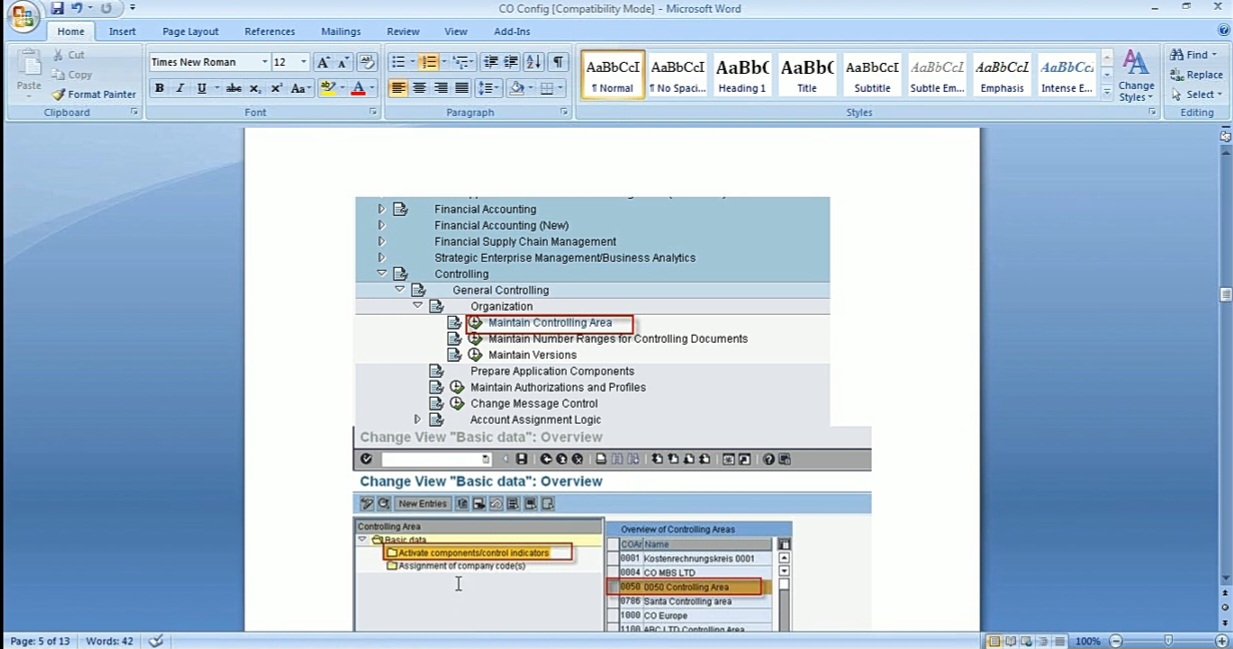
You have the company code assignment here. First, you create, and then you activate company code, and then you activate, the components. So, you can do all these three steps in one in one transaction. You can do that. So first, I create.
So, I create, and then I assign it to the company code and then then activate components. And like I said, these settings are very important, if you’re creating a new controlling area, make sure that the chart of accounts that you have set up for your company code, that this has the same chart of account and same fiscal year variant. Currency can be different, but in our case, the controlling area currency and the company code currency are the same.
Versions are used for if you when we create our planning. So, when we enter our forecast, normally, we want to create multiple forecasts for the next year. We want one value that is approved by management and then one we want to have another conservative approach and so we can have any number of versions, so we can see our actual versus that plan. So, our approved budget can be version 0, and our planned budget can be version 1 or 2, and our forecast can be version 3. So, when you run any controlling report, it always asks you what version you want to run it against, your actuals. You can say you want to run your actuals against version 0. Then it will show your actuals in one column and plan value of version 0 in the next column. It’s mostly used for your planning. As you know, controlling areas for your management, internal management, so they want to plan for the next couple of years. So, you do all your planning and controlling area, and you need multiple versions. So, for our example, we just need at least one version. So, we’re doing version 0.
For Maintain Versions,
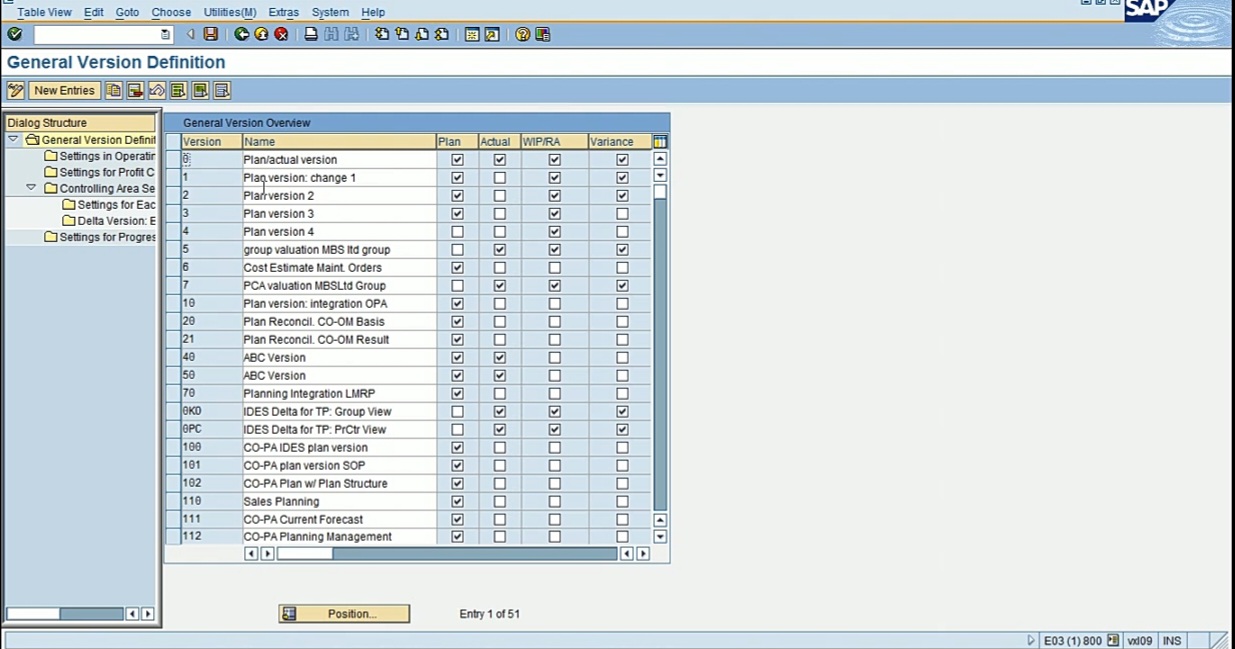
So, we already have these versions. So, you don’t have to create new. You can just use this for your controlling area. So, I’ll select 0, I’ll click on settings for each fiscal year, then it’ll ask me my controlling area. I will enter my controlling area, and you’ll make sure that you have some fiscal years there for your controlling area that you want to use.

If you want to create new, you can, but we don’t have to. I mean, you just click on new entry then enter the new values, but I don’t think we want to create new, there’s already so many versions available. So, we can just use 0 and make sure they are open for our controlling area. You select it, settings for each fiscal year, enter your controlling area, and make sure they are open. Make sure they are available. That’s all you have to do.
You need at least all these steps configured. Only then we can create Cost Center, Cost Element, and Internal Order, and then we’ll post some transactions to it.
So, when we in create order, we will do that later in in the class, when we go in create internal order, transaction code KO01, the first thing it asks is an order type. So, this is what we are configuring whether we want to create an OPEX project or a CAPEX project. So, what I have is Z500 for OPEX project, so I will choose this. So, if I have this, then it will configure based on the order type. So, in the order type I have the order being statistical, this is checked.
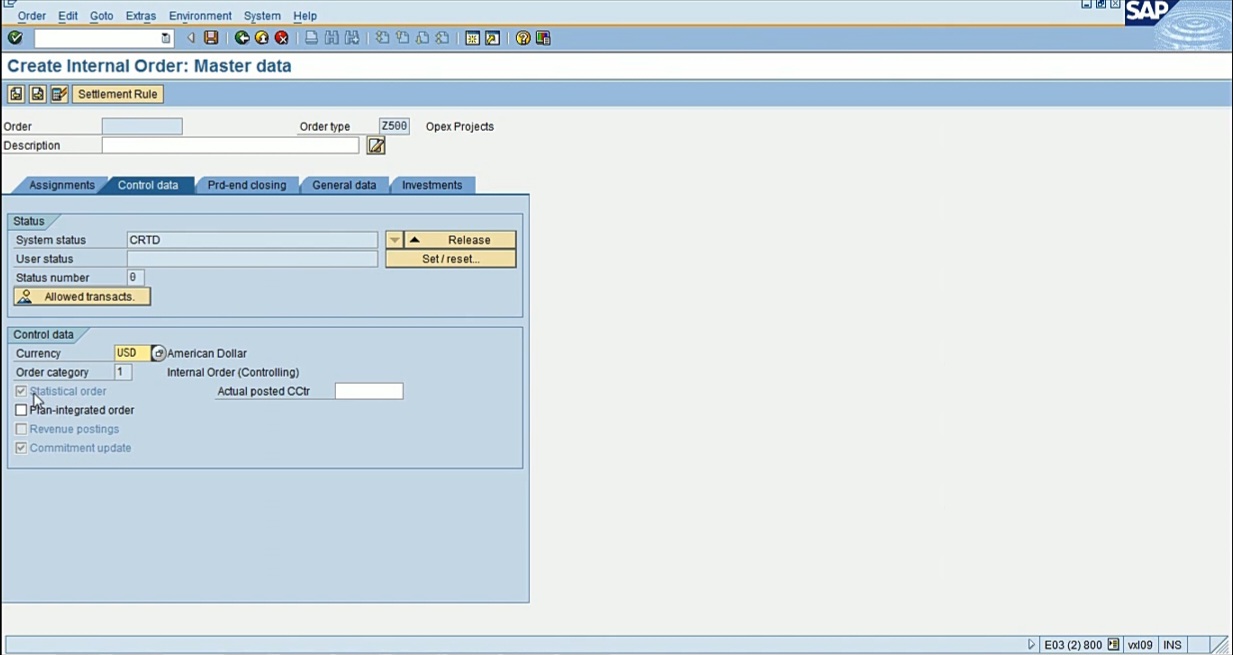
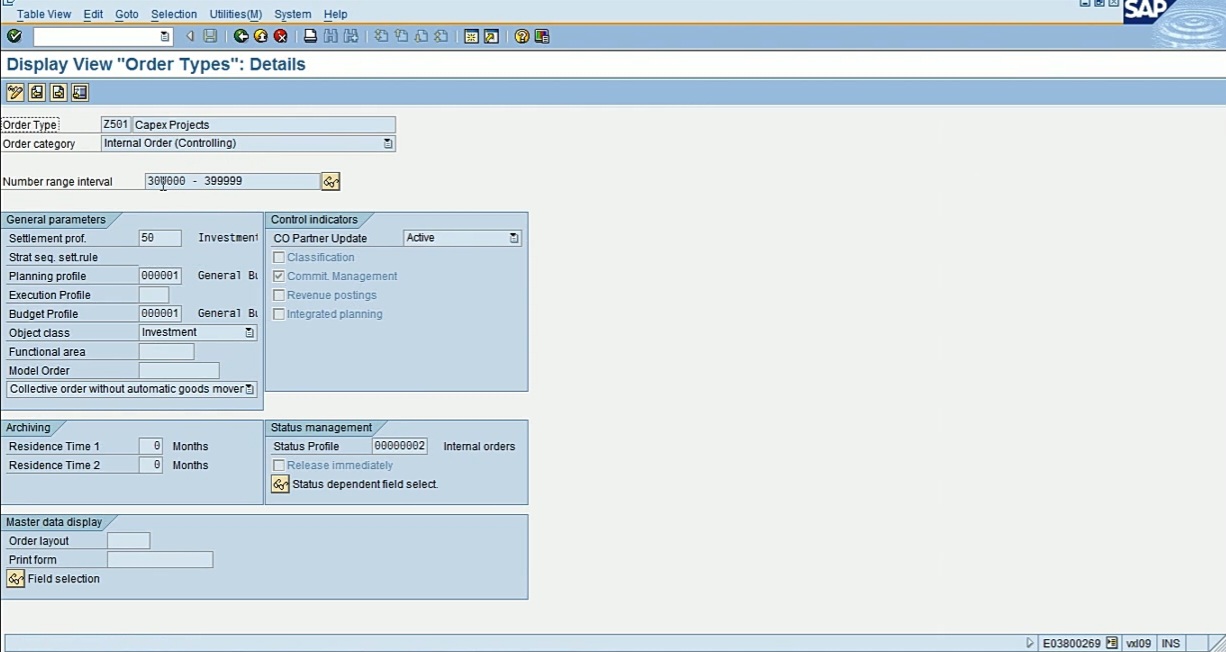
So basically, order type controls what type of project you are creating. So, as you just define, so I have one for OPEX, and you see in this one, statistical is checked, but if I do the Z501,
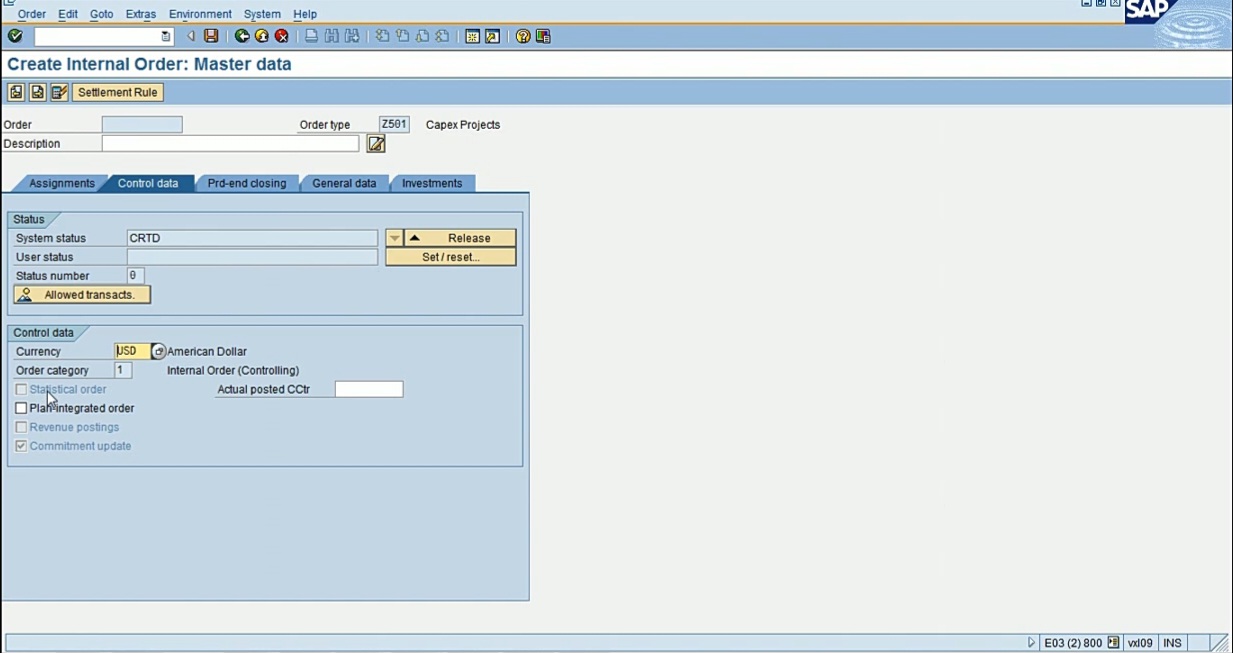
in this one it is not checked, because in the order type Z501, I have defined it that way. So, it controls what type of project you are creating. So based on the order type, so now if I go here, Define Order Types, so for OPEX,
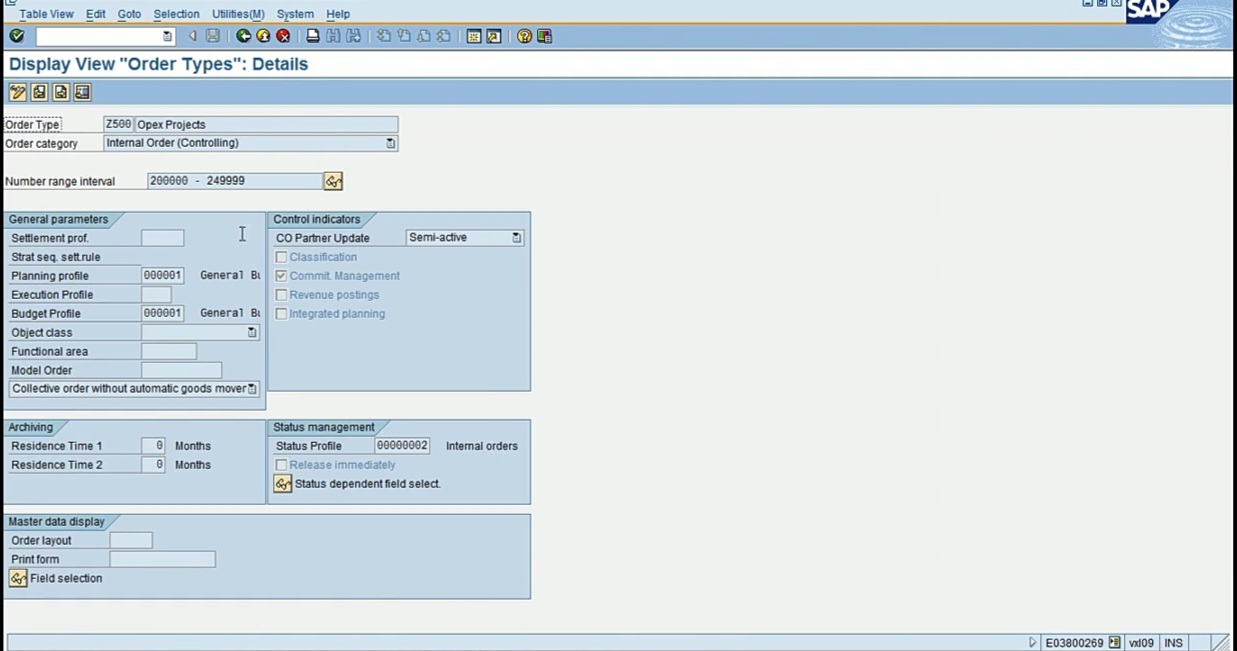
I’ve created this, and the number range are also in the order type. So, if I’m creating an OPEX project Z500, the number range for that project will be from 2000 to 2499.
So, if I create this, you’ll see the number, I’ll just create a test project.
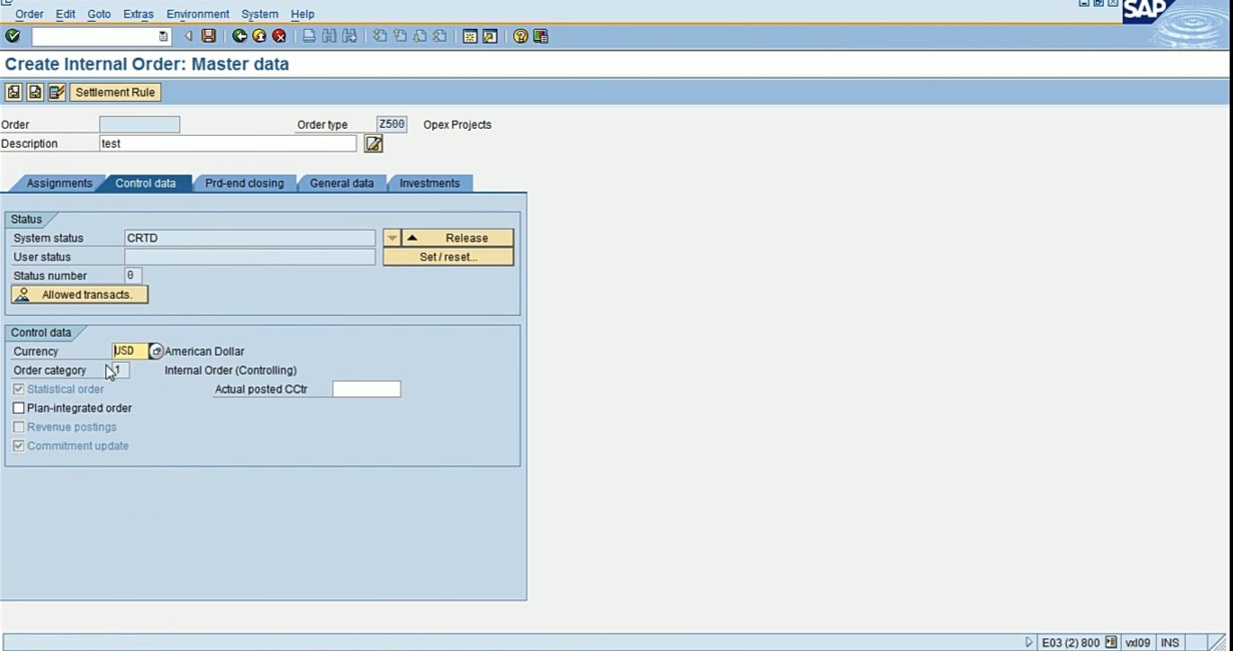
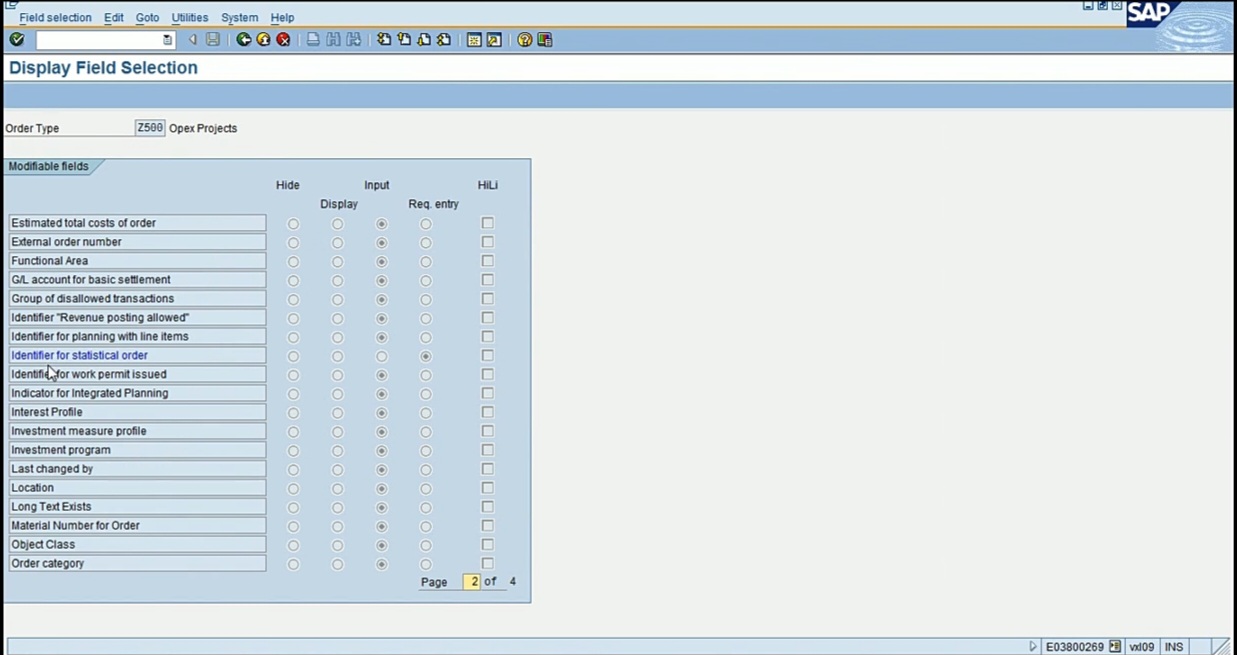
And see statistical is checked, and it is checked because in the field selection, I have made a required entry identifier for statistical analysis.
The rest of the information I’ve not entered anything. So, when I save it, it will give me the order number at the bottom of my screen, and the number is 200020. Why is this number? Because it’s assigned to this order type. Order type Z500 is a two series number. That’s what I’m getting, 200020. If I create Z501 CAPEX project, it will be in this number range starting with 3, this is a CAPEX project.
So that’s what order type controls, what number range of order you want to create and whether it’s a real or whether it’s a statistical.
This week what we are doing is we are doing statistical order, which are not real order. In our case, the real cost is going to the cost center. And the memo item, this information, is going to the order. So, the real cost is cost center in our case. And our order that you create, OPEX project, will not be real. So basically, they will not have the real cost. The real cost is at the cost center level. But next week when we will do CAPEX project, those order will be real order. We will not be entering any cost center with those. It’ll be just that internal order, and then we will do some settlement.
Basically, we will move the cost from that CAPEX, internal order, to an asset under construction and then to a completed asset. That we will do next week. But today, we will do this statistical internal order.
Since we have done the config, the next thing we will do is we will create some structure. But just for example, we’ll create these GL accounts, expense GL accounts that will be automatically created as cost element in the CO, and then we’ll create cost element group, then we will create cost center and then we will create cost center group.

These are all master data stuff that we will do, this is not config, config is done now. Now we will do the master data stuff like end users normally create. And then after creating the master data, we will enter transactions, and then we will then we will run reports to see our data.
We’ll start with creating GL accounts for expense items. So, let’s start with creating account for office supplies 505050. You’ll go in like we did before with FS00. So, we will do office supplies.
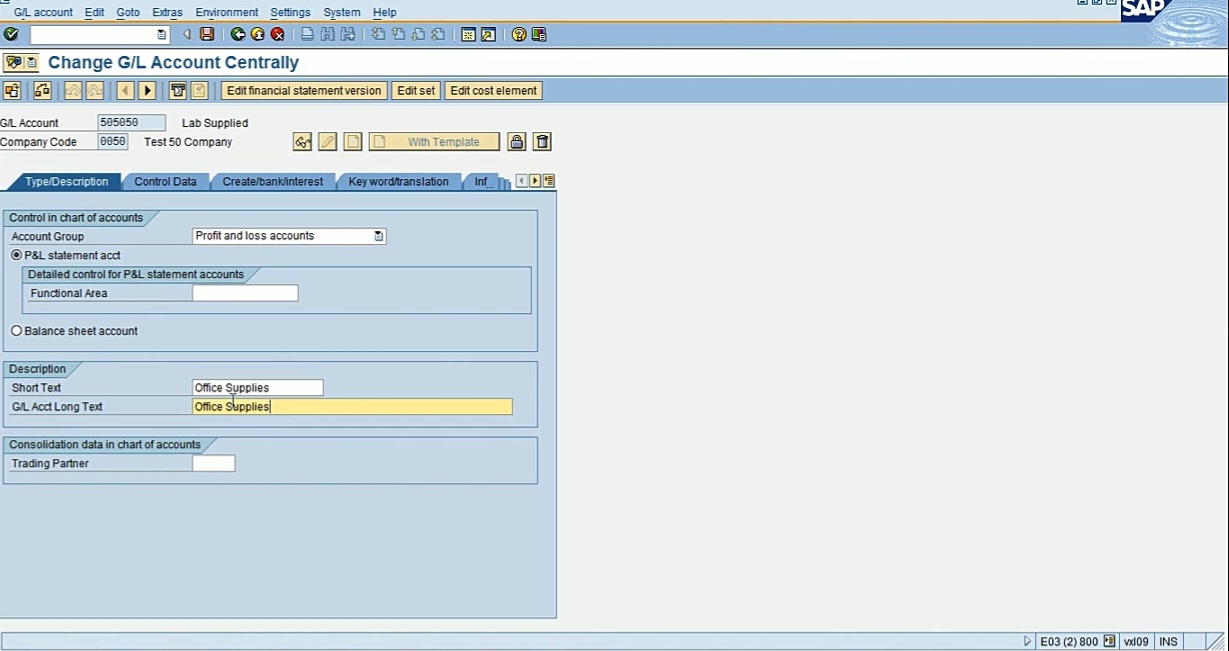
Make sure you have profit and loss here, P and L here. In the control data, make sure line item is checked. And then in the create/bank/interest, you can enter G004 for field status group. Once you have that, then you can click on Edit Cost Element. So, this will create this GL account as a cost element in control. So, this should take you to cost element, it might ask you to enter a date range.
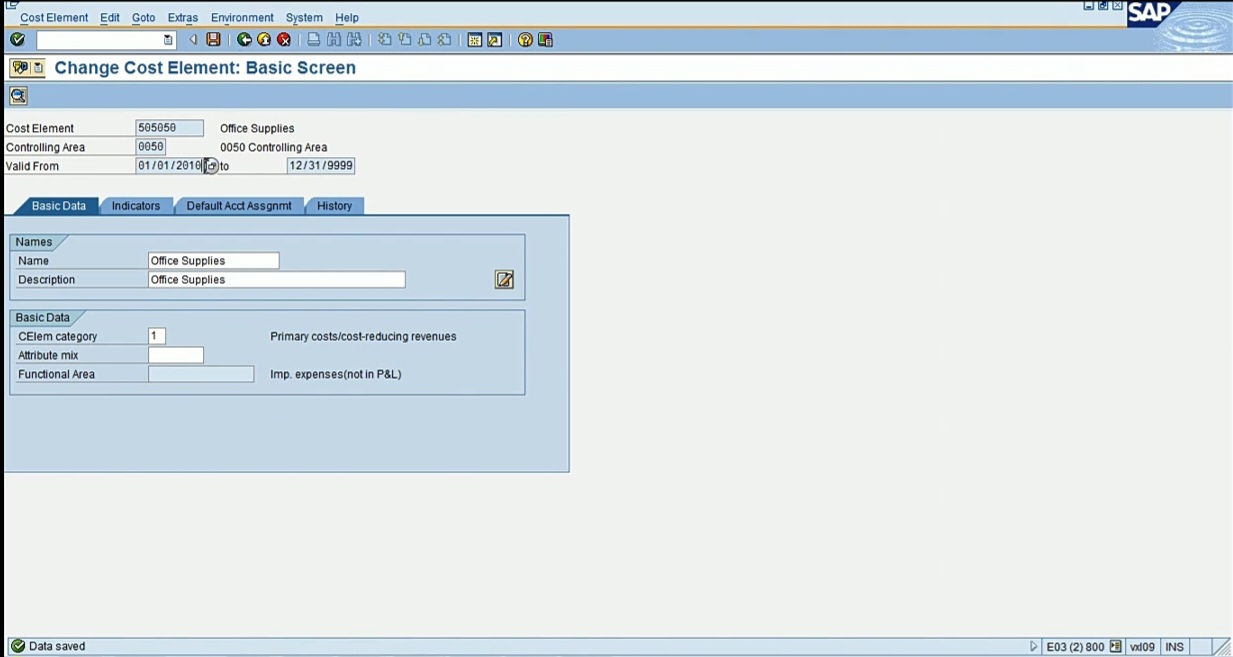
So, you can enter January 1st, 2010 and then enter these information. Once you have this, you can go ahead and save.
I’ll do the second one 505060, and the others.
So, what we have done, from the FI side we have created a GL account, also in cost element. If I go in display, KA03, I can see the cost element that I have created.
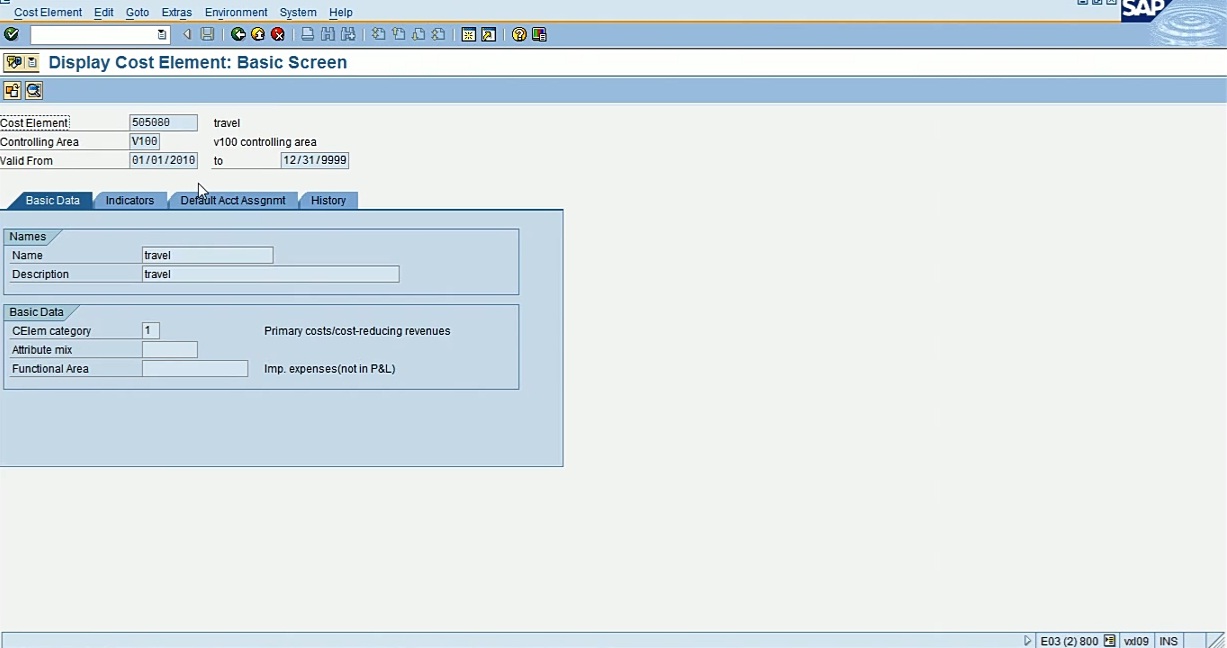
So, from FS00, we have done both. We’ve created a GL account and also a cost element. So now let’s go ahead and create a cost element group for this GL account. So, if you go in from the menu path, you can go in Accounting, Controlling, then Cost Element, then Master Data, then you can go in Cost Element Group, then you can go and Create. Transaction code is KAH1. So let me go there. And what group are we creating? We’re creating group called ‘spending’.
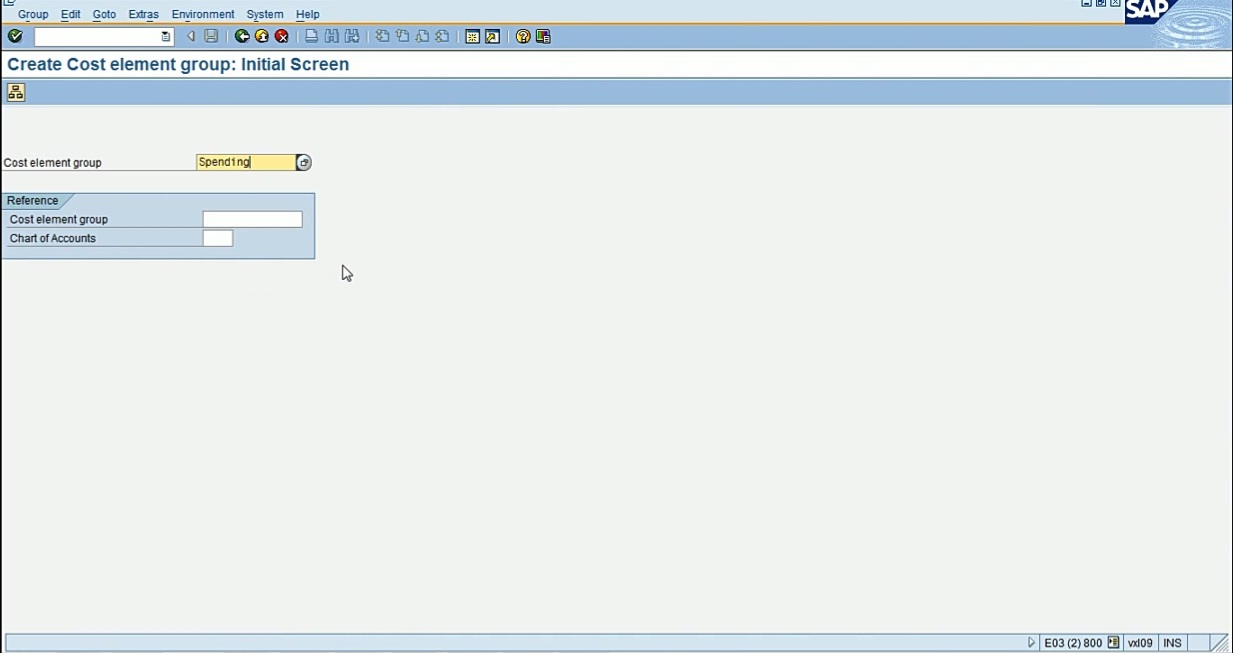
You can name it whatever you want. So, when I do this and press Enter, I get this screen.
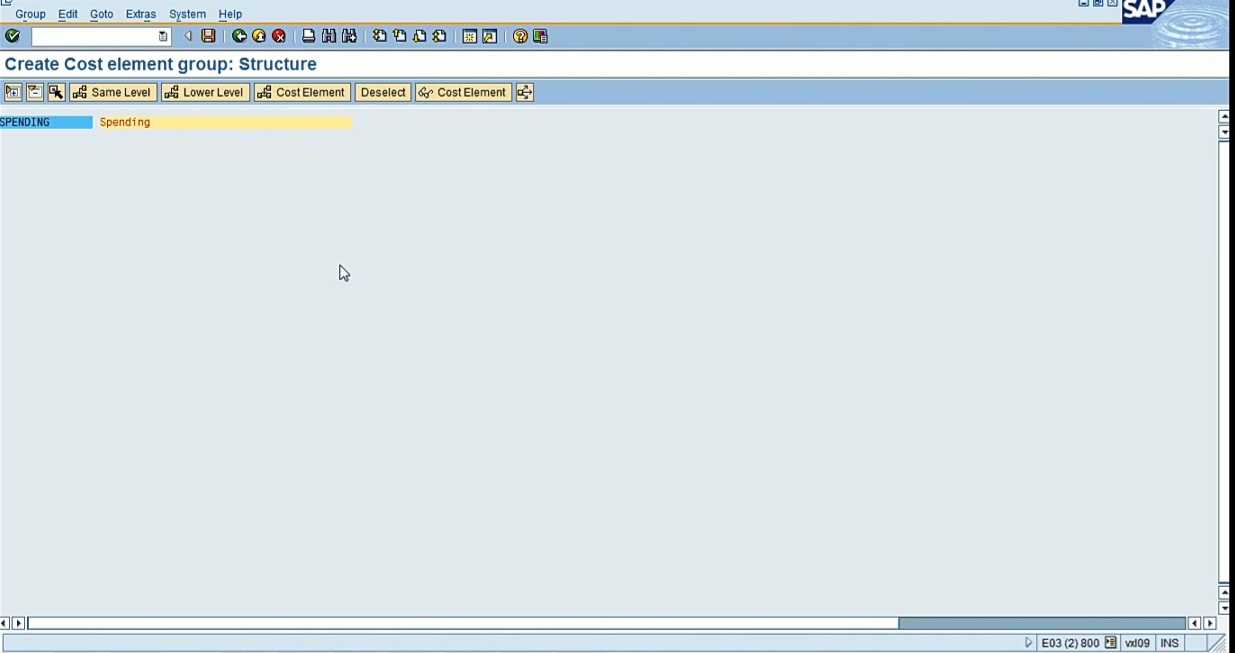
So now I want a subgroup under cost element spending, I want a subgroup called ‘Spending1’. So, in that case, I will click on Lower Level. I want to create a lower group under spending. So, click on lower level, now I will type in ‘Spending1’.
Now let me create one more group. So, I click here (spending 1), now I want a group at the same level not at the lower level, so since I clicked here, I will click Same Level, then I will enter ‘Spending2’.

So now I have two subgroups. Now I want to enter cost element in them. So, let’s do this. I will single click on the first group, ‘Spending1’, now I will click on cost element. Now I will get a group to enter a cost element. So, what I’m doing, let me do the first two in 1’s first group.
So, I will do 505050, in the first and also 505060 here. In the second group, let me add the remaining two. So, I’ll click ‘Spending2’, click on cost element, and enter the remaining seventy and eighty, 505070, 505080.
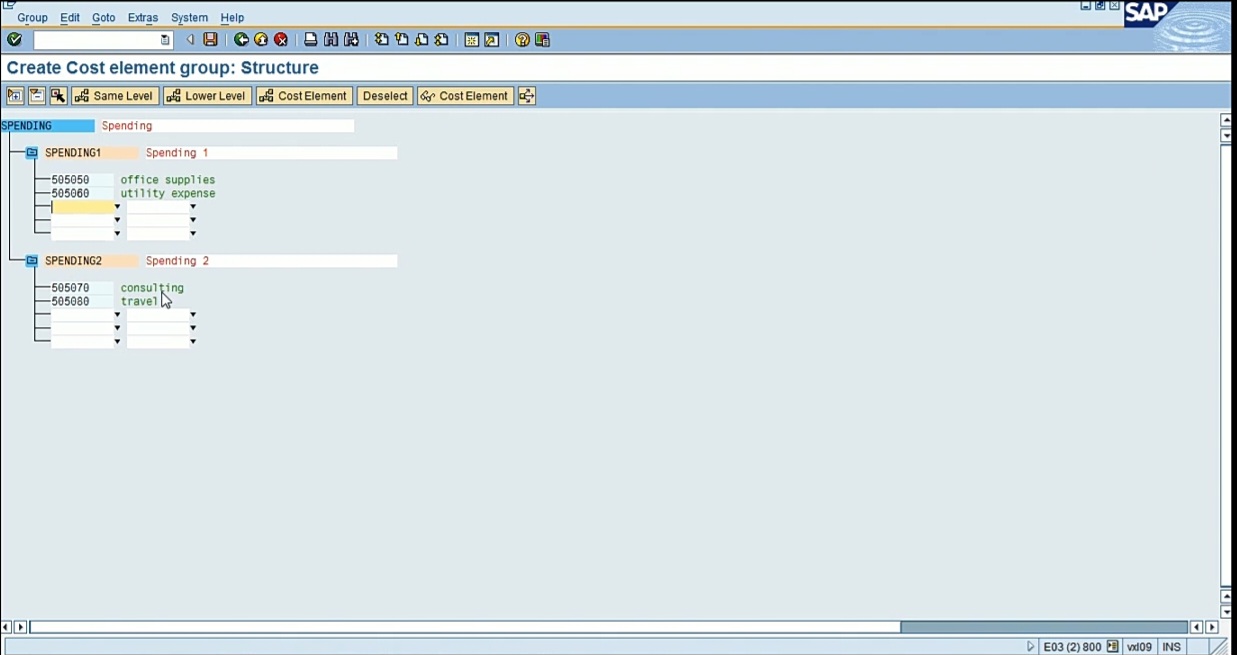
Okay. So now I have added these four GL accounts into these Cost Element Groups. Save it.
So basically, we need a structure, one at level 1 and then one at level 2. So, name it whatever you want. Something else maybe “Spend” or “Expenses”, “Expenses 1”, “Expenses 2”, something just for our structure.
So, we have four GL accounts added to the cost element group. Now let’s go ahead and create cost center. We want at least these four cost centers and let’s go in a transaction code OKEON. The advantage of this transaction is we can do two things here. We can create a structure, we can create cost center groups, and also cost centers. So, everything can be done from this transaction, OKEON.
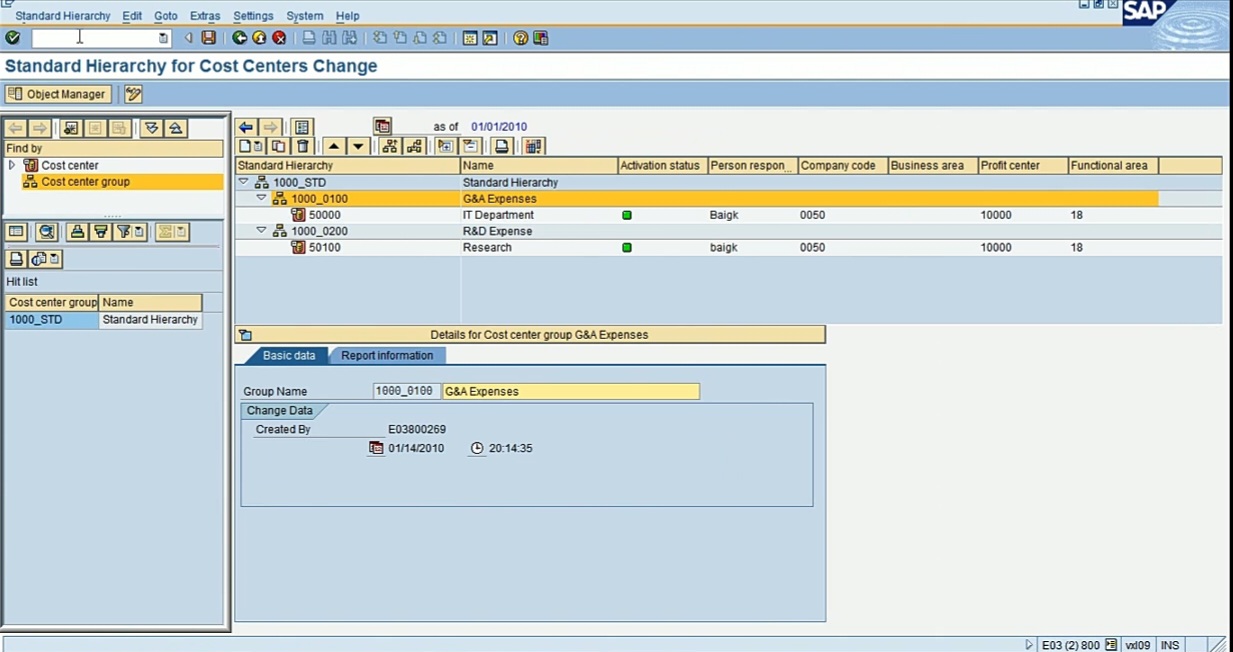
So, I want to create some more. So, it is very similar to the one we did here. So, this is our standard hierarchy, 1,000_STD, we can right click on it, and now we can get the same information, (create lower group or the same group). So, we can click on Create Group-Lower Level, and then we will come to this level.
So, we can name it ‘G&A Expenses’. The group name can be whatever you want. So, we need two groups. One for G&A and one for Operations. Two groups.
And here, if I want to create the same level of this, right click, Group Create-Same Level. And once we do that, then we need to create cost center. So, the way we create cost center is, here at the subgroup, I can right click on it and then click on Create Cost Center. This will take me to this.
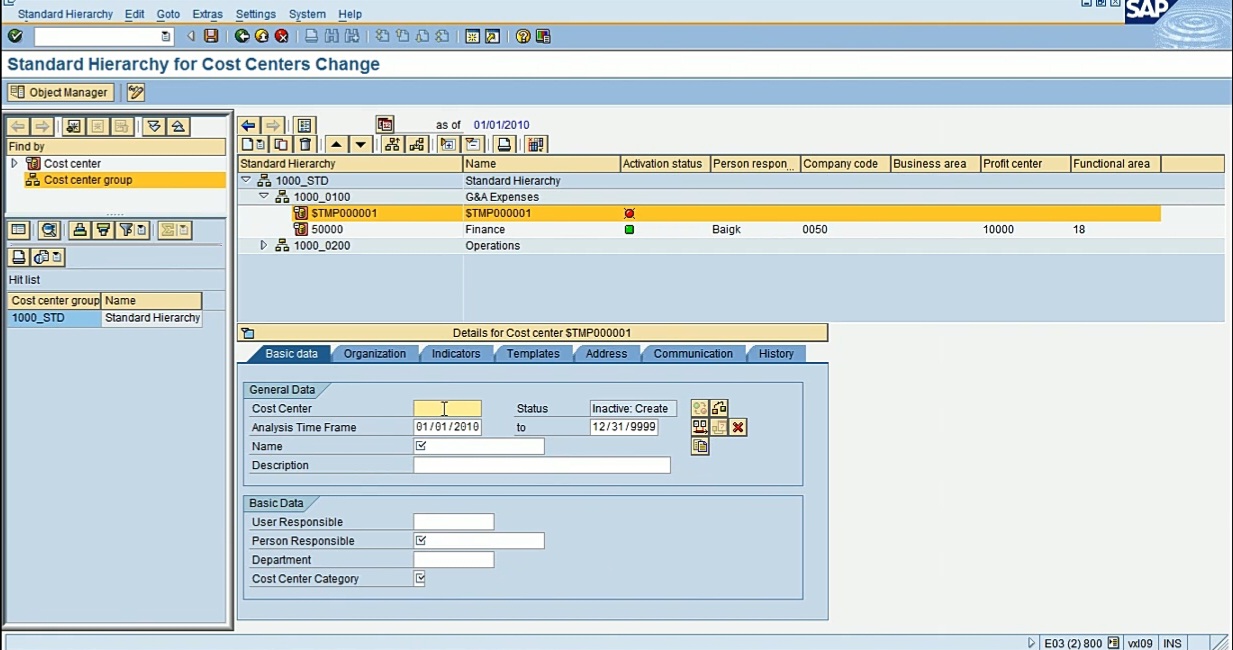
So, cost center, second one is 50010. We are naming it ‘IT’. Person responsible, you can enter whatever name you want. Cost Center Category, we will choose, Information Technology, F, but that does not matter.

Organization tab, we have to assign it to our company code. Business area is optional. Functional area, you can enter.
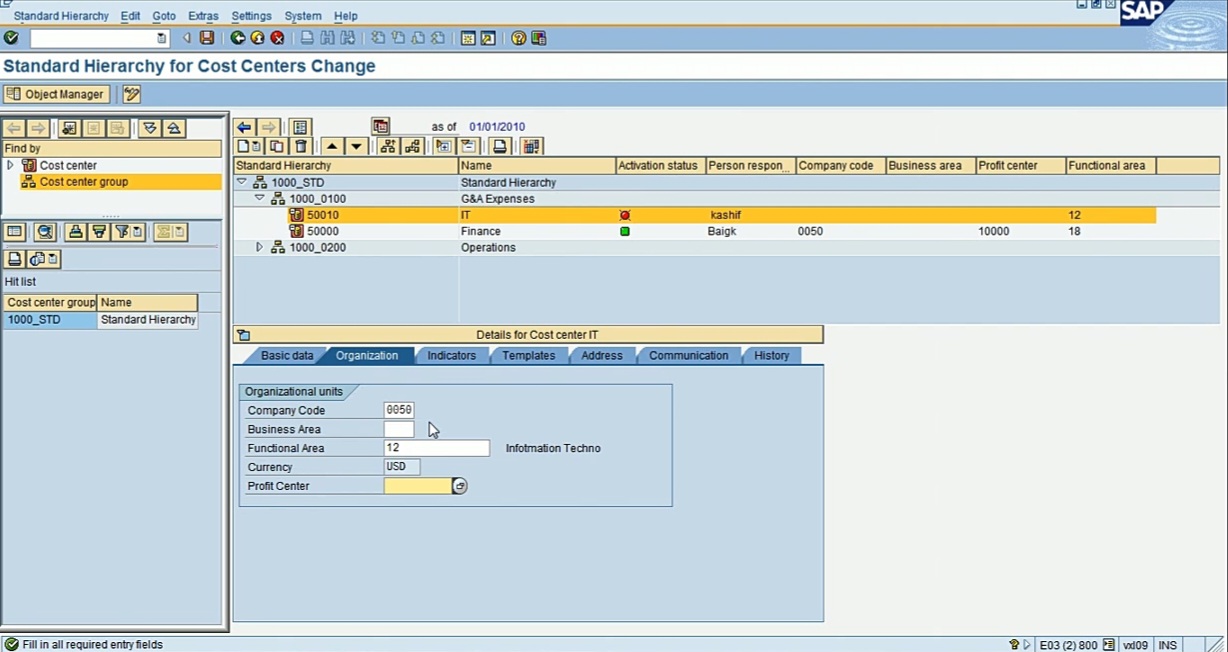
And then we don’t have profit center now, but when we have, we will update the Profit Center here in the Cost Center. So, I’ll just click on save. So I have this second cost center, IT. Same way, I’ll create two more. I’ll create this under Operations. So, I’ll create 50020. I’ll just right click on ‘Operations’, Create Cost Center. 50020, ‘Manufacturing’. Cost center category, we can choose any, okay just choose Production. Company code, 50. Functional Area, we can choose one of the functional areas. Save it.
For the next one, again, I’ll just click on the sublevel, Create Cost Center, and then we are creating ‘Quality’ the same way. So, we have this subgroup, G&A, the other one is Operations, and then we have cost centers inside it.
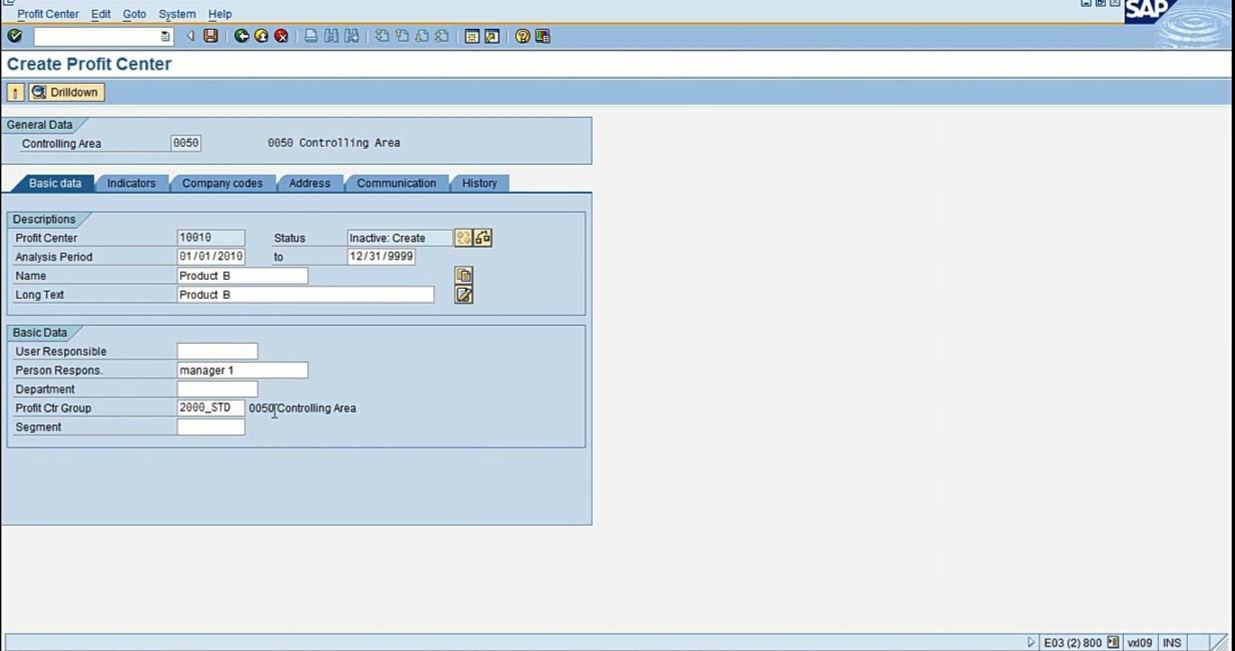
So, let’s go to the next step. Let’s create new Profit Center and then we’ll update the Cost Center, then we will be all set with the Master Data, and then we can do some transactions. Let’s create two Profit Centers. So, we’ll go in Controlling 🡪 Profit Center 🡪 Accounting 🡪 Master Data 🡪 Profit Center 🡪 Individual Processing 🡪 Create. Create is KE51. Let me do it in my controlling area. Let me first switch it to my controlling area then I will reset. So basically, we are creating two new Profit Centers. I just want to do it in my controlling area. So KE51 is to create Profit Center. So, let’s do profit center 10,000 and then 10,010 or whatever name you want to give.

So, I’ll go with 10,000. And then you can name it whatever you want. Let’s say “Product A”. Product A, I’m doing 10,000.
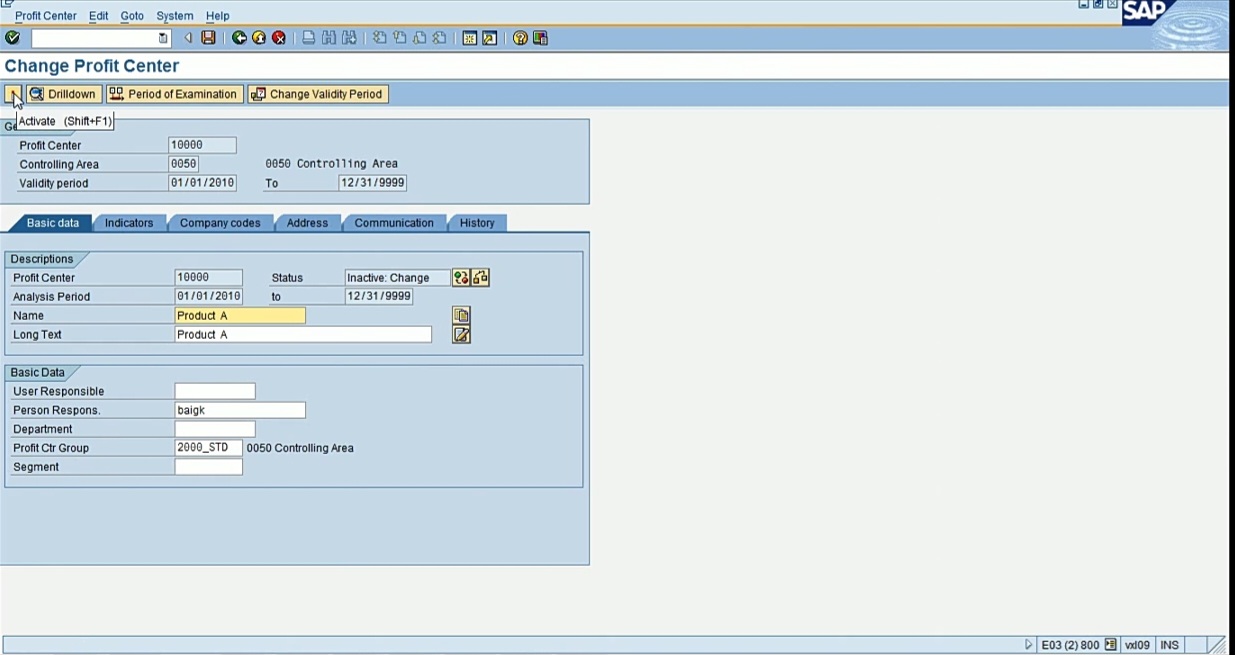
We have to activate that also. Then I will do 10,010. I will name it “Product B”.
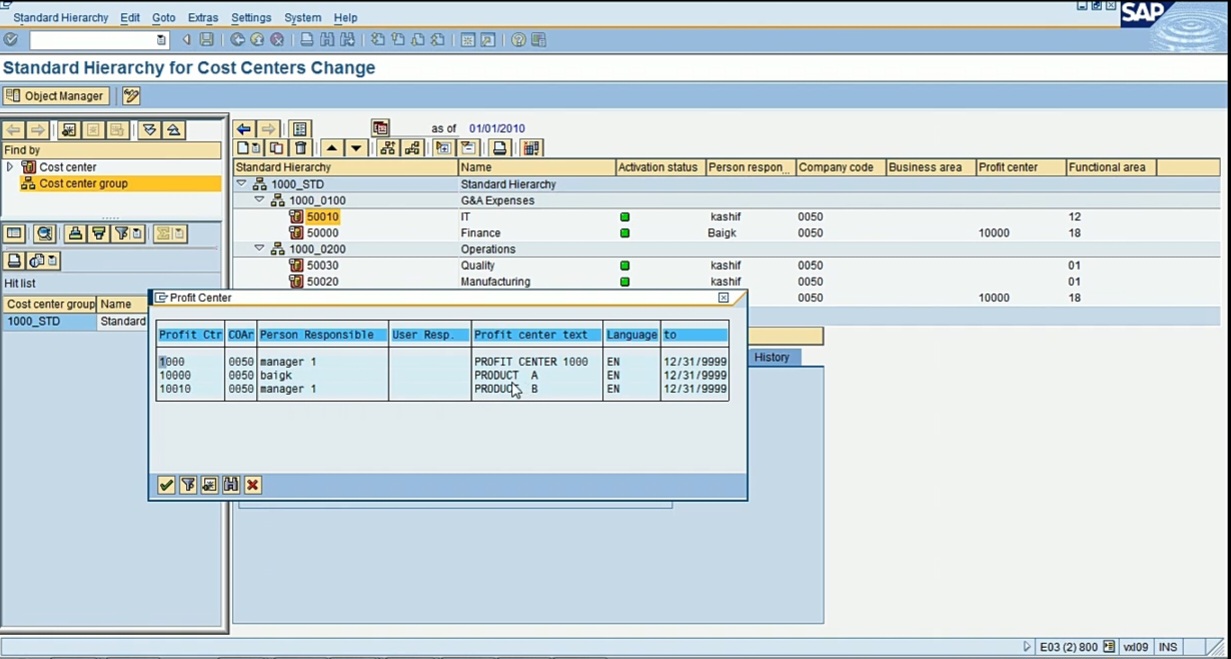
And I will also activate this, if you click on that candle, it will activate that. So, I have two profit centers: 10,000, Product A and then 10,010, Product B.
Try that and see if you’re able to create these profit centers. Make sure you activate that. Click on the candle to activate that.
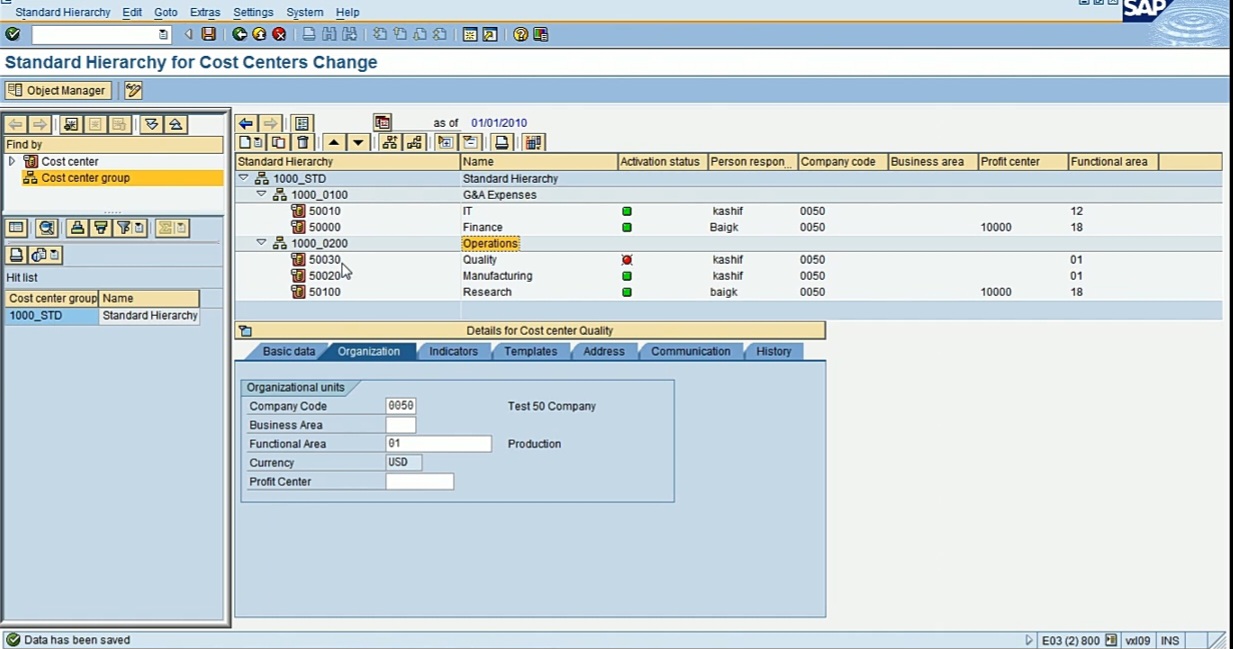
If you are done with the profit center, just go update in your Cost Center. Go to OKEON, and let’s assign two of the profit centers to IT, Finance and, other two to Quality, Manufacturing. You can go in the Organization tab; you will see a profit center field. So, assign two of your profit centers that you created to G&A expenses and other profit centers to these Cost Center Operations. Let’s do that. So, let’s say if I am doing it, I’m going to search it. So, I’ll go in my first cost center. In profit center, I’ll do a search under my company code. I’ll leave my company code and these are my profit centers.
So, I’ll choose Product A. And you can just ignore the error. That’s fine, we have not posted anything. And click on save. So, 10,000 is my first. So, for 5030, I will do the Product B. And then I’ll also do for the remaining. So just enter your two profit centers, one to the G&A Expenses Cost Center, another to the Operations Cost Center.
So now what we did so far, we updated the Master Data. Master Data is an end user transaction. All the transaction we did, you know, end user performs these transactions. So, what we did, let’s go over what we did.
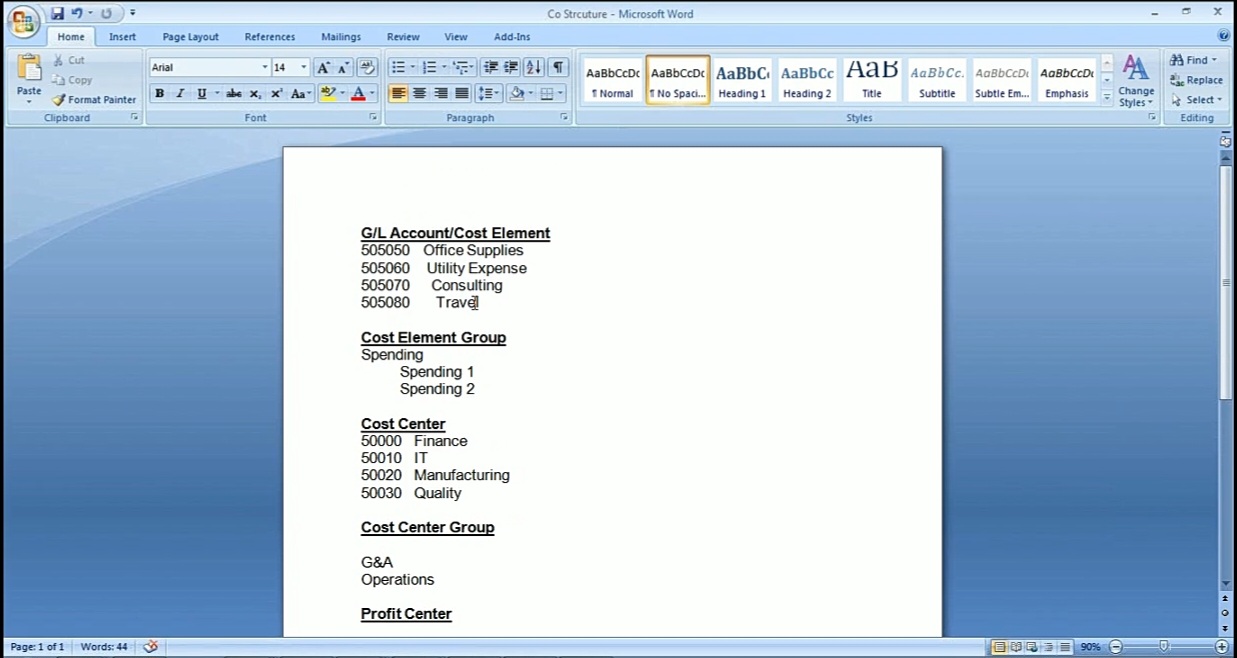
We created GL accounts. And also, at the same time, we created cost element; 5050 Office Supplies, Utility, Consulting, and Travel. So these are GL accounts, and we created cost element. Then we went to create cost element groups for this. We grouped them, we grouped the first two together in one group, and the second two together in another group, and all of these four in one group. Under spending, in my case, in spending I had two subgroups and each subgroup had two GL accounts. And then we went and we created four cost centers. And then we created two subgroups for these cost centers, and we created two profit centers. And we assigned one profit center to two of these cost centers and the other profit center to these cost centers. So now we have done the master data and let’s post some transaction and then we will run the report and then you will have some better understanding of what we did so far today after looking at the reports. So, let’s go ahead and post some data.