

Complex Posting Using F-02
Okay, let us go to the next topic now, which is complex posting using F-02. It’s quite an interesting topic.
Thank you for reading this post, don't forget to subscribe!
Remember, I showed you how to post a general posting using a RB50. See this? There’s also another screen which SAP provides to do the same posting, which is this general posting. Okay, actually, the difference between this screen and this screen is, this is the old version of posting transactions to SAP. This has been the screen since R2 version. R2 is the mainframe version of SAP.
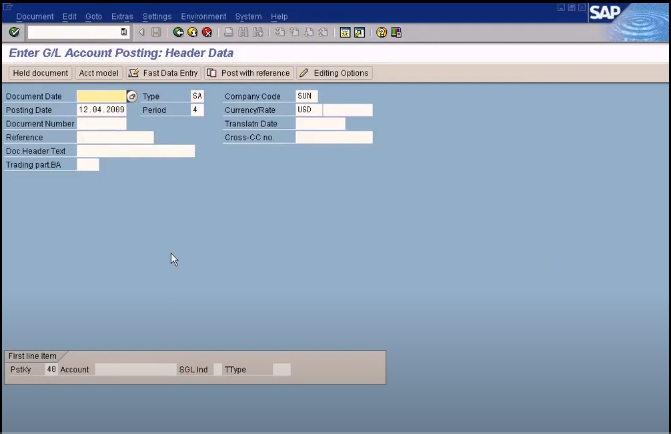
So when they moved to R3, which is a client server environment, they designed a new screen, which is this. See, this is much more user friendly than the earlier screen, but they still retain the old screen, because in the old screen, I can actually do all the transaction postings using a single screen.
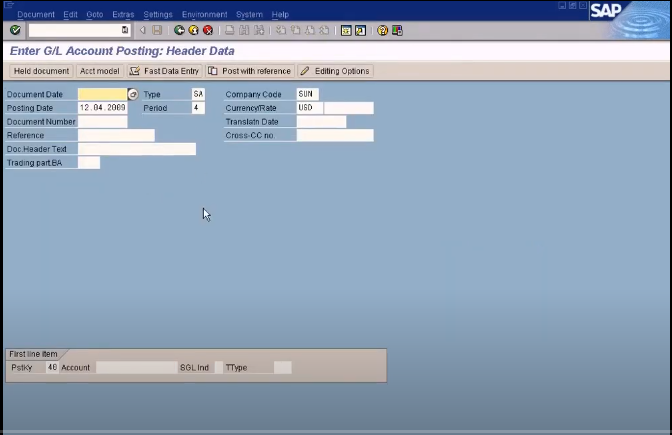
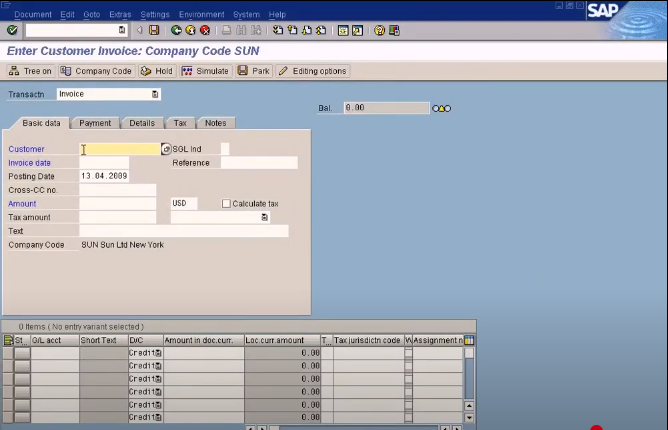
The limitation of the new screen is, let me go to the new screen. I cannot use this screen to post AR Invoice or AP Invoice, because this is Enter G/L account document. If I want to post AR or AP Invoice, I still have to go to the respective screen where it is here, which is FB70, which is for AR Invoice.
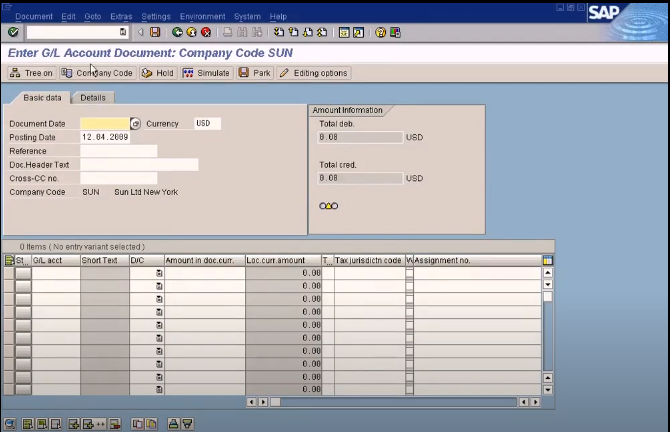
Because from here, this screen does not allow me to select a customer. There’s no field for customer. Whereas, this screen has got the customer field. This is the problem with the new screens. You have three different screens to post a respective transaction. The first one is AR Invoice, which is this, FB70, the second one is AP Invoice, over here. See, I can see vendor here, whereas in the AR Invoice, I cannot see the vendor, so I have to use Invoice, and the third one is G/L Account. This is for posting journal entry documents, where I can select G/L accounts only. But, if you use the old screen, using one single screen which is FS02, I can actually post a journal entry document, or AR invoice, or AP invoice. I’m going to show you now. I’m going to show the normal way of posting a journal document using this screen. Then later on, I’ll show you how to post journal entry document, AR invoice document, AP invoice document using the same screen without changing screens.
Okay. Let me just go to the earlier one. Remember we always do the funds transfer from bank account to cash account. Let me do this. Let me recap your memory. Remember we always do this, so I’m going to do this again using the old screen, FS02. Okay, see, this is how we post it using the FB50, the new screen.
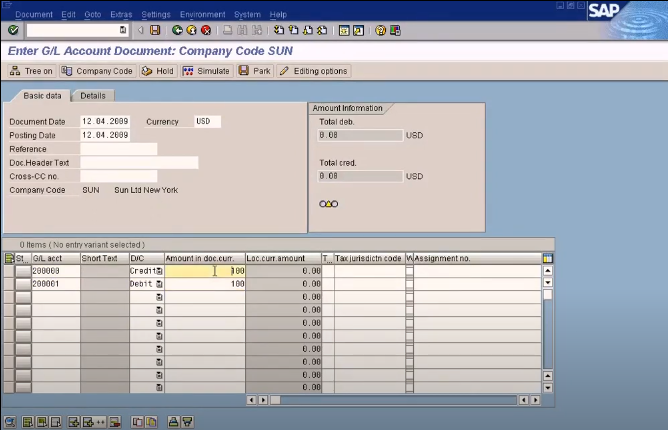
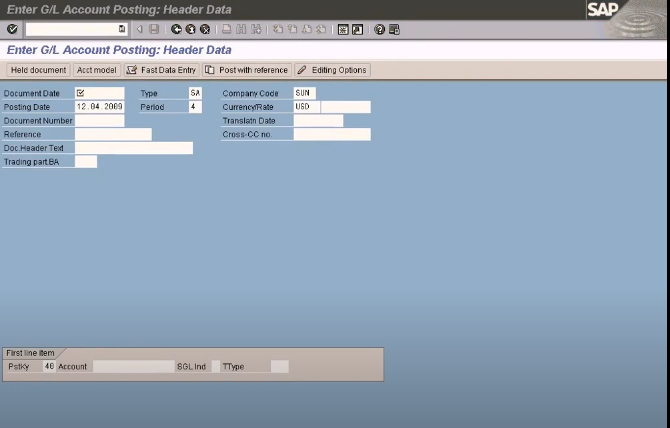
If I were to do the same thing in the old screen, this is how I have to do it. I go back here. Date, all these don’t change. Come here. Okay, this is where we need to enter the first line item here, which is this, credit, 200,000. How am I going to do that? I can enter 200,000, no problem. How am I to tell whether it’s credit or debit using this posting key? 40 means debit, 50 means credit. If I go back here, I need to credit this account with 100, so I’ll choose 50, and press enter. I need to enter the amount, the amount cannot be entered here. It has to be entered here in the subsequent sub screen. This is where I have to enter 100, which is meant for this account, and I need to enter the due on. Okay. Now I can enter the second line item, which is this. Up to this point, it is still the first line item. The second line item, this account, I need to debit this account, right? Now we debit, I need to enter a different posting key, which is 40, press enter, so I can enter the amount which is 100 here. Due date is this, that’s about it, and I can simulate. See, credit, 100 from cash in bank, and debit to cash in hand. You can do the postings now.

The same way, if I have to simulate here, I’ll do the same thing, I need to enter the dates here. Simulate. This is using FB50, I’ll still get the same postings, see, just hang on. Okay. You see the postings here? Once again, it is 100 credit. See this, so I want to draw your attention to this part here, posting key, 50, 40. Even though you enter this transaction in the FB50 screen, you didn’t enter the 50, 40 here, right? All you entered is only credit and debit. But when you simulate, the system will automatically convert the debit and credit flag that you entered to the respective posting keys, 50 and 40. 50 is for credit, minus 40 is for debit, plus. See, this will correspond to this posting key here. This is how the system stores the transaction internally in the table, the system table for 50 and 40. Okay, you can also post this. I’m going to post this.
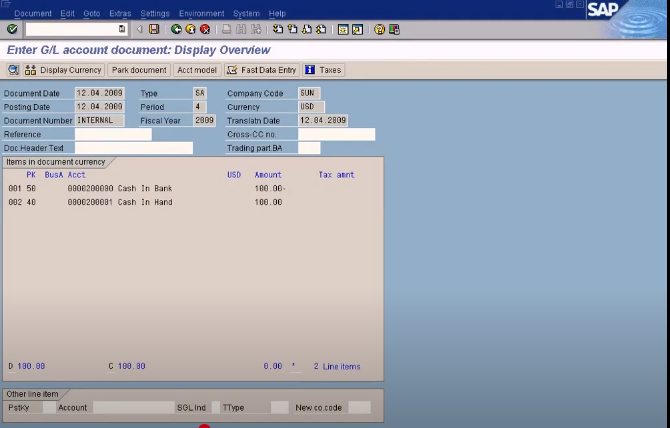
Note this document here because our next topic is regarding the number range here. See this, 10002, let’s take note of it. I can also post this but I’m not going to post this. Alright, so we have seen how to post the journal entry that we normally use to post using this, FB50 screen using the F-02 which is the complex posting. Now, I’m going to show how we can post AR invoice using F-02 screen, which cannot be posted using FB50 screen. Just hang on. Alright, let’s say I’m going to post AR invoice, let me just post this too. FB50 is also posted, so if I were to use this, see this, posting key here, in this account here, what I can see is only the G/L accounts, right? Okay, I can see only the G/L accounts. If I were to see the customer accounts, there’s a trick here. Just go here, just change this to 01 posting key, and you can see the customer accounts. See, customer, you can see the customer. Once again, if you want to change this field to display the customer accounts, all I will do is just go here, posting key, choose 01. You know why? 01 stands for account type C, and debit and credit is D invoice.
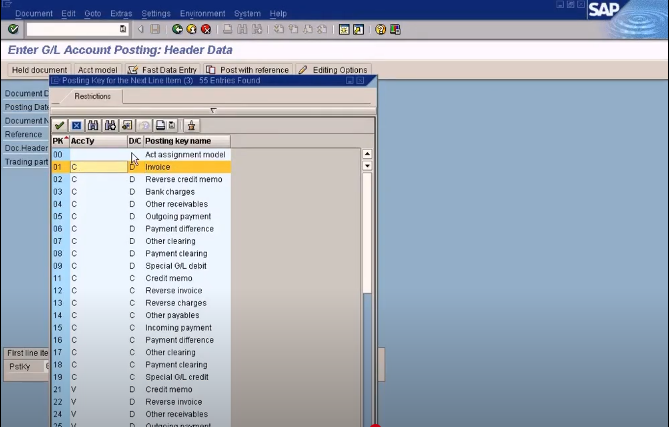
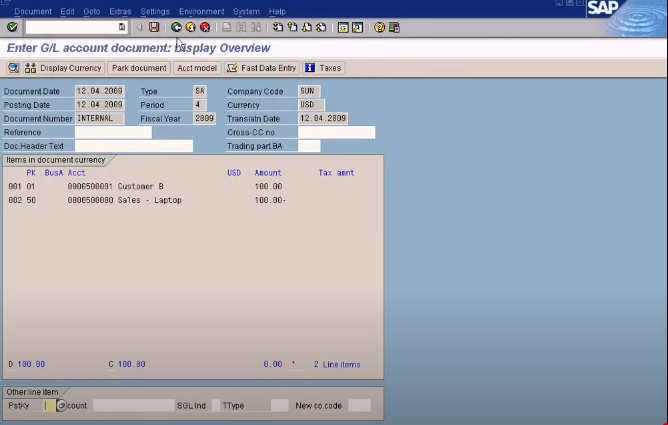
This C means, this C indicator will make sure that the customer accounts are shown in this field, in this list. This account field will accept customer accounts once you choose 01. That’s what this C stands for customer, and V stands for vendor, and G stands for G/L accounts. A stands for asset accounts. So this single alphabet here will determine what accounts the system will show for this field here when you choose a respective posting key. Just now, remember I entered 40 to debit a G/L account, let me choose it again, 40. 40, we look at the 40 again, the system will show on only the G/L accounts. See it, alphabet G here. This means it will show the G/L account. Let us check it now. When I go in here, so you can see all the G/L accounts. These are GL accounts. These are not customer accounts, right? So similarly, if I use 01, it will show the customer accounts because it’s C here. So using this posting key here, I can choose a customer account like customer B. Let’s say I’m going to post a sales invoice of $100 to customer B. Now I’ve chosen this, when I press enter, I’ll come here, I’ll just put the 100 for the invoice amount, and then, I choose the credit side. This is debit side. Credit side will be the revenue account. So for credit, I have to choose 50 so that system will display. Okay, see this, I have to choose a revenue account, right? Revenue account is sales-laptop. I am not supposed to put 01 here, because 01 is already put to select the custom account. Now, I need to select the revenue account, so I have to put this.
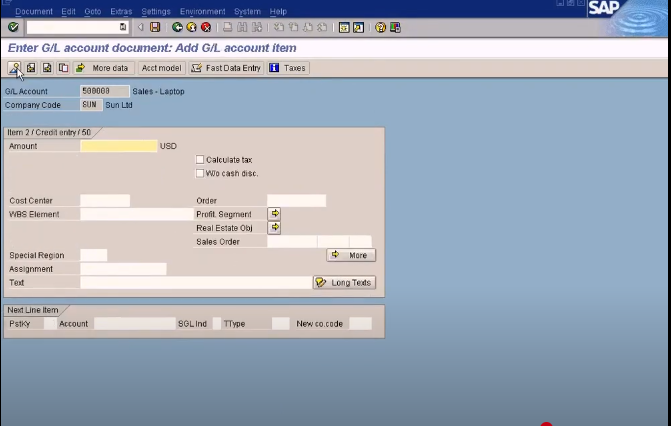
Alright. Now, I am ready to post this. Let me just simulate. Oh, I need to enter the amount for the revenue account which is also 100. Simulate. See this, now, this is how I can create an AR invoice using the same screen which is F-02 without having to choose a different screen. You can do the same thing using the FB70, which is this.
Let me just show you FB70. Since you have a customer account here, I can choose that. Here, you enter the customer account, and here, you enter the revenue account. But let me go back to FB50. This is FB50, the one that we used to post to journal entry. Can we use the same screen to post AR invoice? You can’t. You can’t really select a customer account. There’s no field for customer account. All I can do is I can select only the revenue account here. For customer account, I can’t really choose, so this is the limitation of this FB50 screen, even though it looks nice, easier for the users to enter details, but it is limited to perform only one function, which is journal entry posting. This is the advantage of the complex posting screen. I’ll go back here, see, F-02, general complex posting screen. Using the single screen, I can even post the AR invoice. Let me post it. Posted.
Now, let me show you how can I post the AP invoice. Choose this, and go for 31. 31 posting key has got a account type as V, and a debit and credit sign of C, which means that if I select this 31 as a posting key and I come here, I’ll get a listing of vendor accounts here. See vendors, go here, I can see the vendor accounts. I select this, then when I press enter, I need to enter the amount, right? I need to enter the amount. I put 50. When I put 50, how the system knows that whether this should be booked on the debit or credit side of the vendor account? How does the system know that? It is using the posting key again. Let me go back. I can’t really go back. This is the problem with the general posting screen. You can’t really go back. You have to quit all the way and come in again. So this posting key, 31, my question to you just now is that how the system knows whether to post the amount that we entered to the debit or credit side is using this flag here. C stands for credit. D for debit. So if I choose this using this, using the flag of C, the system knows that you should post the amount to the credit side. I enter, I put 50, this is booked in the credit side, and here, this is the cost of sales. Cost of sales should be debited, 40. 40, cost of sales-laptop, and put the debit side, so let me simulate.
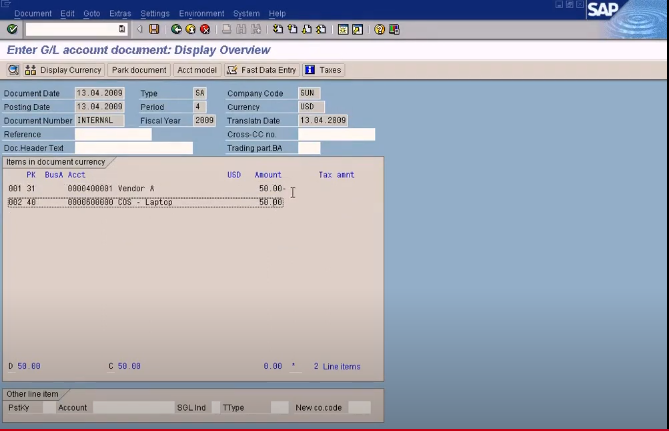
See, vendor account is credited. This is a minus sign here, and cost of sales debited. For comparison, if I use the FB60 screen, let me just go back, this is a enjoy screen. It’s also called enjoy screen with the new screen. If I use a new screen, it’s a vendor account, right, FB60, let me just post the same thing, 40001. 50. Cost of sales is here. 50. So this is how I would enter the transaction using the FB60 screen, which is same as this.
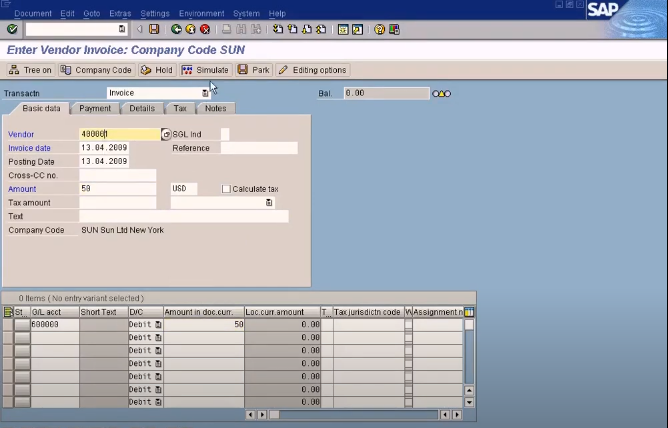
See this, even if you simulate here, the posting key derived is 31, 50, see, corresponds to 31. The end postings, what I am trying to say is, the final postings, the database, is actually is this pattern here. Okay, this pattern, 31, 50, 40, 50. This is how the system will store the information to a database, but it offers two different screens for you to enter the information depending on whatever you like, but the end postings remains the same, but I’m not going to post this. You can post it if you want to.

All right. I have demonstrated to you how I can post a journal entry, AR invoice and AP invoice using the single screen, which is F-02, which is also known as complex posting. We have covered this complex posting using F-02. That’s the end of the topic. Let’s go to document type now.