
Enterprise Structure Setup (Part 2)
So, like I said, we have done the basic configuration for the GL side. In FI, we have done the GL configuration, we have created a GL account, we are ready to post a GL transaction; a debit one account and credit another account. This is the basic GL transaction, and the transaction code is FB50. So, like I said, same thing, you can either type in the transaction code FB50 or you can follow the menu path from here and post the document. So, you know, once you get used to it, you know, you will just enter, the transaction code here, FP50, but you can also go from here posting document FP50, the same thing. So FB60 is the most common transaction used to post a GL entry.
Thank you for reading this post, don't forget to subscribe!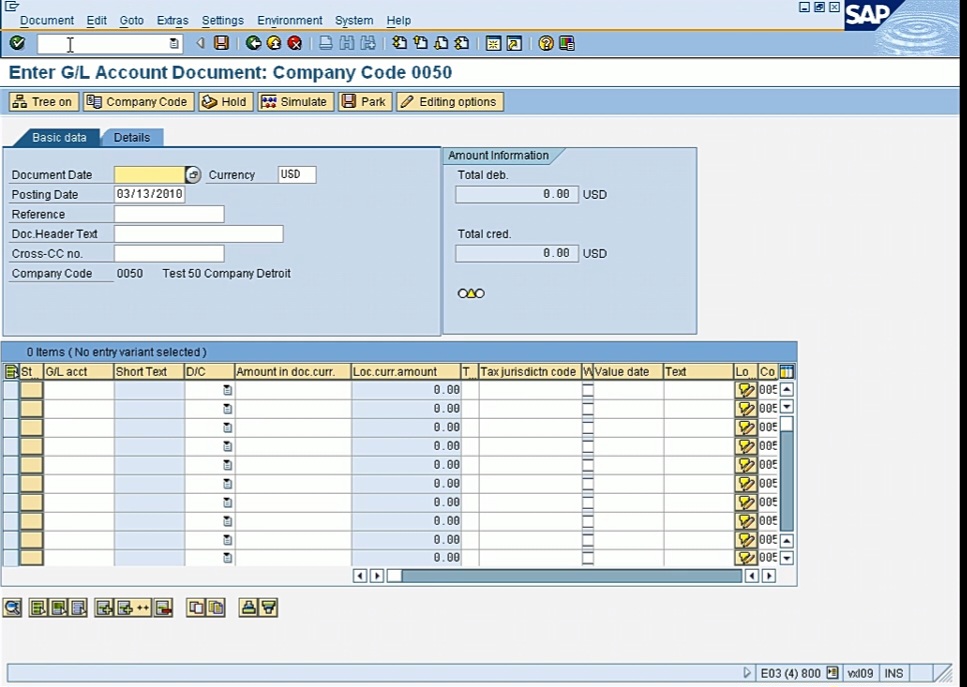
And the screen that we’re in now, the new version, is very user friendly. So, this part, the top part is called the document header, and the bottom one are your line items. So, the header has like the document date, the posting date. These two are required fields. It has the currency, the default currency will be your company code currency, but you can change it to any other available currency that you have in SAP. And reference is an option field. You can describe about the entry you’re posting, same thing with the header text. These 2 are optional fields.
What is the document difference between a document date and a posting date?
Posting date is the actual date that will be used to post the document, and that period has to be open. Document date can be, let’s say, if now we are in March and we have to make some changes to the December numbers, so in that case, the posting date will be December, but document date can be today’s date. So, document date normally is today’s date, and the posting date you want to choose, let’s say, you are in March and you want to post for February, so in that case also, the posting date will be February, but document date can be today’s date. So, it’s just another option of say, if you look at the document, you can see, okay, when was it posted and what was, the month it was supposed to be posted in. But for my example, I can use just the same date. So now I have the document date and now in the line items, first thing you see is the GL account. Let’s say I don’t know my GL account, so I can do a search. I can click on this bubble, and now I have many ways to search a GL account. The best option is to search it in your company code, so make sure this has your company code. If you have it blank, then it will search for all available geo accounts that are in SAP, you don’t want that, you want to restrict it to your company. Now it will give you all your GL accounts.
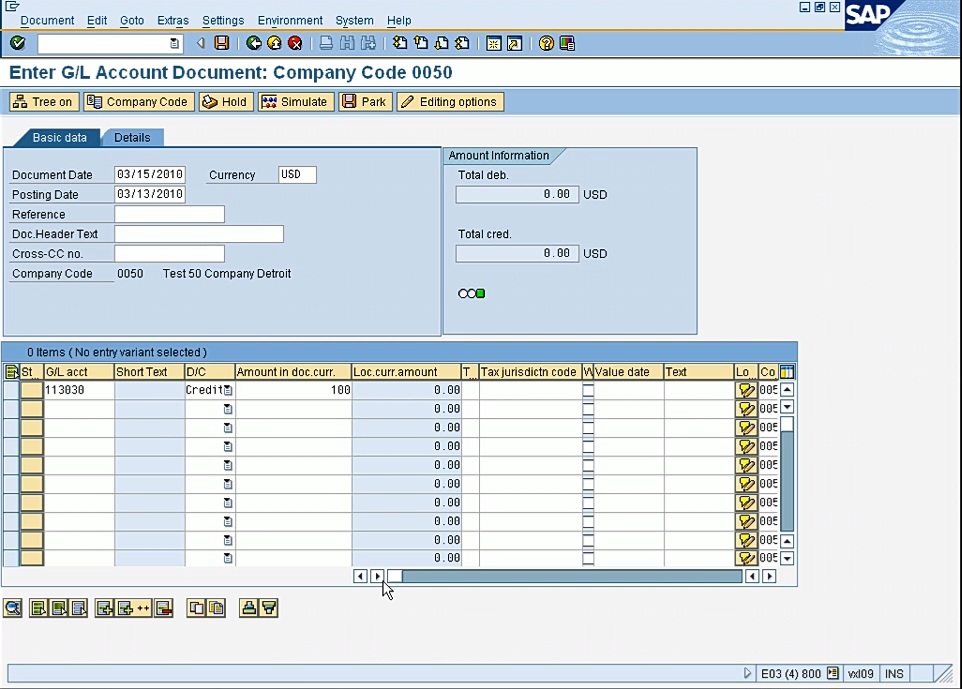
Let’s say you know that the GL account that you want to choose start with 1; in that case, you can put a ‘1 and a star (*)’, and then press ‘enter’. It will give you GL accounts starting with 1. Another option is if you know the name that it has cash somewhere in the name, then you in the long text, you can do ‘star (*), cash, star (*)’ (*cash*) and make sure you have your company code and do a search. Now this will give you only GL accounts that have cash in the name. So, there are many ways to search for a GL account. And it has some tabs also that you can do it in chart of accounts, in company codes. So, the best search that I have seen is I prefer GL accounts in your company code. So, if I leave it blank, it will give me all the GL accounts that I have in my company code. So, let’s use the one that we created, Cash Bank of America. So that is my GL account, now I have to choose a credit or a debit. Let’s say I’ll just choose a credit. Now I need to enter my amount. I’ll just enter 100.
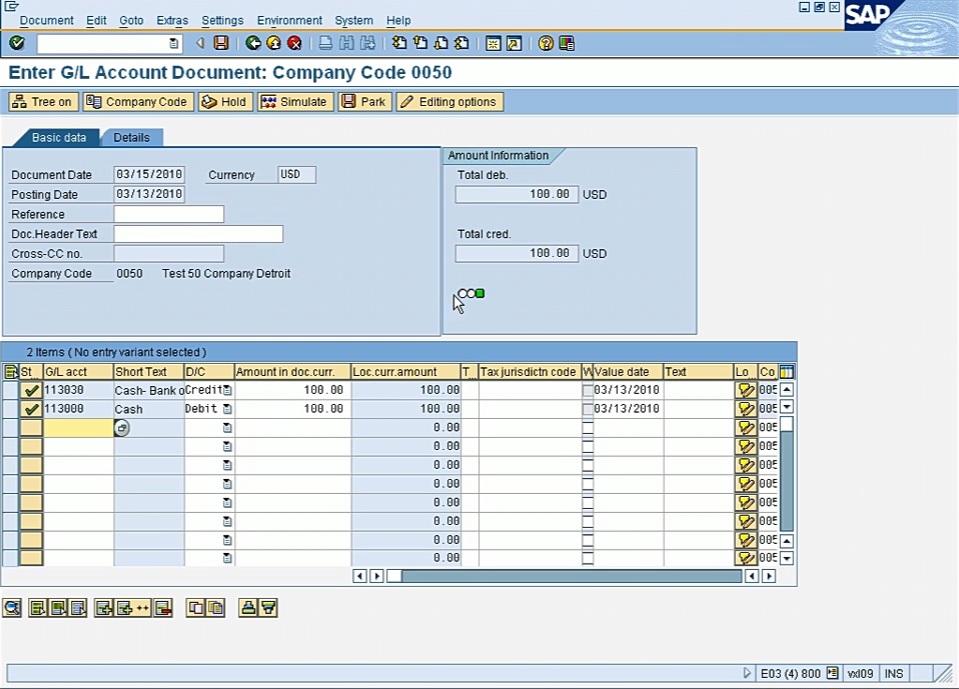
There are some additional fields that we will go through and when we’ll enter, invoices or expense account, then I will show you that if you enter expense account, then you will have to enter a cost center or order number or internal order. So then we’ll go through this when we will do CO configuration. But at this point, we are using balance sheet accounts, so we don’t need to enter any of this information. So, let’s choose another account. So, we have to balance it. As you can see, we have a red light because the entry is not balanced.

We have a $100 credit as you can see here, but we have a 0 debit. So, we have to balance this entry before we can post it. So, let’s choose another account in our company. Let’s choose another cash account to offset the balance. So, I’ll just debit this account. Okay. So now I have a green light.
I am crediting the new account that we have created and debiting this account. So now I have a green light, but at this point, I am ready to post it, but it’s a good idea to click on simulate and see how it will post. So, this you can do before you post it. So, I’ll click on simulate. So, this will give me just a preview of how it will be posted.
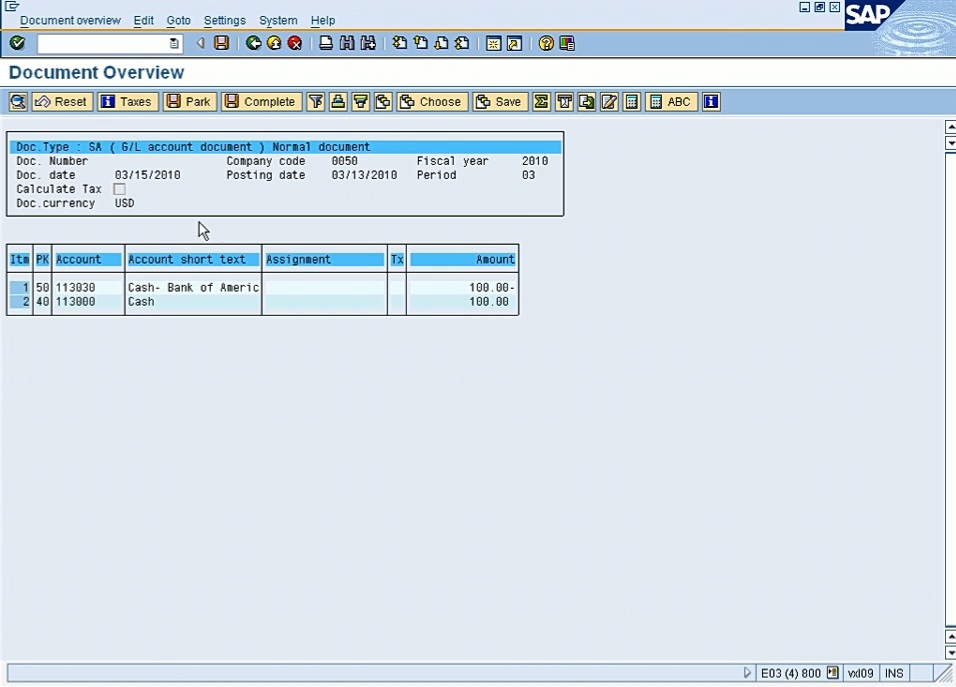
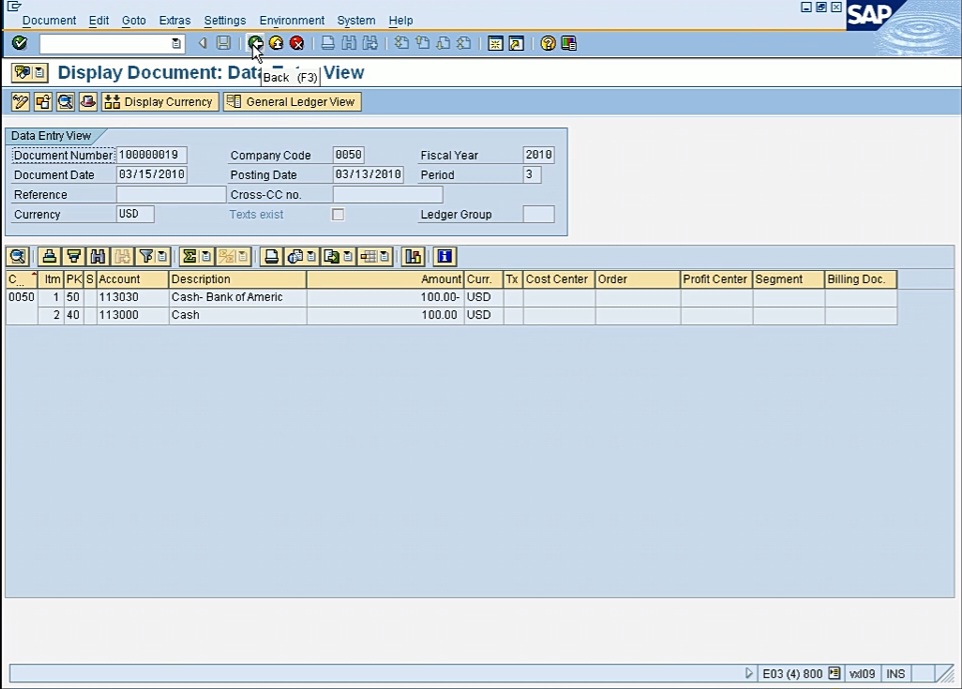
As you can see, the top part is the header and the bottom part are your line items. And the header has your posting date, document date, company code, fiscal year, period, and your currency. And your line items have your GL account, your amount, and the description of your GL account. So, if everything looks okay, I can click on the ‘save’, the post option, and this document will be posted. And this is the document number that we get at the bottom of our screen.
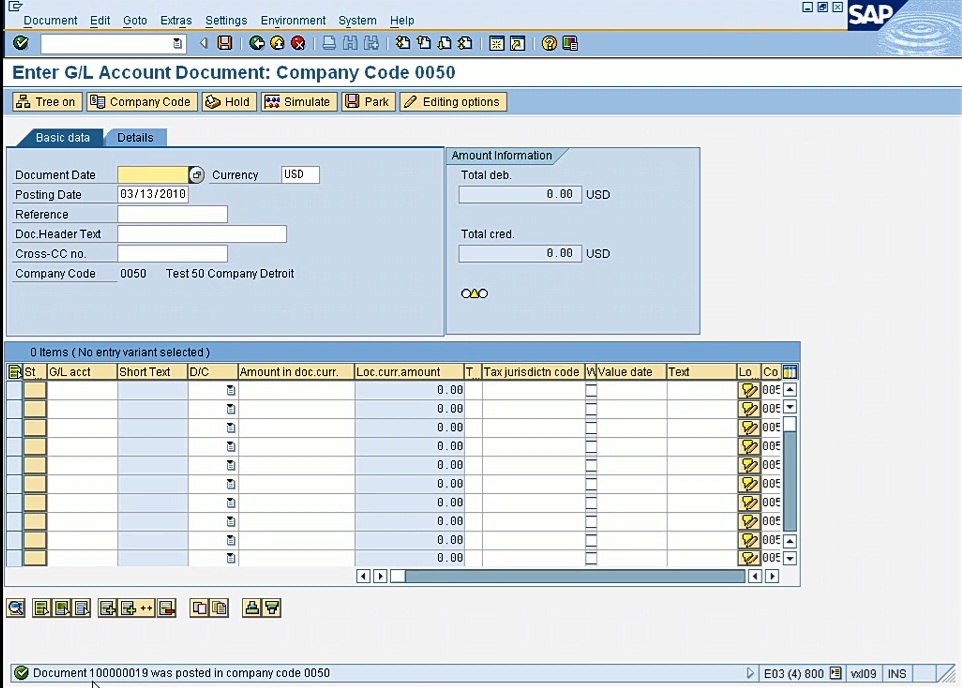
And this is the number that I was talking about the document number ranges. So, this document type is linked with 1 series. So that’s why I got this number, 100-019. And when we will post a vendor invoice, it’ll have a different series for only 2 starting with 2. And for customer invoice, it will have a different number range and asset are different number range. So that’s how we can differentiate the document. So, this is the document that we have posted in our company code. Now I can exit from the screen and I’ll go back to the main screen. So now I have posted a document. Let’s say if you want to see it, let’s say if you have posted several documents and you want to view the documents that you have posted. For that, the transaction is FB03. FB03 will display the documents that I have posted and by default, it will bring in the last document that I have posted.
In this case, you know, it just gave me the document that I posted,
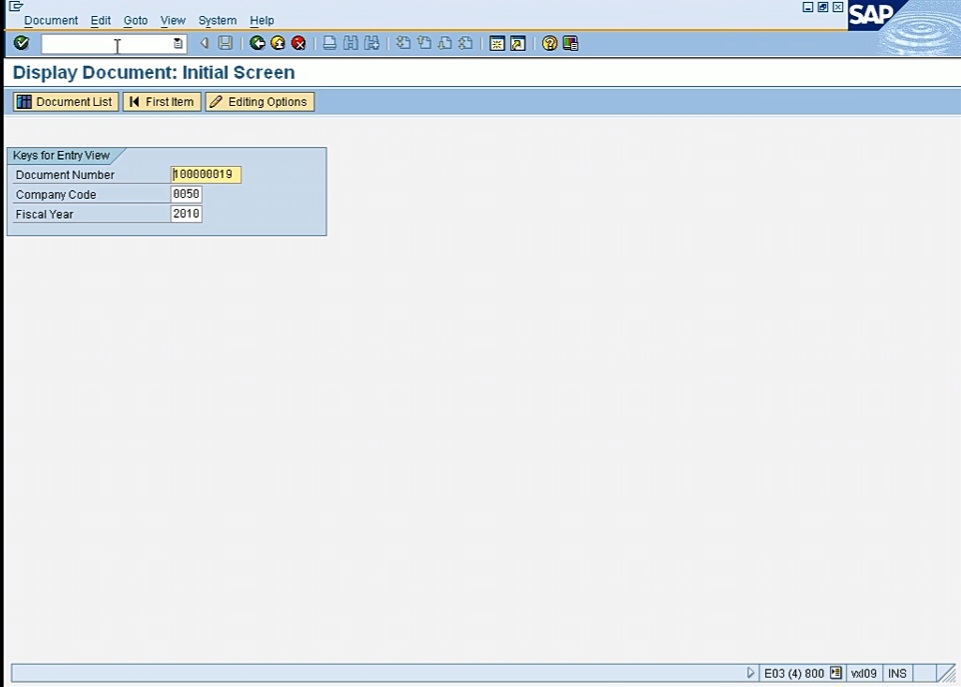
I’ll just click on enter and I can go to my document.
Okay, let’s say this is not the document that I’m looking for, I want to look for some other document. So instead of entering, I’ll just click on ‘document list’.
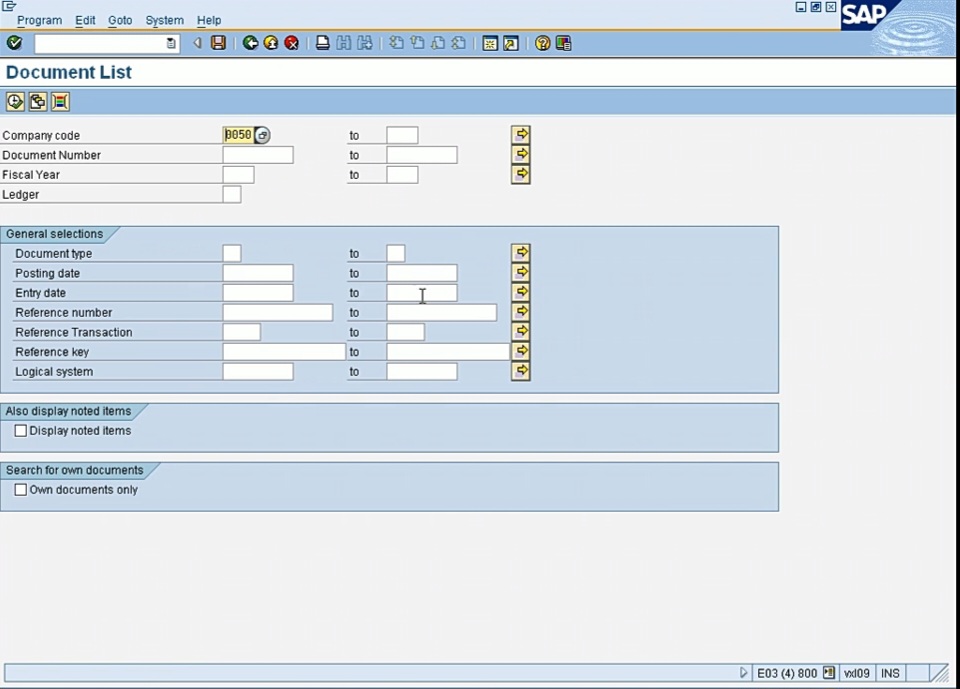
And here, I can enter that posting date that I used, the entry date, the actual date that I enter the document. And if I’m looking for my own documents, I can I can do a search here basically, and it’s a very good search. Let’s say if I want to look for 2010 fiscal year, let’s say if I want to do look at posting date from, let’s say beginning of March to end of March. Posting date, in company code 50 fiscal year, I’ll click on the clock and then it will give me these 2 documents that are posted.

And if I double click on it, I can go to these documents. So, it’s a good way to search for a document. And in accounting you will have to look for some documents, see who posted and you will find FB03 very helpful to search for documents. Let me show you one more thing. Let’s say if you want to change something, what can you change? Let’s say after posting, you realize, oh, I made a mistake. I want to change something. Well, there are very few things that you can change on a posted document. Just the text, I believe, in the header text that you can change. You cannot change the GL account; you cannot change them out. The only option is to reverse the document and post it again. So, let’s just go over changing.
Let’s see. FB02 is to change, what to change. Let’s go to our existing, the recent document that we’ve posted.
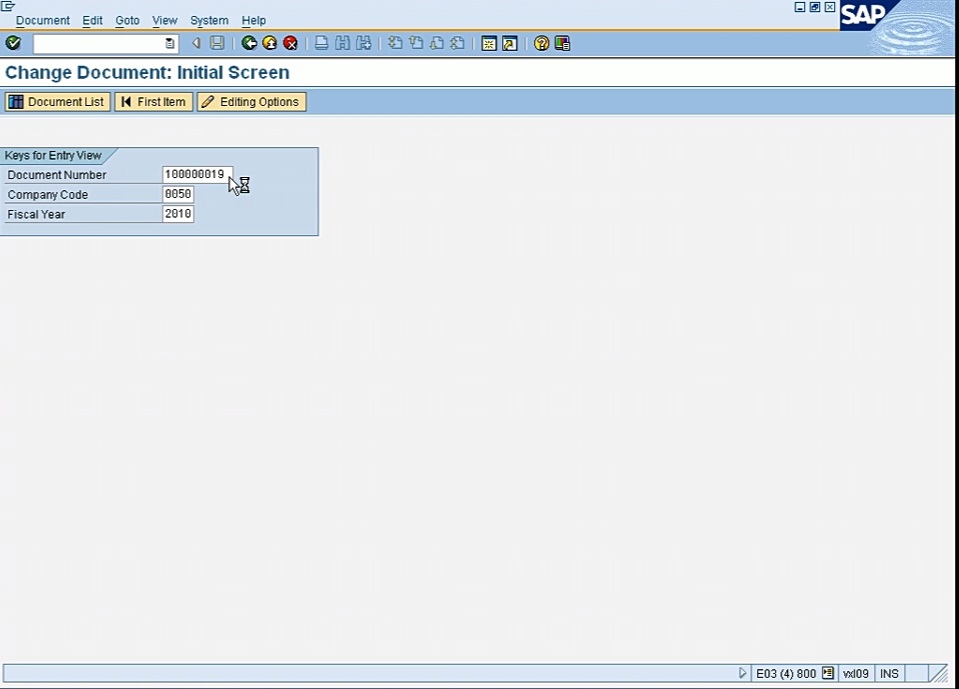
As you can see, all the fields are grayed out, which means I cannot change it. So basically, all the fields are locked, so changing is not an option. In some cases, you can make it the text field, but we didn’t enter any text, like the reference field. In some cases, you can make that option. But in this case, you know, change document is no use, we cannot change anything. So only option we have is to reverse it. To reverse it, we have to go in FB08, and then we can post a new one with the correct document. I will have to search it on documents first. So, this is my document that I want to reverse.
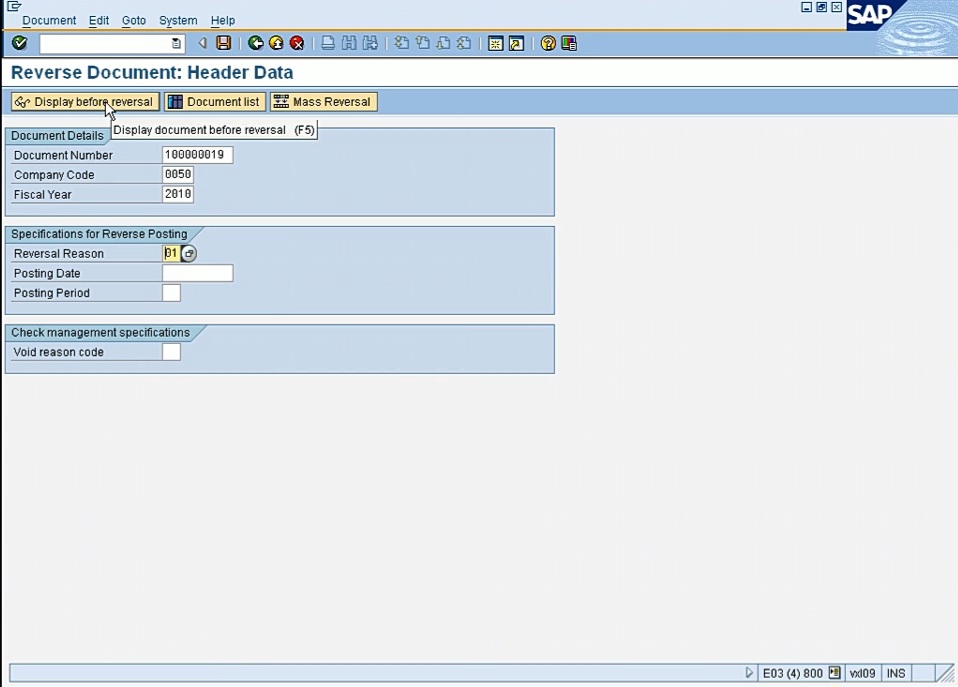
I have to choose a reversal reason. So, it’s a reversal in current period and I can choose ‘Display before reversal’ to display the document and then I can click on post and then it will reverse the whole document. So, see 100-020 was the reversal document.

And these two documents will also be linked and I’ll show you how.
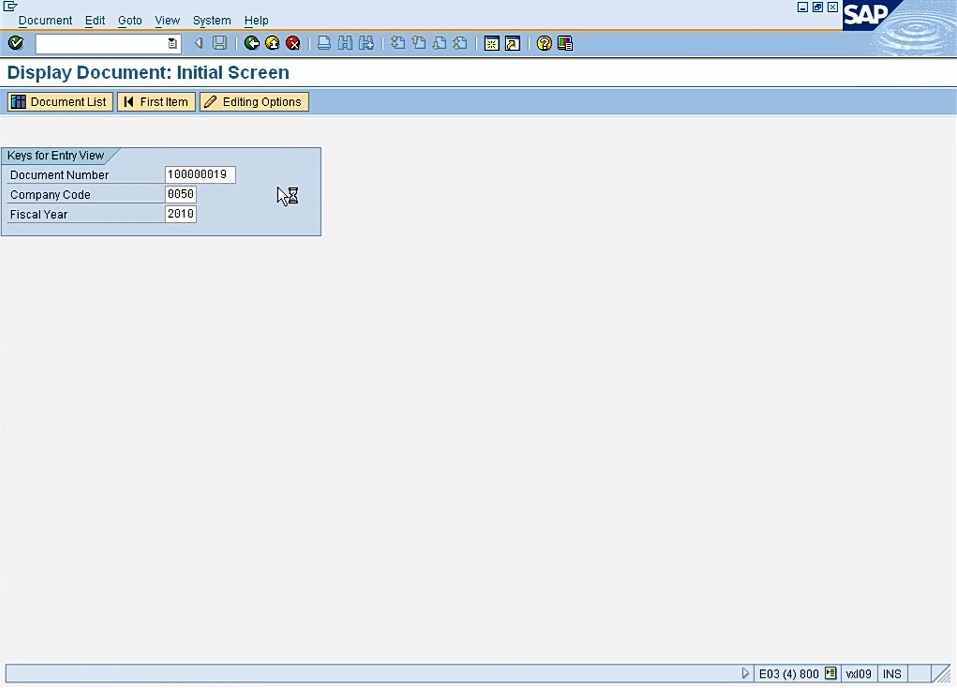
If you go in FB03 and if I go in 19, this below is the document that I reversed.
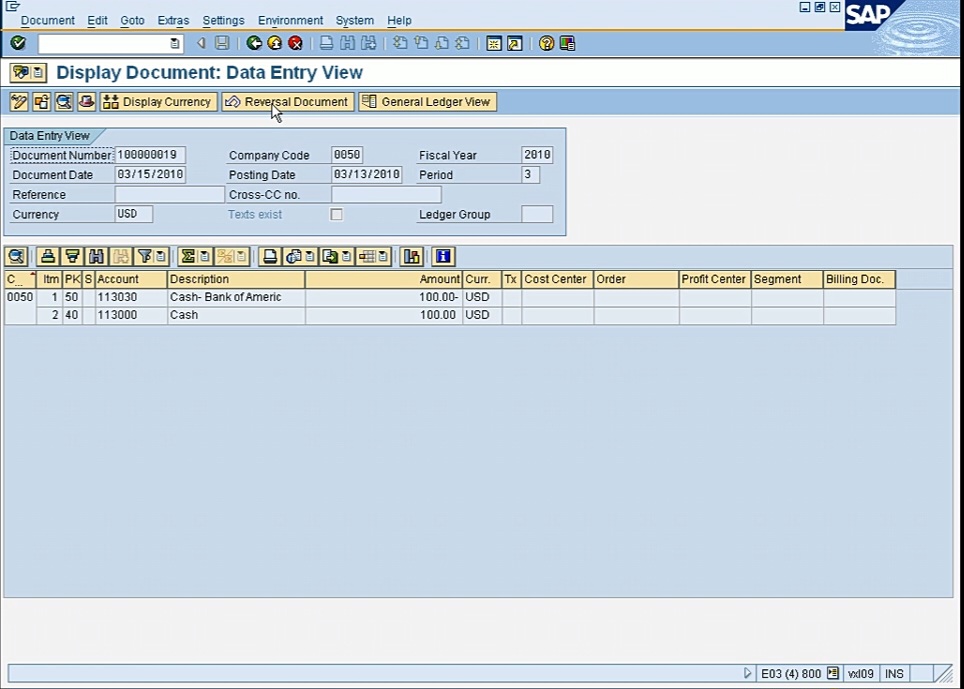
And this will say that this document is reversed, and if I click on this, it will go to the reversal document. And the reversal is doing the opposite thing. It’s debiting the cash account and crediting the other cash account. And this is doing the opposite. So basically, once you post the document, you cannot change it. The only option you have is to reverse it. And this is very good for audit purposes, so you’ll see the whole thing, that you reverse it and then you can post a new document. So, for audit purposes, you know, it has everything. First you post it and then you reversed. So, you need some explanation why you reversed. Because, you know, the one thing that auditors come and check, because when auditors come, they check all your documents, all your line items. And then they choose, then they pick and choose, okay, give me the backup for this document. So, in SAP, you cannot hide anything. The document will give you who posted it, when they posted it. So, it gives you all the information. So, once you post the document, you cannot hide it, you cannot delete it. I think one thing I forgot to show you in FB03, it also gives you, let’s say, if auditors are looking at the document, they want to see who posted it, they can say, okay I can see the posting date here is March 13, but what was the actual date that this document was posted? It might be posted, you know, 3 months from now. So, let’s look at example of December 2009 document that we are posting today. So, you know, SAP will give you that information, if I click on this cup icon beside ‘Disoly Currency’, this will give me the user ID ‘Entered by’, that’s my user ID ‘Entered by’.
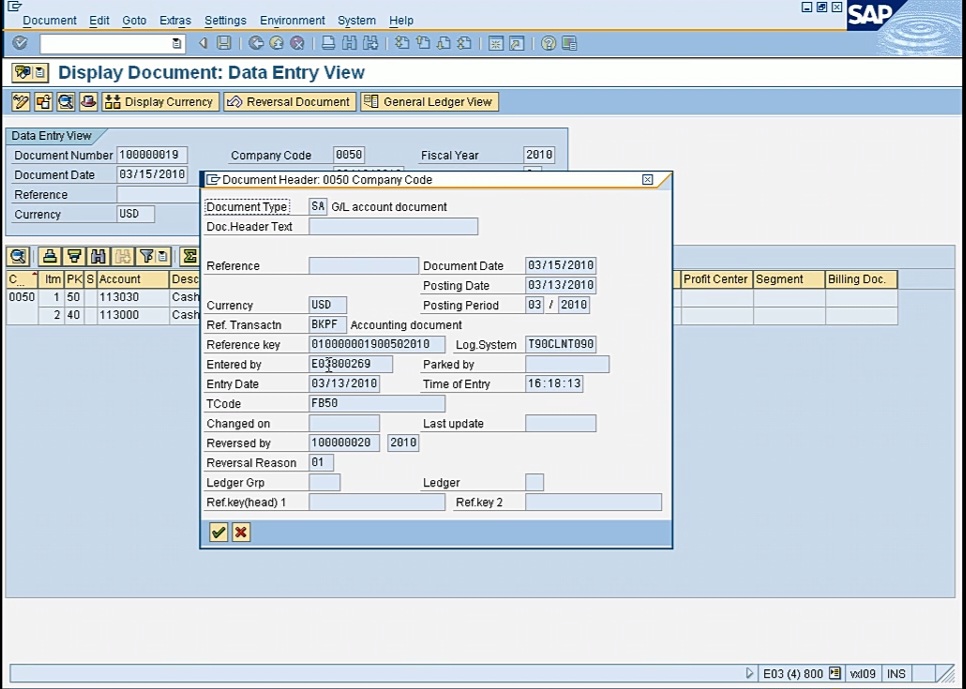
In real world this will be your username, and which will be your last name and your first initial. So, you know, this will have your name and entry date is the actual date this document was posted. So today is 13th, so it’s showing you that date and the time, 16:18. And it’s also saying that this document was reversed by, end of the document ending with 20. And there are also other reports you can run-in SAP that gives you for each document, okay? You can get a list of each document and the end period and who posted it and any reversal or not. So, you can get all those information on a report also. Entry date is the actual date that you are posting the document. But posting date is you know, whatever the peers are open, you can enter March, you can enter February, if February is open. But the entry date, you cannot choose, SAP will see, okay today is March 13, that’s your entry date. System will give you that, you don’t choose your entry date. So basically, you cannot hide from the auditors when you actually posted it.
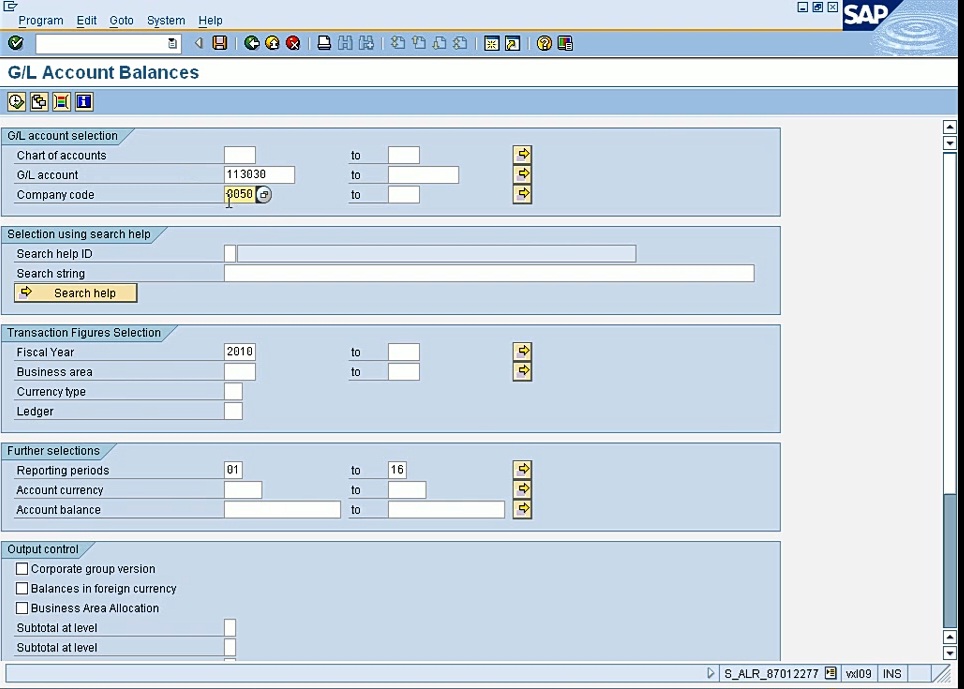
Let’s do one more thing. Let’s do account analysis. Let’s say, you want to see in my cash account, what is the balance and what are the transactions. So, for that, I think I have a trading document also for that account analysis, FS10N, I prefer FS10N. FS10N is a transaction to look for GL account balance. So, we will just look in our account, the account that we created and we just posted one transaction. So, we enter our GL account 113030, we choose our company code, we choose our fiscal year, okay, and then we execute. So, this will give all the periods and it will give us a balance.
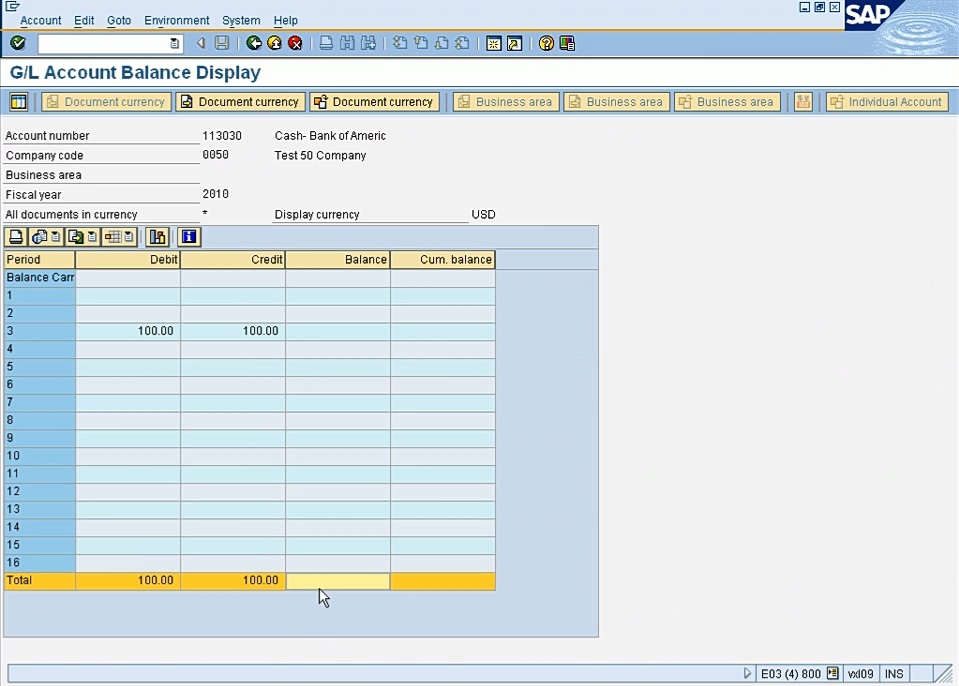
So, the cumulative balance is the balance coming from December of last year and this balance is for each month. And in our case, we posted $100 and then we reversed it. So, the net balance is 0, but it’s showing the debit and the credit. So, if I click on the balance cell, if I double click on it, it will give me these 2 transactions. So let me double click on it.

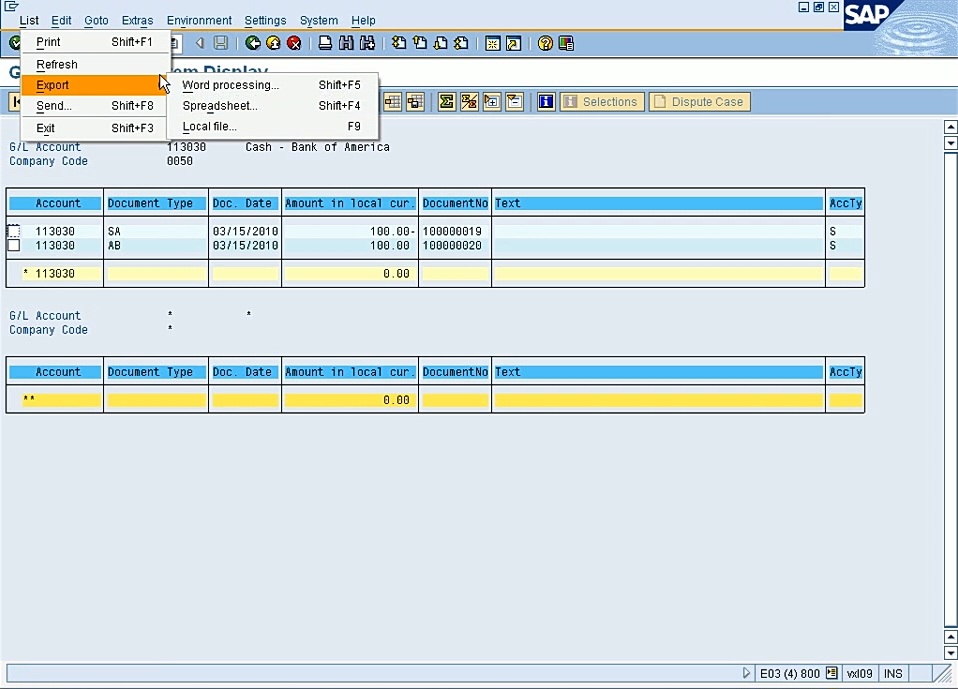
So now I have these two line-items and it’s giving me the document number. And I am getting this information only because I have line item display checked in the GL master record that we discussed earlier. If it was not checked, you know, when I double click on it, I’ll get an error that line item display is not checked. So, it’s not very helpful if I cannot see the documents behind these numbers. So, if I double click on it, so I can see these two documents, ’19 and ’20. This is $100 in credit and this is $100 in debit. And if I double click on it, I can further see, if I click on the mountain, I can see both debit and credit for this GL document. And like any SAP report, this is kind of a report, this is a report. You can adjust the columns. You will see this ‘change layout’. And this is true for any in CO, FI, MM, you will see this for any report, SAP standard report, you can change the layout.
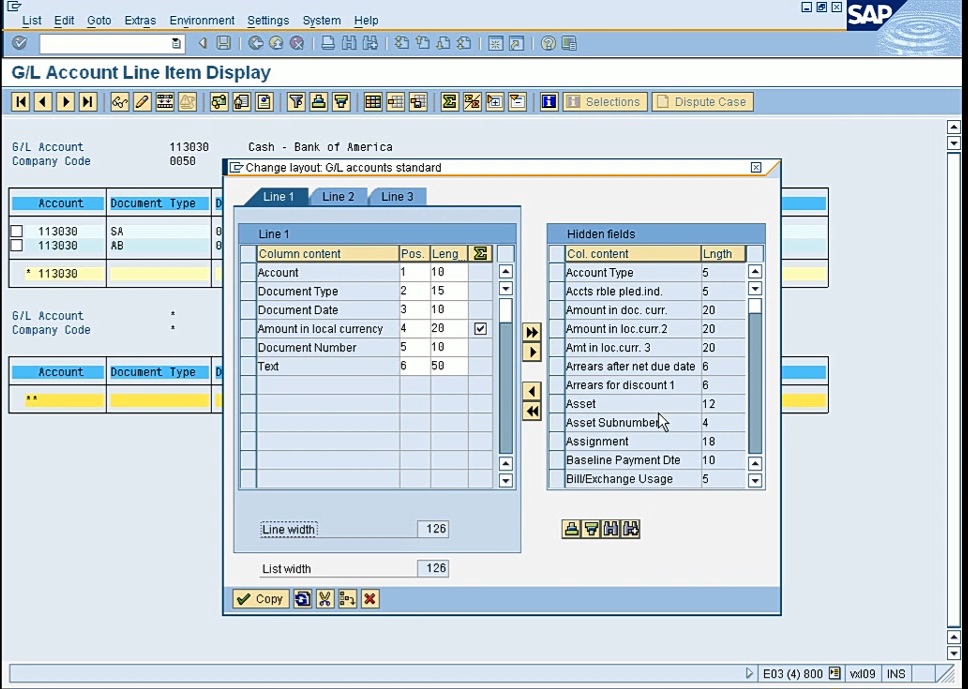
Like, these are the visible fields and these are the hidden fields. If you need any of the hidden fields, you can just select it and click on the left arrow. They will be added here, and then you can click on copy and they will be added here. And after making the changes, you can also save the layout, so you don’t have to make changes again. And, you know, again this is common for any standard SAP report. There are other functions to filter it, if you have some more information we can use the filter function, I’ll show it later. If you want to modify the report, you can do that. You can also export it to excel. If you do this export spreadsheet, you can export this to Excel.
Now Excel will open up in the next few minutes.
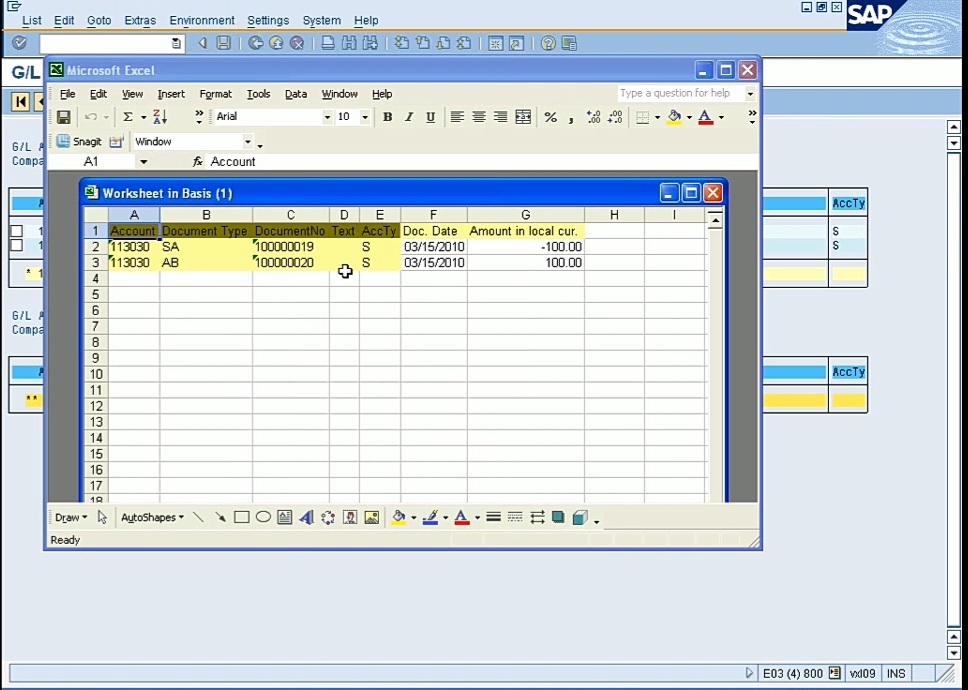
So now all this report is exported to Excel and you can do that for any standard SAP report. Account analysis, there’s some other functions also, account clearing but we need to do that. There’s a month-end procedure that I guess we can complete it later, we don’t need to do it now. Like I was discussing earlier that on your year end for your balance sheet, you will have to move your ending balance for December to beginning balance on January of your next year. So, these are some year-end transactions that you need to perform. I guess we can go over it later once we do some more transaction. But for that we need to do F.16 to do that. There are some standard reports also that we can run to see our balance. But my favorite GL report is FS10N. FS10N will give you all the information that you need for a GL account. And again, you can modify it, modify the layout. Let’s run some other if I have any balance.
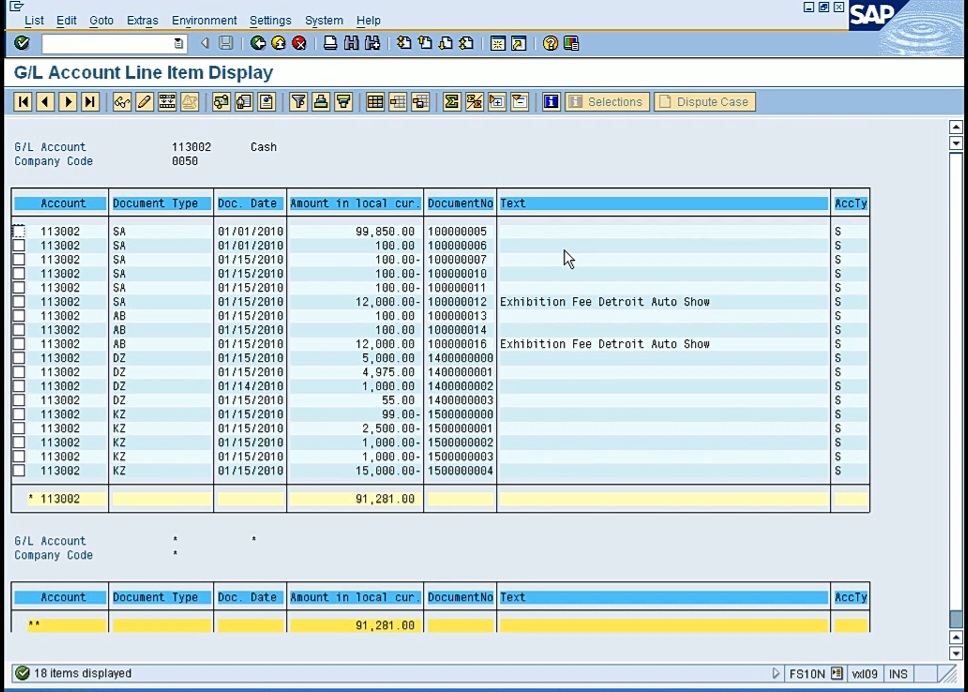
Let’s say for this account, I can run reports, I can do filters. This report in real life can be, you know, hundreds of line items long and let’s say if you want to filter it, let’s say filter it for a date. Let’s say if you want to see only January 1st, transaction on this GL account on January 1st. So let me show you how to do a filter. You select the column and then you click on ‘filter’. And then you enter the date that you want to filter, “January 1, 2010”.
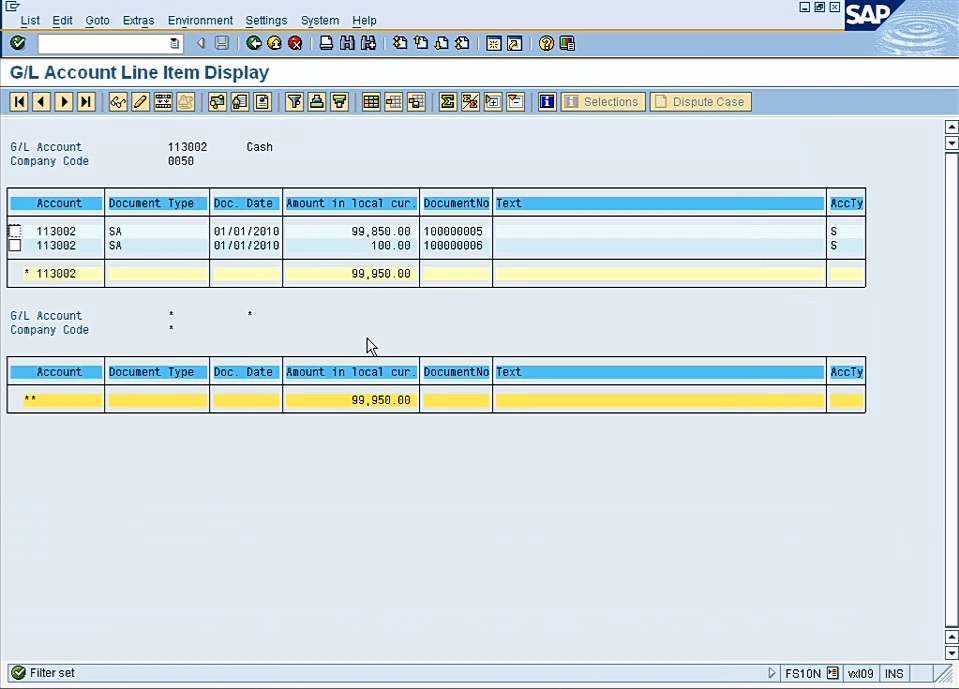
So now it has filtered for that date. And you can do it for this document type, amount, and there are number of things that you can do filter. If you want to do, in ascending/descending order, you can select this and click on sort in ascending order. So, this report will be in ascending order. First, you have the negatives and then the positives. I find this report very helpful. And again, you can also run it from multiple GL accounts.
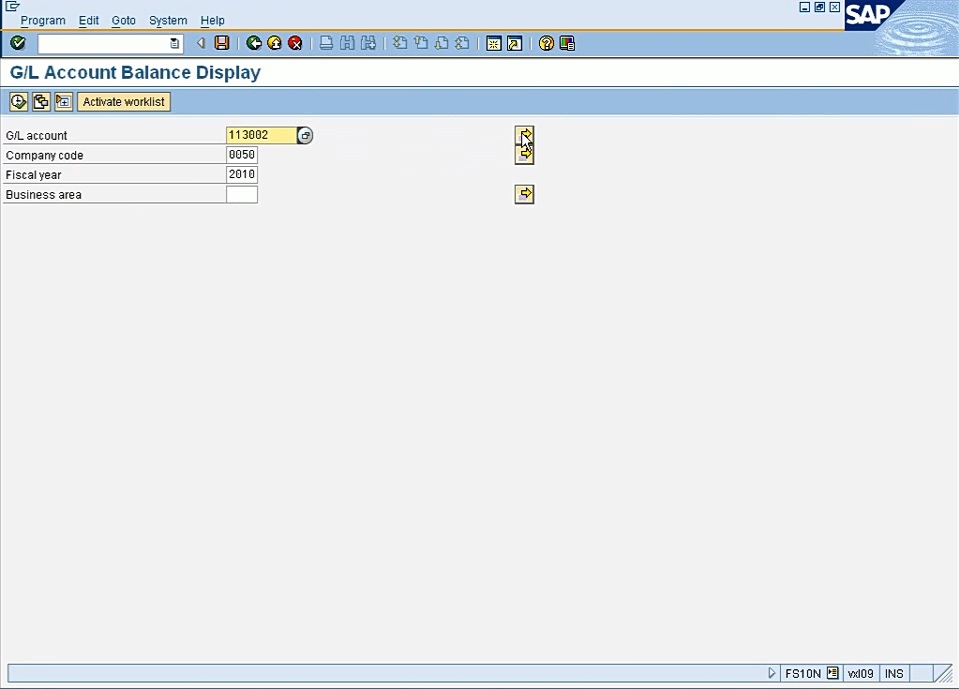
If you click this button as in the image above, you can have multiple GL accounts, you can also enter a range of GL accounts.
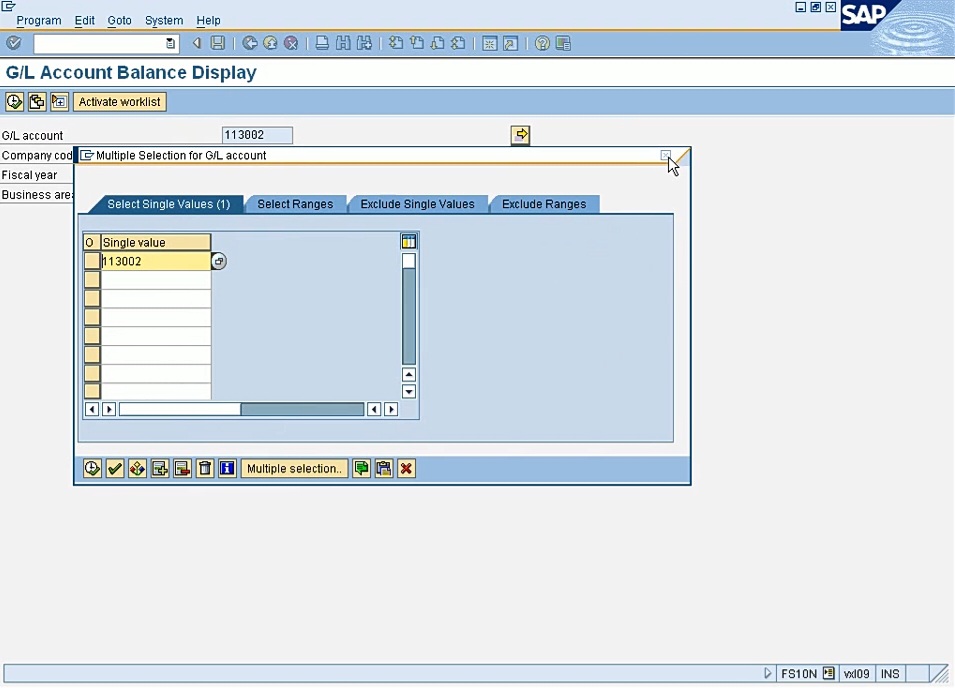
So, you know, not only for one account, you can do it for multiple accounts. It’s good for analysis. I find this report very helpful for analysis for GL accounts. But there are many standard reports available also. All the reporting you will find, let’s say, this one, we are now in, GL, and for each sub ledger, you have an option like AR, AP, Fixed Assets. So, in Information System, you will find all the standard reports, GL Reports 🡪 Account Balances 🡪 General 🡪 GL Account Balance. So, these are some other standard reports also, but like I said, I prefer FS10N. So if I do this:
So, this gives you,
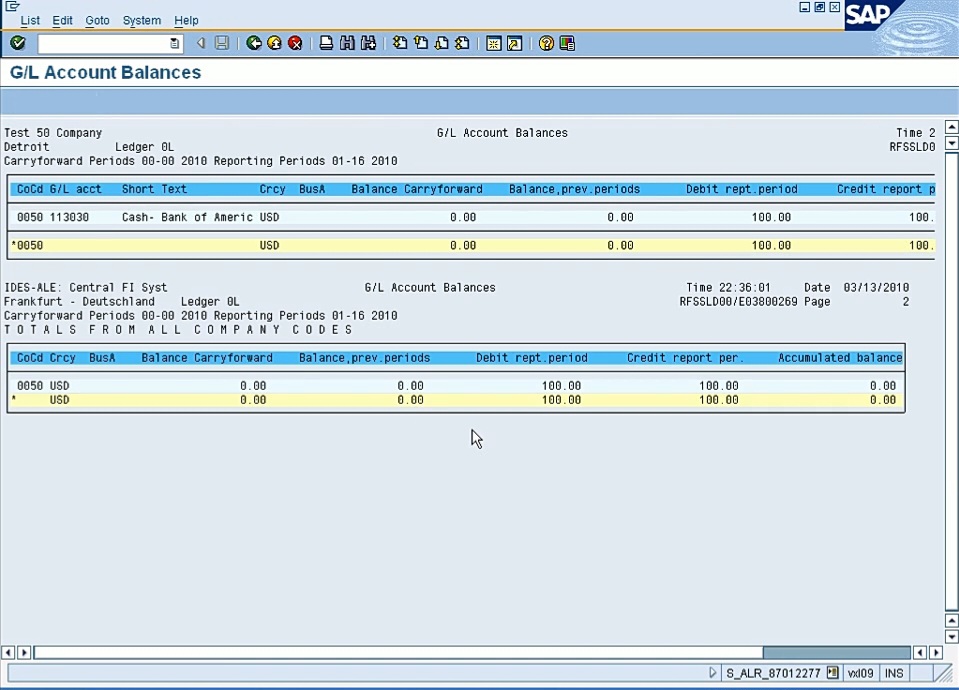
But the formatting is not that great. These are old SAP reports and, you know, if you export it to Excel it doesn’t look good. That’s why some users prefer to create their own custom reports, because some of the standard SAP reports are not that good. But all the standard reports you will find under information system for each sub ledger. So we are in GL, so all the GL reporting will be under Information System. And for AR, it will be under AR Information System, that’s where you will find all your reports. And let me also show you some basic settings. I don’t know if you are aware of that. When you log in, there a few basic settings that you can do from System 🡪 User Profile 🡪 Own Data. If you do that, then you can set up in default, your decimal format.
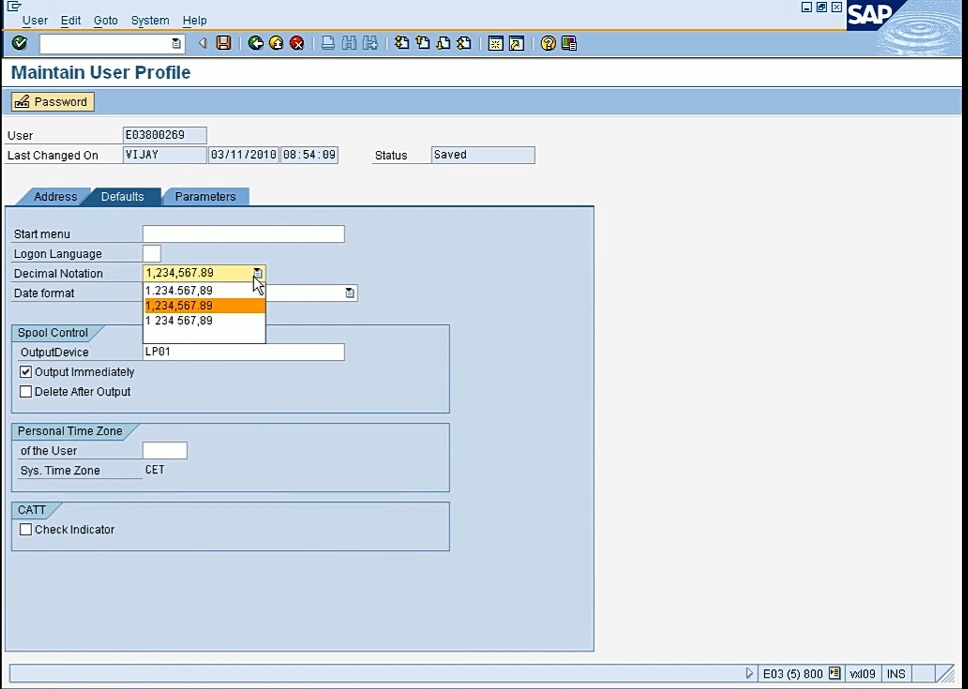
Like in Europe, they have different distance format and you can choose the date format if you want month/day or day/month, you can choose that. So, there’s some flexibility there to change and is also optional for the logon language and parameters. So, like the users in Europe, they don’t like this date format, they can change to this date, month and year format. And the decimal format they can also change on their need. And one more setting you might not have on your screen, is if you see that when I go in each transaction, it gives me the transaction code also like here FB50, this might not be in your screen, but if you change the settings and check display technical names, only then you will see this.
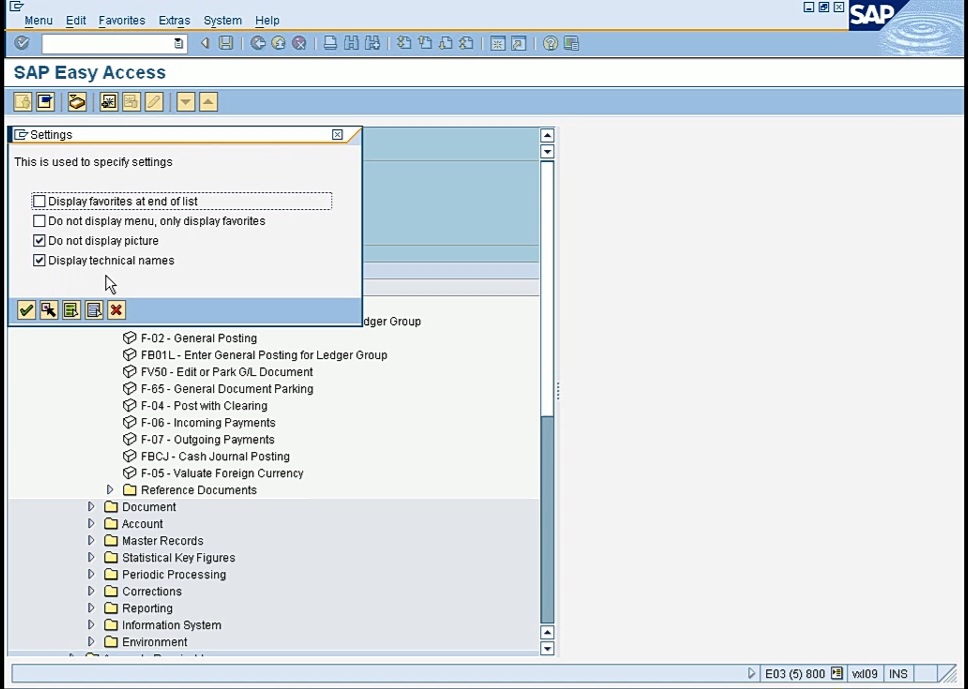
And I find it very helpful if you’re using this menu to at least look at what is the transaction code. So next time you don’t have to come all this way you can just enter FB50 here. This I find helpful. Another option is creating a favorites folder. So, the transaction that you perform on a daily basis you can just go in your favorites folder. So, to do that, either you can go in Favorites and insert transaction and just type in, let’s say, FB50 I use every day. I can enter FB50 here and now in my favorites folder, FB50 will be added. So, I don’t have to scroll down, I don’t have to remember the name. I can just come in my favorites folder and just double click on it. I can also create folders in my Favorites folder, insert folder, so I can name it like the “GL Transactions” and then move this favorite transaction in my GL Transaction folder. So, and I can create another for, let’s say, AP. So, in AP, I can have the AP transaction and the GL I have the GL transaction. So, you can customize this based on the transaction that you use every day.
My next topic is AP, but I would really like that if you go and do the configuration for GL and then perform the GL transaction first before we start AP in AR that will be ideal, I guess. So, we don’t go in different directions.