

Customer Account Group
Okay, now we have seen changing documents. It’s a very simple topic. I’m going to custom account group.
Thank you for reading this post, don't forget to subscribe!
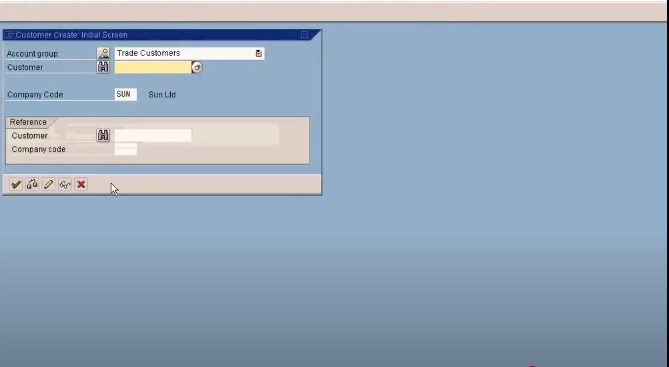
Custom account group is not something new for you. Remember, when I created a customer master data in the basic session, I told you I’m going to explain about the account group in the advanced training session. So I’m going to explain about it now. I asked you to choose trade customers out of all this account group list. We’re going to Zoom into the trade customers now to see what there is. This trade customers can be configured here. Financial Accounting (New), Preparation for creating customer master data and define account groups, is screen layout.
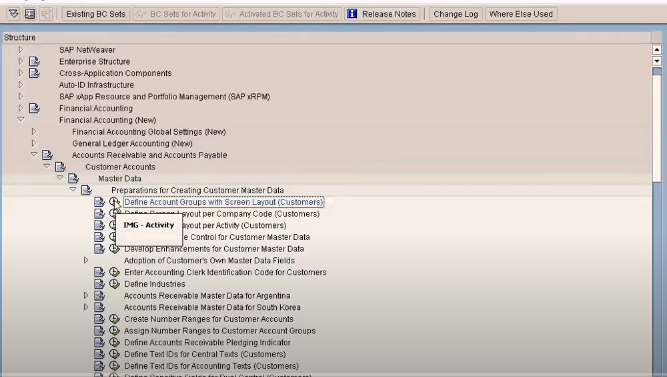
So let’s go and define account group now. See, all the account group which can be seen here is actually coming from here.

All of it coming from here, and our trade customers, the one where had created is here. Let us zoom into trade customers. What are things we can do? Define the account group. Once again, account group is just a classification of different type of customers. For example, if we have various customers, customer 1, customer 2, customer 3, all these can be classified under one customer group. Let’s say customer group 1, and similarly, other customers, customer group 2, 5 and 6. This is just a classification. Customer group is just a classification of customers. So other than the classification, we can also control certain fields display using this customer group. I’m going to show you now. See this, different sections that we have, we go into this, general data, address, see this, we have all the fields that is available in the customer master data screen. Name, search term, and all this over here, so I’m going to make the PO box, postal code, as required entry. Now, it’s optional entry. That’s why it doesn’t ask for you, right? There’s no check mark here. See this? There’s no check mark like this over here. Postal code and city. Now I’m going to set the check mark. Let me just see whether the postal code is a required entry. I just see, let’s. Let’s see whether now it is changed. I go back and come again. I think I have chosen the wrong postal code, not that one, it’s over here. This is the one I wanted to show you, because this postal code refers to here, this postal code is over here, so I put it back to optional entry and make this as required entry. Save it.
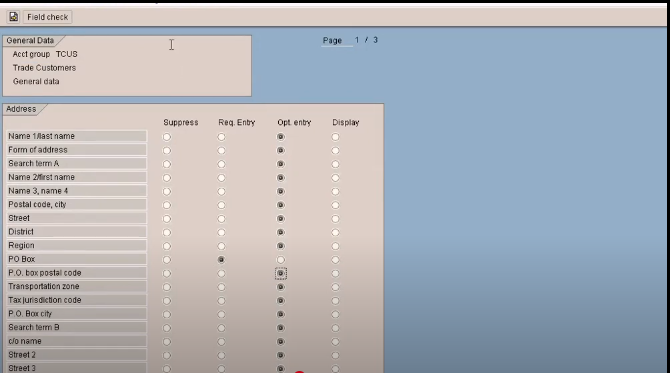
I go back and come again. Still not, let me just check what’s the problem. Create, trade customers, country, postal code is here, right? Let me just check what is the field name. Postcode 1. Okay. So, must come here and check whether the technical field name corresponds to Postcode 1. This is one of the ways to make sure that we are looking at the correct field. Here, this is the one, the correct one. Postal code and city corresponds to this. Postal code and city. Let me just confirm this. See, postal code. Okay. So you must make sure you choose the correct field. Save this. Okay. Now I can see the check mark here. If I go out and come in again.
See the check mark here, now, it’s made a required entry. This made an optional entry. Once again, over here. Okay. That’s how I control the display of the fields, or if the entry is mandatory entry or optional entry. And the other thing you can control using the account group is the number range that is assigned when the customer’s created.
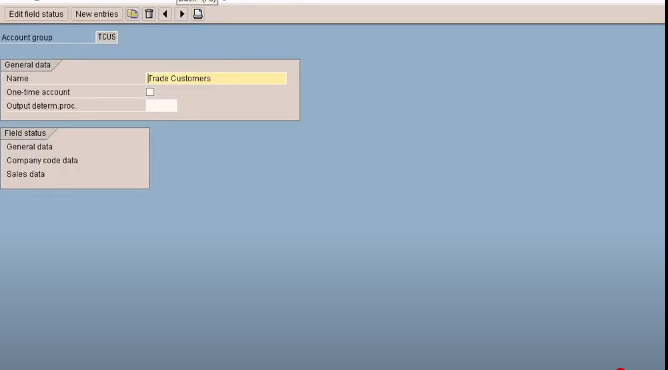
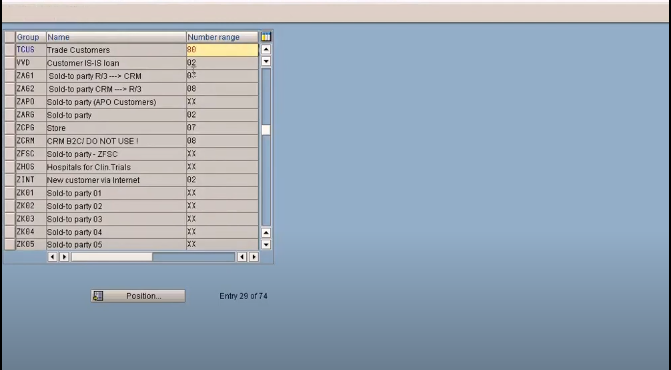
Okay, let me show you. See this, assign number ranges to customer account groups, let me go to Tcus. That’s my customer account group. The number range assigned is 09. Let me check what is 09. Create number ranges for customer accounts, so 09 is over here. So the number range that is used is series 5, and I have created 4 customers that’s why the current number is 500004. If I create one more customer, the customer number that will be assigned is 500005.
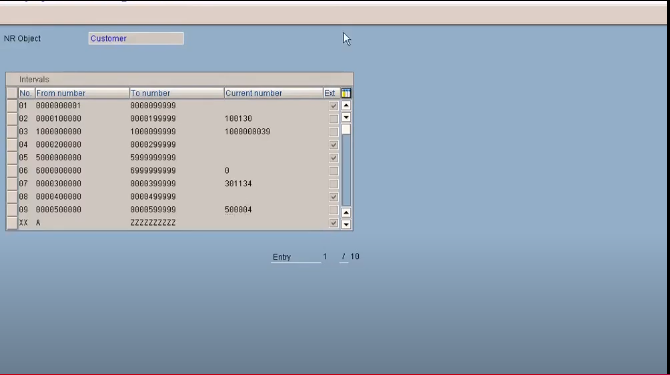
Let me just go and check my customers. Let me look at all the customers that’s created. I think we also created some customers and then deleted it, that’s why you can’t see it here. So the customer current number is 500003. I think we deleted 500003. Let me just confirm that. I think somebody created it and deleted it. Let’s not worry about it. So basically, this is how you assign the customer number range to customer records through the account group. Once you create here, you can create new number ranges here, you can recreate new number ranges. Give number range like 80 and from 1000 to 2000, something like that. Save it. Then assign the 80 here to the account group. Come to Tcus, and then, change this to number range, 80.
This is how you use a customer account group. That’s the purpose of a customer account group. The two main purpose is to determine the number range and control the fields display.
You may watch the full course on the following YouTube link
https://www.youtube.com/watch?v=AfcMG9-jfr4&list=PLN17Nn94liux88cwVwqbiRQQo1qK4sOdQ&index=75