
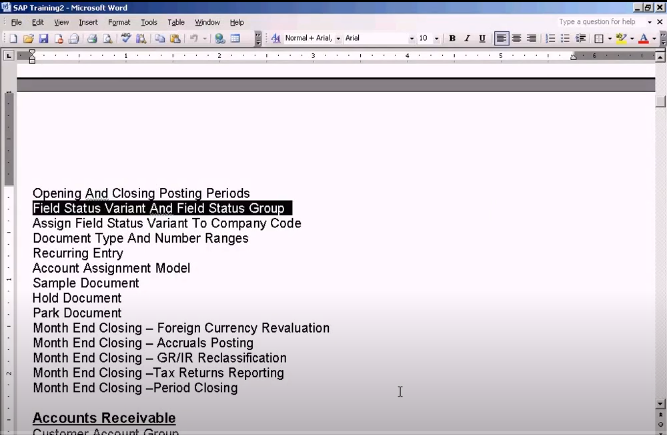
Define Field Status Variant And Field Status Group
Okay, we go to the next topic now, which is Field Status Variant and Field Status Group, this one.
Thank you for reading this post, don't forget to subscribe!
Okay, let me explain what is the importance and purpose of Field Status Variant and Field Status Group using a slide, so that you can understand it better. Actually, these two, Field Status Variant and Field Status Group, is used to control the appearance of certain fields in the data entry screens of SAP system.
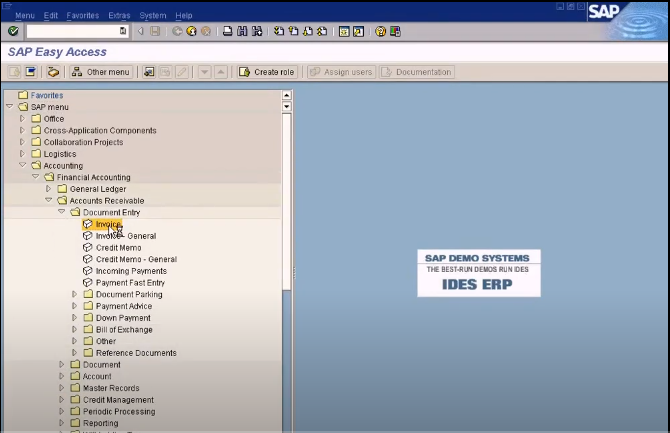
Because for certain data entry screens, let me just go to certain data entry screens. Over here, let me go to posting sales here.
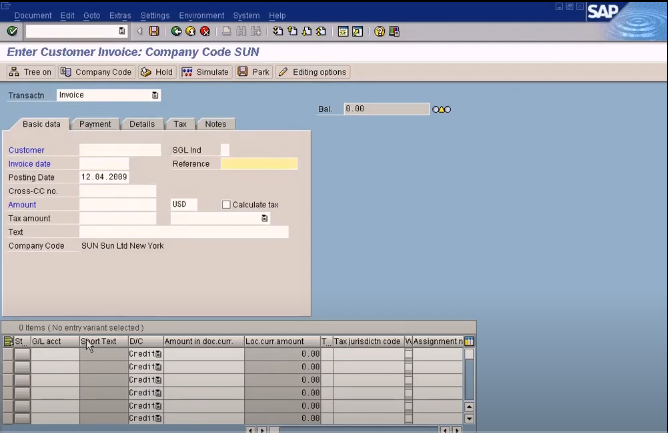
When we post an invoice, let me just pause it until it loads. Okay. Let me load this screen. This is a typical data entry screen. Okay. For certain business transaction posting, we don’t want many steel fields to appear. Okay. For example, we may want to hide this tax jurisdiction code, assignment number and so forth, to be hidden for certain type of business transaction postings. And you have another scenario whereby you want to make certain fields read-only, and don’t want to allow the users to change anything on those fields for certain types of business transactions. So what I’m trying to say here is that we have a situation where we need to control the appearance and behavior of these fields. All these are fields here.
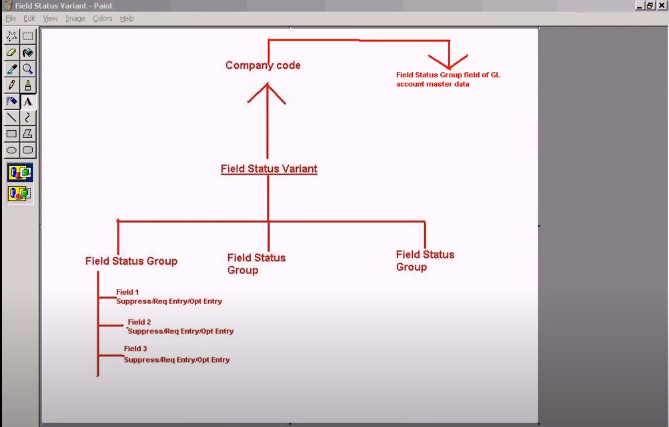
How are we going to do that? We can do this using the field status variant and field status group in combination. Actually, field status variant is a key, just remember that it’s a key, and so as the field status group. It’s another key, and the relationship between field status variant and field status group is that field status group is under field status variant, so therefore, you can see many field status groups, one, two, three, all combined into field status variant, one field status variant. So what are we going to do with the field status group? Under the field status group, we can group the fields that is available in the data and the screens here. All these fields are grouped under each field status group, and for each field, we can actually specify whether this field is supposed to be suppressed or made a mandatory field or made an optional field.
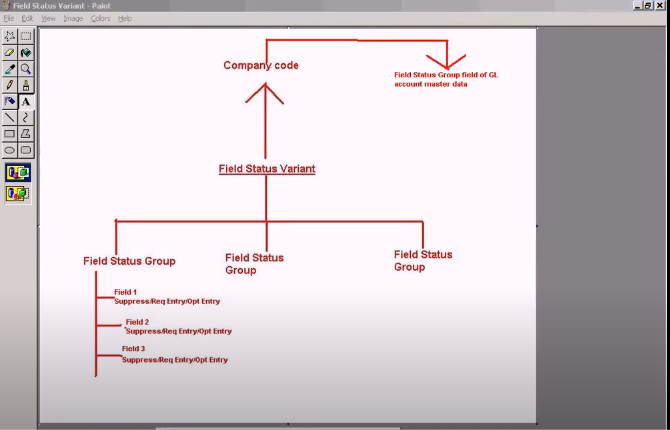
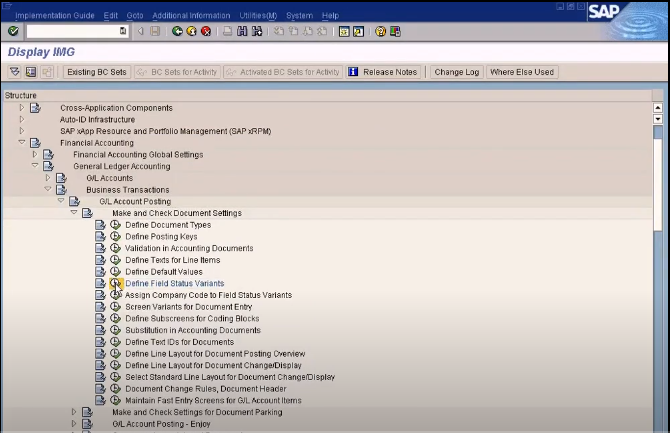
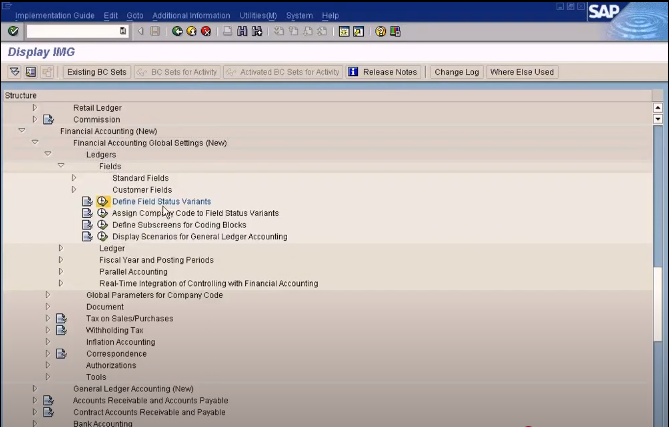
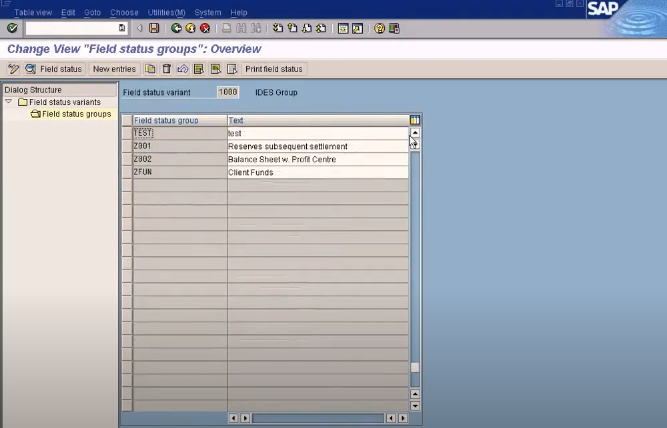
Let’s look at it. Let’s go to define field status variant. Okay, see this? Financial accounting, general ledger accounting, business transactions, G/L account posting, make and check document settings, and this one.
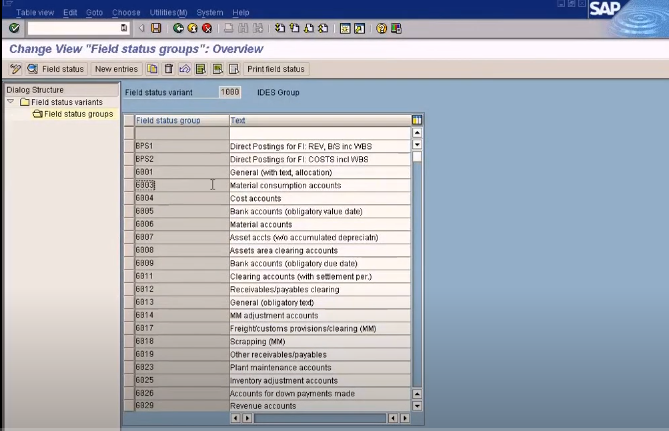
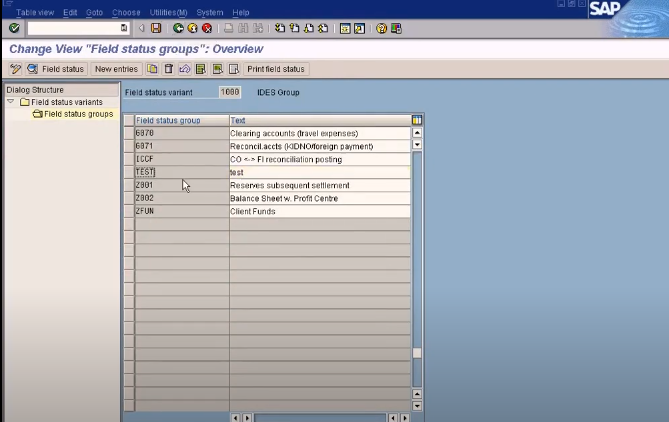
This is where we can see all the field status groups here. 1, 2, 3. See this? These are the field status variant. Let me go to 1000. The listings here is a field status variant here, so we choose 1000, which is one of the field status variant, and double-click this. We zoom into 1000, and you can see all the field status groups under 1000. This is field status variant. Now you can see the hierarchy, right? Field status variant is the topmost key, and then, under the topmost key, we can see lots of sub keys, which is field service group. See, this and this.
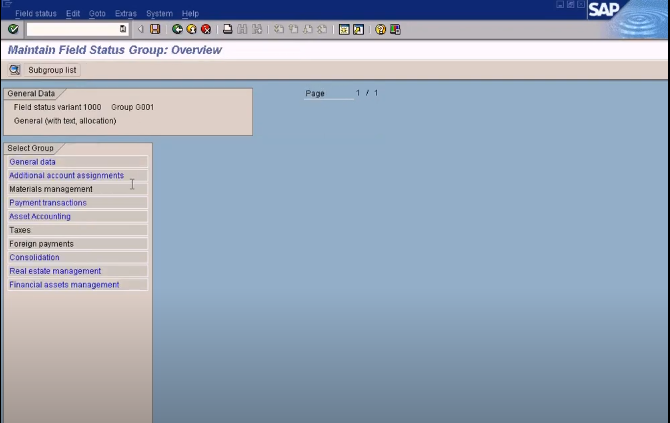
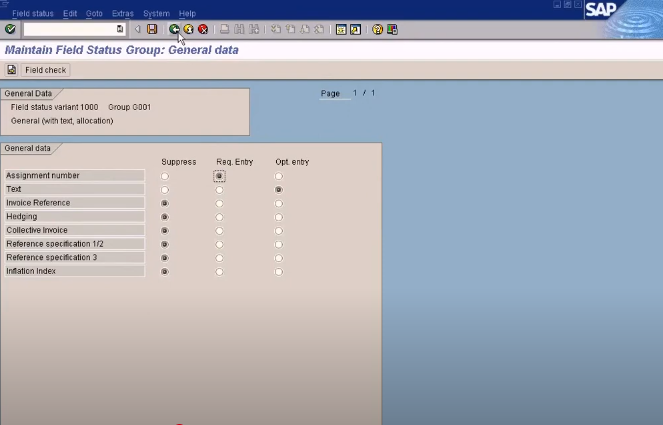
Now, we zoom into one of the field status group to see what they have inside, let’s say, G001, double-click. Do you see all these fields here? The fields are in turn grouped based on certain classification, general data, additional account assignment, payment transaction, and so forth. Okay, let me go into general data. You see all these fields, I have an option to suppress required entry option entry and so forth. If I go to a different group, this group that you are seeing here is a subgroup under the field status group, because the way I put the fields here is that each field is assigned to a field status group. It’s not the case. The ideal picture will be something like this. Let me give you the ideal picture. Okay, and I have one more field status group. Hang on. Let me draw the final one. Okay. These are the field status group, and under the fields group, we can have the final fields. Okay. This will be the correct picture. Fields status group. Under fields status group, we can see the fields group.
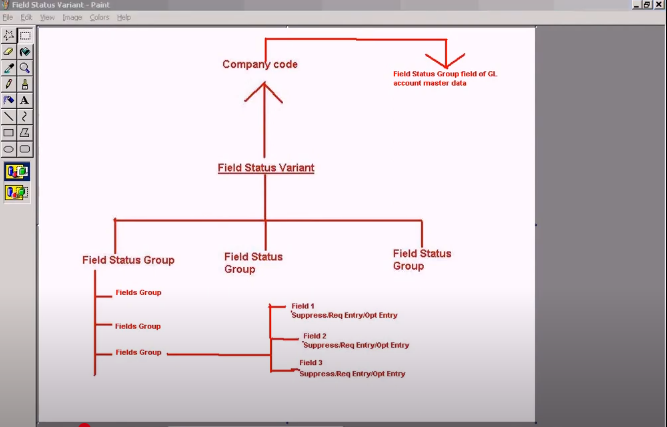
These are the fields group. All these are fields group. Some fields group are in blue, some are in black, do you know why? If it’s blue, it means the default settings have been changed. Let me go to materials management. The default settings of all the fields is suppressed. So if you change one of it, let’s say, I change vendor groups to required entry, that means I’ve changed it, right? See, it has turned to blue, so any fields group that you see in blue means that the default settings of the fields underneath is actually changed from default settings to something else. Okay, that’s what it means.
I put it back to suppress, it goes back to black. So it means there are no changes inside the fields found under this group. That’s why it’s black. So if you see blue, then you know that something has been changed inside. Let me just go to payment transactions and see this. Let’s say if this is assignment number option entry, if I change to required entry, it will be made a mandatory entry. You can see the check mark, and if we don’t want to display the assignment number just to suppress it. That’s how you play with it. I’m not going to save it.
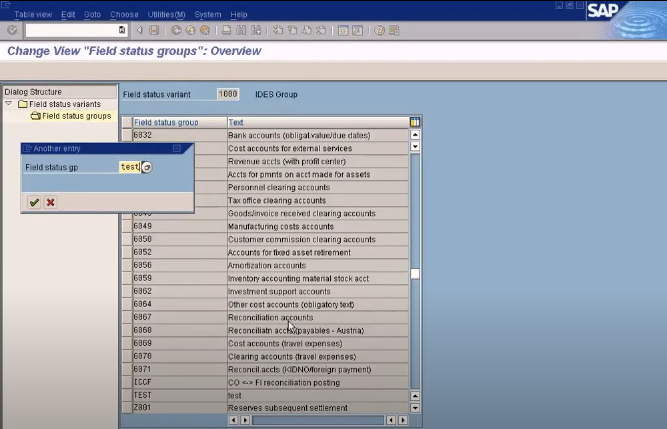
Okay. If you want, you can create new entries. Let’s say, test. Let’s create a new entry, test. Now, I’m going to save this, underneath, I go, you see this, all are made optional entry, so I can actually change anything I want, and save it. I have a new field status group under the field status variant of 1000, so how am I going to use this? Let me just choose this one. Let me just put on the current entry assignment number.
Okay. How am I going to use this? Okay, let’s go back to the graph again. Once you’ve defined the fields under the fields group, it’s assigned to field status group, and this is in turn linked to the field status variant here, so this field status variant has to be linked to a company code. Alright, let’s look at this step here, assign field series variant to company code. We are going to do this, okay. How are we going to do that? Let’s do it now. Go back. I have defined already, so this step is finished. Now we go to this step here, assign company code to field status variant. Choose that, our company code is Sun, assign the field status variant of 1000, so it’s already been assigned. If you want to assign, just choose this. All the field status variant that we have created earlier will be available here. Let me just open it. See, can you recognize this? I forgot the business transactions, forgot the menu bar, let me just check it here. Financial accounting global settings, G/L general accounting, oh not there, here. Just hang on a sec, I’m going to pause it. Okay, I just realized something, I beg your pardon for that. This minor part here belongs to the old G/L. It’s not part of the new G/L. See this, it doesn’t have the word new, right? Our new G/L is over here. Remember I told you the difference between old G/L and new G/L? Since we are using ECC6.0, we should be using the new G/L and not the old G/L. Old G/L is 4.6C. ECC5.0 and 6.0 should use new G/L here if you have activated a new G/L. So this is still alright, even if you access, define the field status variant using this type, it’s still alright, there’s no changes. Let me just show you. It’s just that it’s not appropriate to show you the old one, so let me show you the menu path for the field status variant under the new G/L. You go here, it’s under here, under the financial accounting (New), financial accounting global settings, ledgers, fields, and define field status variant.
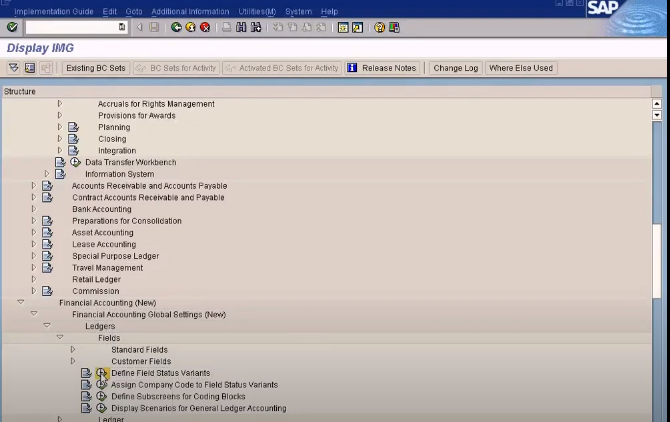
So let me just open up this, there are no much changes, it’s the same thing like what I showed you earlier, okay. Actually, even if you do the settings using the old G/L step here, it’s going to be still the same. It will be updated in the new G/L also. If we do a setting here, it will be updated. Remember, I created a test field status group in using the old G/L screen, let me just check whether it’s here. Okay. See, it is here. It doesn’t really matter which menu path you choose, both comes back to the same screen. But for legitimacy purposes, we still use the menu path that is shown in the new G/L module. Just forget about the earlier menu path.
Come here, ledgers, fields, and fields status variants. Okay. Now, I’m going to show you how to assign the field status variants to the company code. Remember, I showed you that. Here, it’s already been assigned. Whatever that you see here, these field status variants will be displayed in this list here.
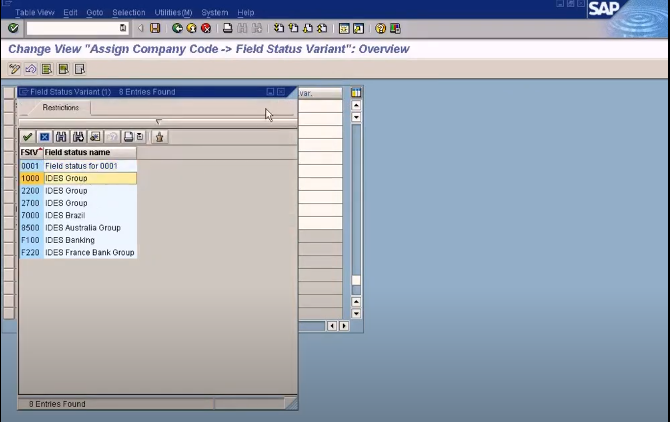
So you just choose the field status variant that is appropriate and assign it to the company code. Once you do that, this step will be finished and the field status variant will be assigned to the company code. So what is the next step? See this arrow here? Let me show you something. So once you’ve done the assignment, the field status groups will be available in the G/L account master data setup. You use field status group, under the create/bank/interest. See this test, the field status group, test that I created just now, this is available now in the field status group because once you create a field status group here, assign it to the field status group, and assign it to the field status variant, assign it a company code, and it will be available in the G/L master data setup screen of the company code. See the link now, see, test, so I can I can change the field status group of this G/L account to, test, now. So whatever settings that I have done for the fields under this field status group test will be applied to this G/L account, but I am not going to do that.
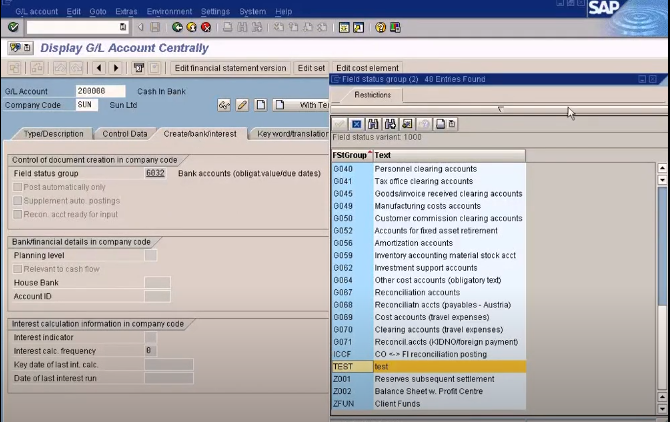
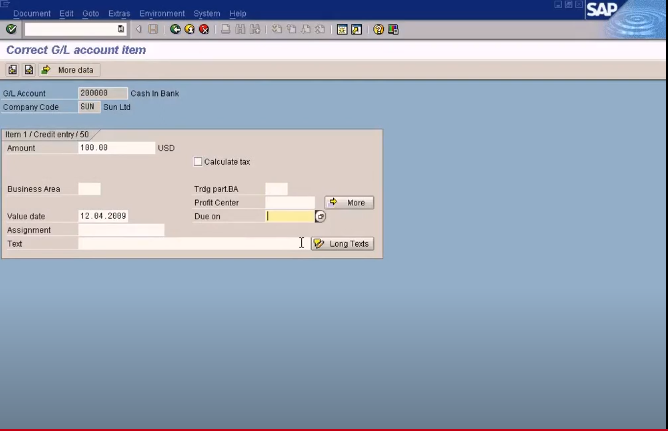
Okay, let’s assume that this is assigned to the G/L account, 200,000. Let me check what is set here, G032. Copy this. I go back here. Double-click, now, position, paste it, G032 Here Bank accounts, right? Let me double-click. You see this? I’m going to take you here, payment transactions, required entry. Remember, whenever we do a postings to this G/L account, the system will ask you to enter a due date or something like that. Let me just recap your memory. FB50, I’m going to put this date, copy, paste. I’m going to pull that field, 200,000. Remember this, okay, 200,001. Okay. What I’m going to do is simulate.
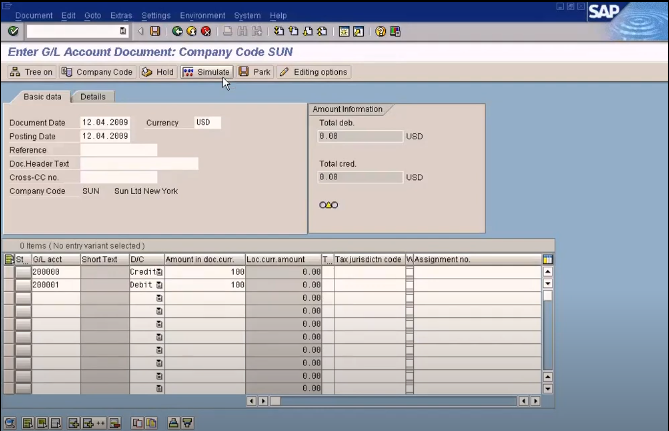
See this, BSEG-ZFBDT, this is a system name. This is a technical name for this field. Can I double click this? Okay, double-click. See, this field, due on. Okay, this BSEG-ZFBDT is a technical system field name for this field, due on. Okay, how to confirm this? Just press F1. Baseline date for due date calculation. Click here. Technical information. See this, this a table name, this a field name Z-F-B-D-T, and that corresponds to this here, performance.
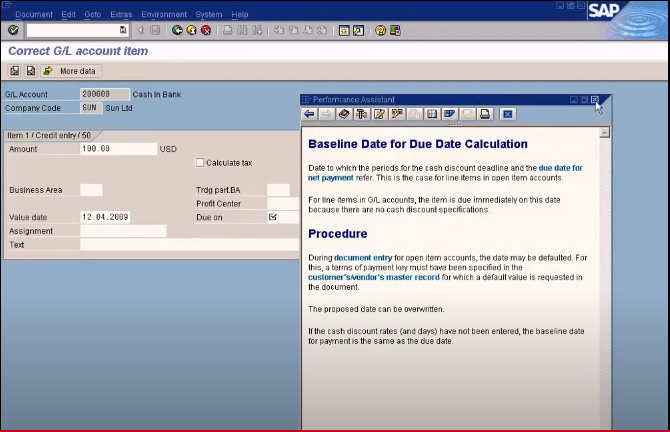
So what it’s saying is that this baseline date for duty calculation is made a required entry. The reason being, let me take you to the field status group, this G032, remember this G/L account has got a field status group of G032, so therefore, whatever that’s specified under the G032 field status group will be applicable for this, any postings to this G/L account, 200,000. So here, under due date, is made a required entry. This due date corresponds to this due date here, due on. How to prove that? Let me just go to here, due date, and do a field check. See this, baseline payment date. Baseline payment date, if you zoom in, it will show you the same date, two days for net payment.
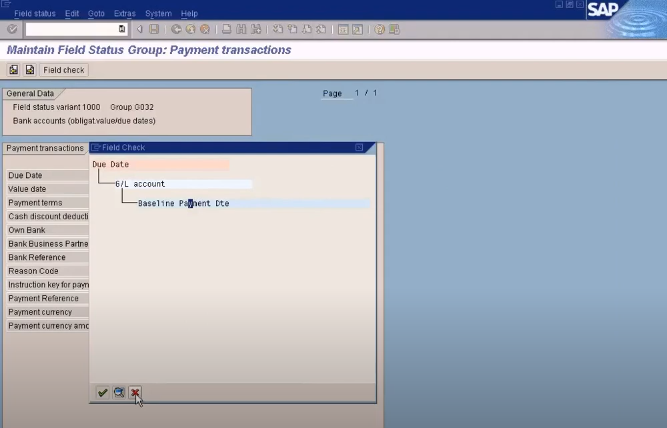
So baseline date for payment date is made a mandatory field, therefore, it’s asking for due date here. Okay, if you don’t want this to happen, you just make this required entry optional entry, or you can even suppress it, so the next time we do our postings to this G/L account, the system will not prompt for this field.
Remember, in the basic training session, I told you not to worry about this. I’m going to explain this during the additional training, so this explanation. Now, we are in the additional training, I’ve already explained how this field is made a mandatory field. It’s using the field status variant and the field status group. Okay. Alright, you can make an entry, then you can proceed. I’m not going to post this. Let’s quit it.

So similarly, you can control the appearance and behavior of fields, the data on the screen using this field status group, so any postings that will hit this G/L account through the data entry screens, FB50 is a typical data entry screen, it will be controlled by the settings area made in the field status group. Alright, now you see, field status group field, G/L account master data. Whatever you set up here will appear here, so that you can select and assign the test. I’ll delete the test now, so that the field status variant is kept very clean. Test. I created this just to show you. Let me delete it, and then, we can end the session. Okay, we can end this session now.
You may watch the full course on the following YouTube link
https://www.youtube.com/watch?v=S4aFAdvFSRs&list=PLN17Nn94liux88cwVwqbiRQQo1qK4sOdQ&index=59&pp=iAQB