
Production Order Settlement, WIP Calculation
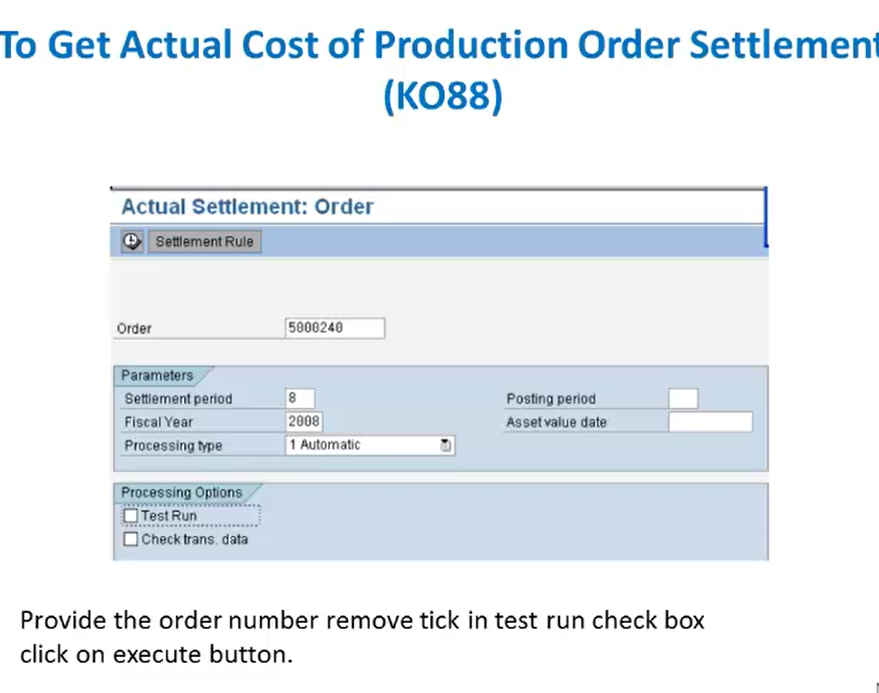
Next, we’ll see how to get the actual cost of production order settled. Now for this, we’ll use the transaction code KO88. Let us see how to do that. So this is the actual order settlement screen, that is of production.
Thank you for reading this post, don't forget to subscribe!
Here we’ll have to provide the order number and we’ll have to remove this test run checkbox. So here the order number which we have used is taken from the previous example. So after this, we’ll have to click on the execute button. So we provide the order number and remove this test run checkbox and click on execute button. After that, we’ll get this particular screen of the order number.
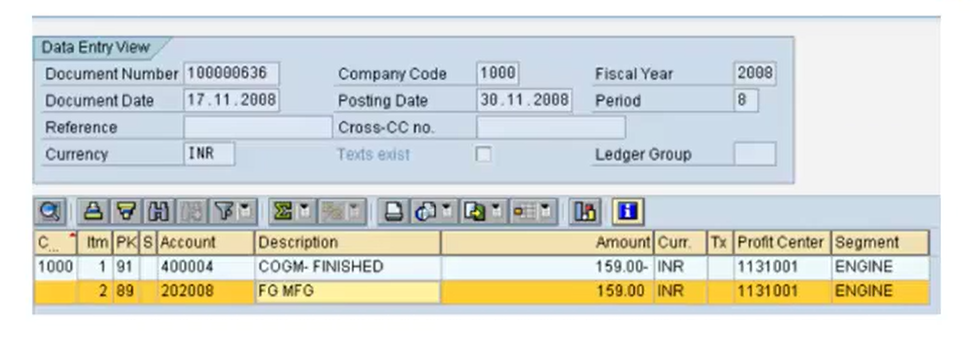
So this is the data entry view for that particular order. Here we’ll get the line items description. So this is how we view the data in production.
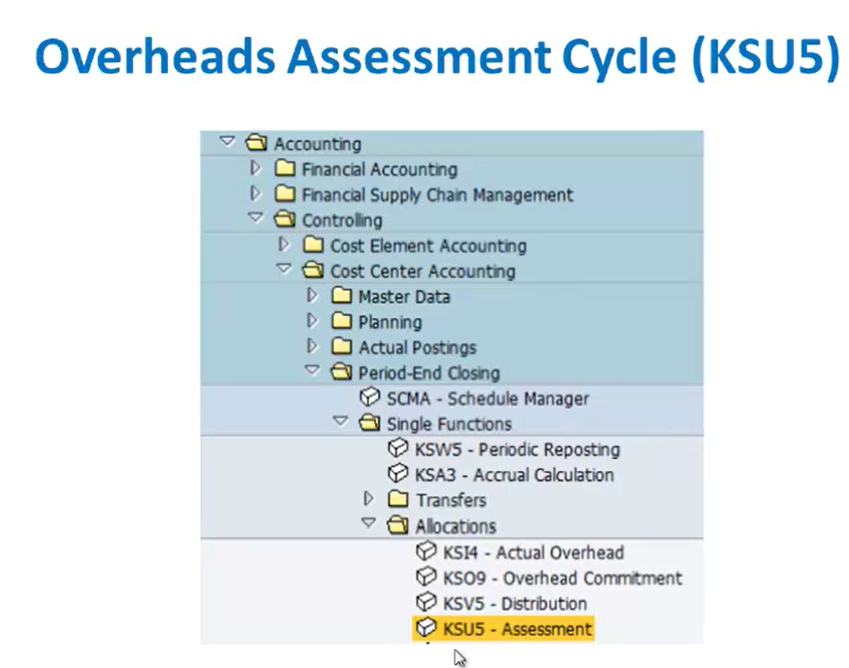
So after getting the actual cost of production order settlement, next, we’ll see what is overhead assessment cycle. Now here we’ll have to use a transaction code KSU5. Let us see what is overhead assessment cycle. Here we can also go via an SAP menu path, which is under allocations, where we have an assessment that is KSU5.
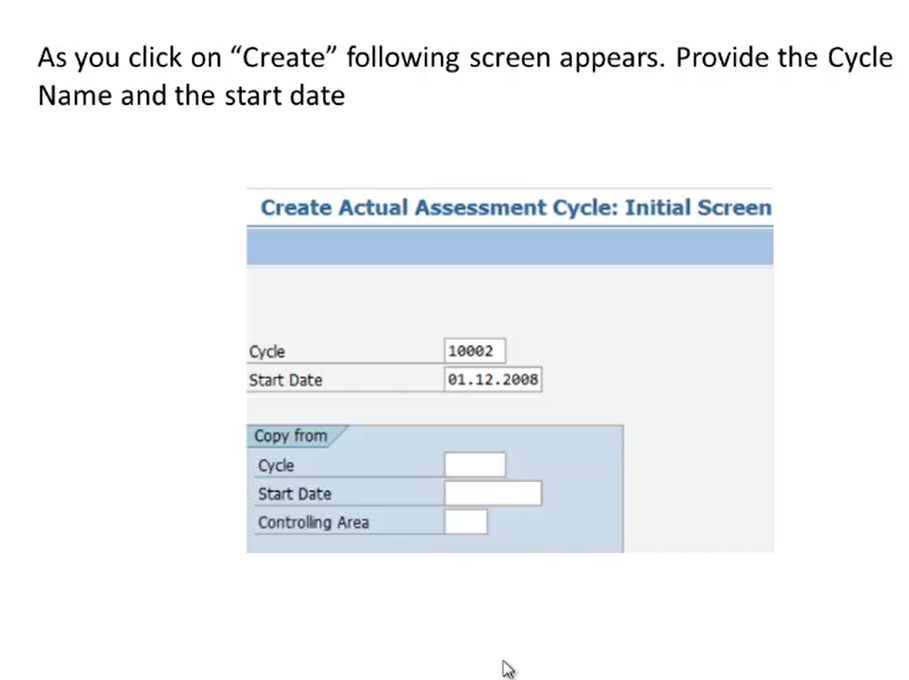
Now this is the assessment cycle transaction code. Now here we can go to extras. Then under cycle, we have the create option. So from there, we can create a menu. So before that, we’ll go to the KSU5 transaction code. Under that transaction code, we’ll have to go to this path. That is Extras, Cycle, and then we’ll have to click on the Create option. So once we click on the create option, we’ll get a screen where we have to provide the cycle name and the start date.
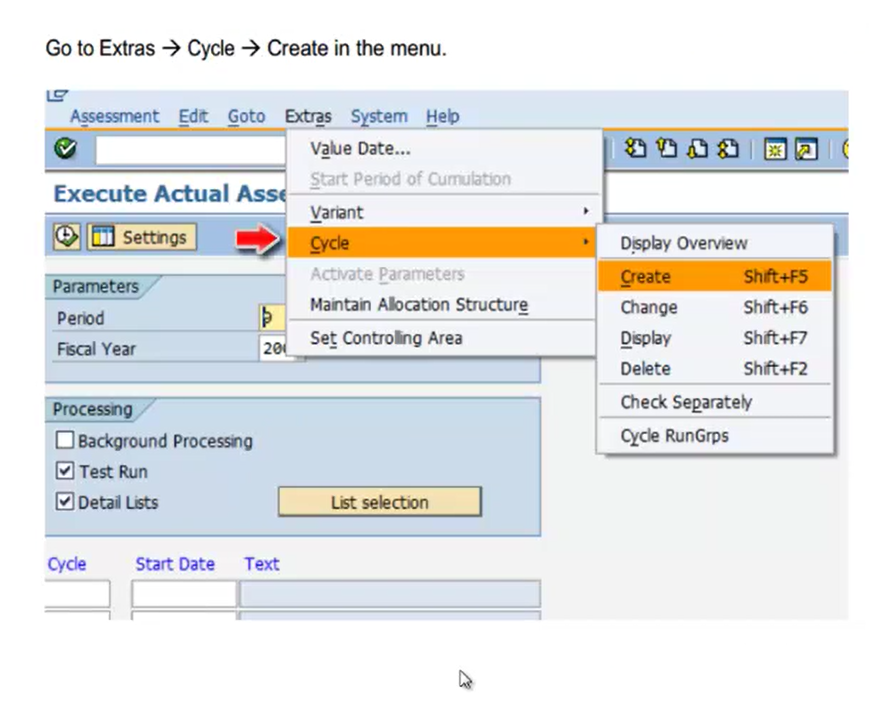
So here the cycle name is been provided by the teams So this is 10002, and that is the start date. So after providing this information we’ll press enter and we’ll get this header data screen
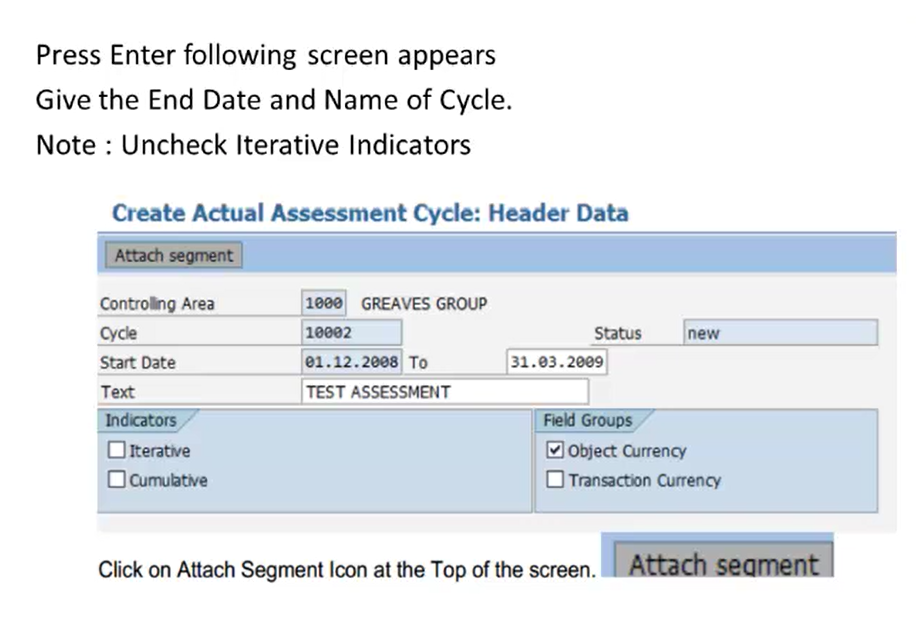
Now here we’ll have to give the end date and the name of the cycle, that is the description to the cycle. And we should note that under indicators we have to uncheck the Iterative indicators. Now iterative indicators means repetitive. So here we’ll have to uncheck this checkbox and we have to provide an appropriate text that is the description and we have to provide the end date to it. Now after these details we’ll have to click on the Attach segment icon. So we’ll click on this attach icon after providing this details under header data section. So under attach segment cycle, we’ll get this particular screen.
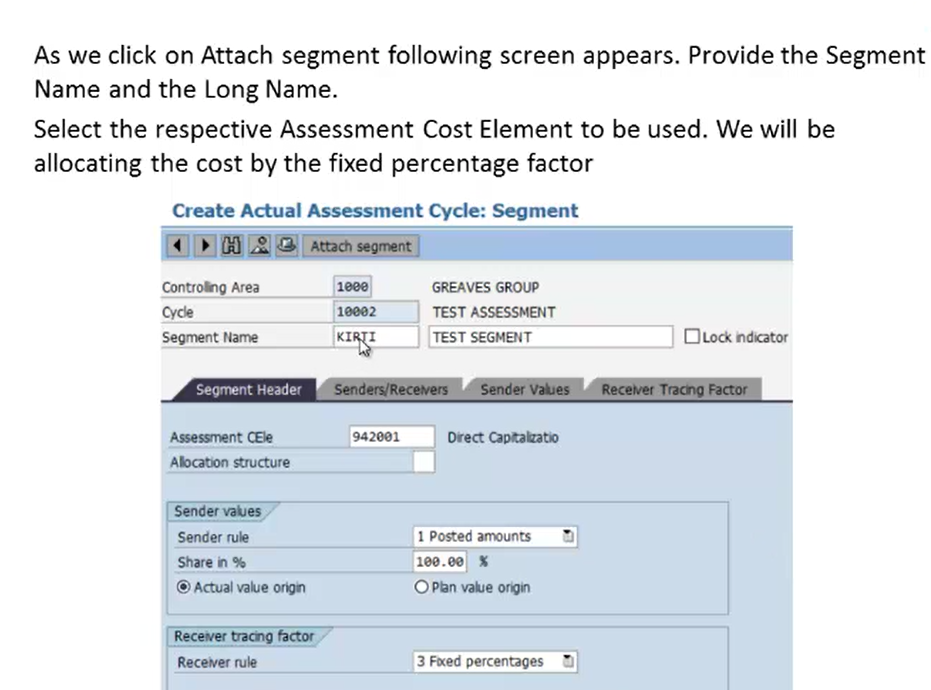
Here we’ll have to provide the segment name and the long name. So, this is the segment name and this is the long name, that is the short description name. Then we’ll have to select the respective assessment cost element to be used. So, this is the assessment cost element to be used which is provided under this particular field. And we’ll be allocating the cost by the fixed percentage factor. So here we have to allocate the cost in the fixed percentage factor. And rest of the details can be managed by the functionalities. So this is how we maintain the data under this segment header tab, which we’ll get when we click on the attach segment tab.
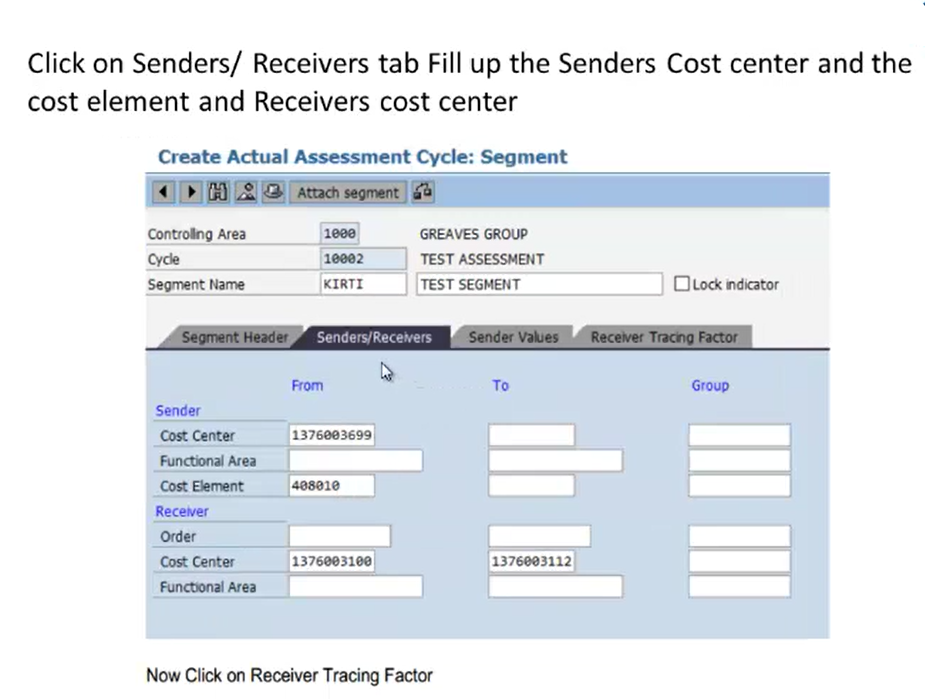
So after maintaining this assessment cost element and the fixed percentage factor, next we’ll go to sender/ receivers tab. So here we’ll have to fill the senders cost center and the cost element. So here in sender section, we’ll fill the cost center and cost element. And under receiver section, we’ll have to fill the cost center. So here we have a range from and to. So for sender and receiver we’ll have to maintain the details like this. And after maintaining these details we’ll go to the next step. So once this is done we’ll go to the next step, which is receiver tracing factor.
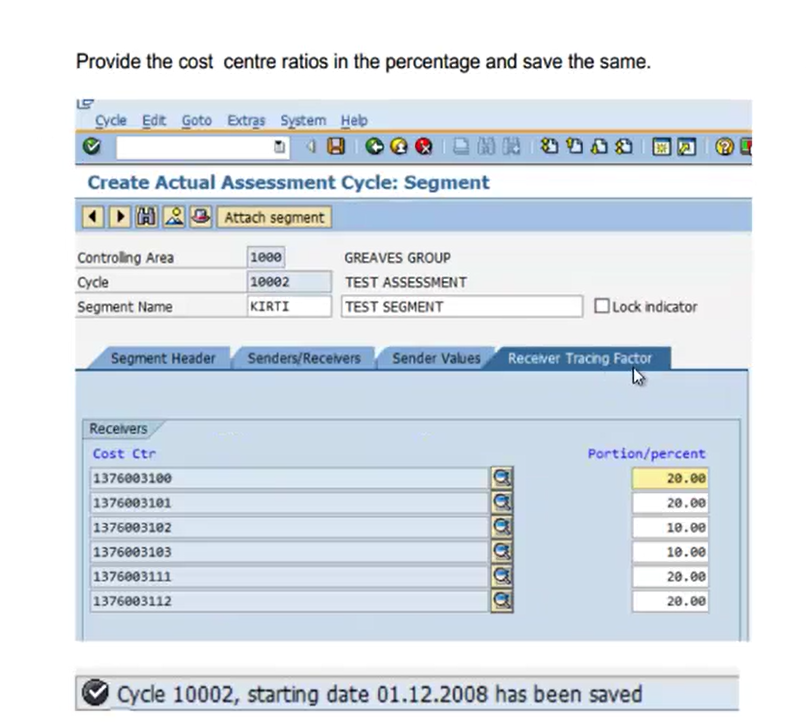
So under Receiver Tracing Factor, we’ll have to provide the cost center ratios in percentage. So this is the cost center, which has already been saved. So here we’ll have to provide percentage for that particular cost center ratios. So after maintaining all these details under actual assessment cycle, we’ll click on the save button. So once we click on the save button, we’ll get a message like cycle 1002, then starting date would be this have been saved. So this is how we create an assessment cycle. So here we have seen overheads of the assessment cycle, like how to create an assessment cycle. Now next, we’ll see executing an assessment cycle.
So previously, we have saved the cycle by creating using the KSU5 transaction code. Now we’ll see execution of this assessment cycle. So here we’ll go to that KSU5 transaction code after creating that particular cycle, we’ll provide the period and the fiscal year in this fields.
And after providing the cycle code, so here we have created the cycle code as 1002. So here 1002 will be provided along with the start date. And as soon as we press enter, we’ll get this test assessment description, which we have maintained. So after maintaining this data we’ll click on this execute button. So once we click on this execute button we’ll get this execution assessment cycle basic list.
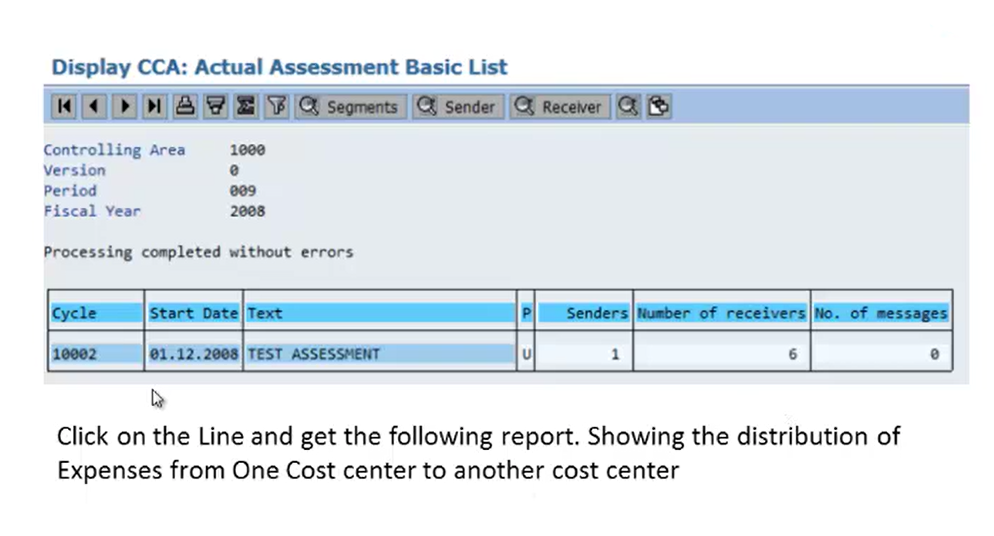
So this is the output which we’ll get, that is the execution of the assessment cycle. So here we’ll click on the line, and get this following report. Now this is showing the distribution of the expenses from one cost center to another cost center. So this is how we get the actual assessment list.
Now here once we click on that particular line, we’ll get a detailed display of those line items. So here we have the detailed display of the line items for that particular segment under period 9.
Now we have a report which is created for this assessment, that is actual assessment. So here, we have to go via this path. This is the SAP menu path, which is there under information systems.
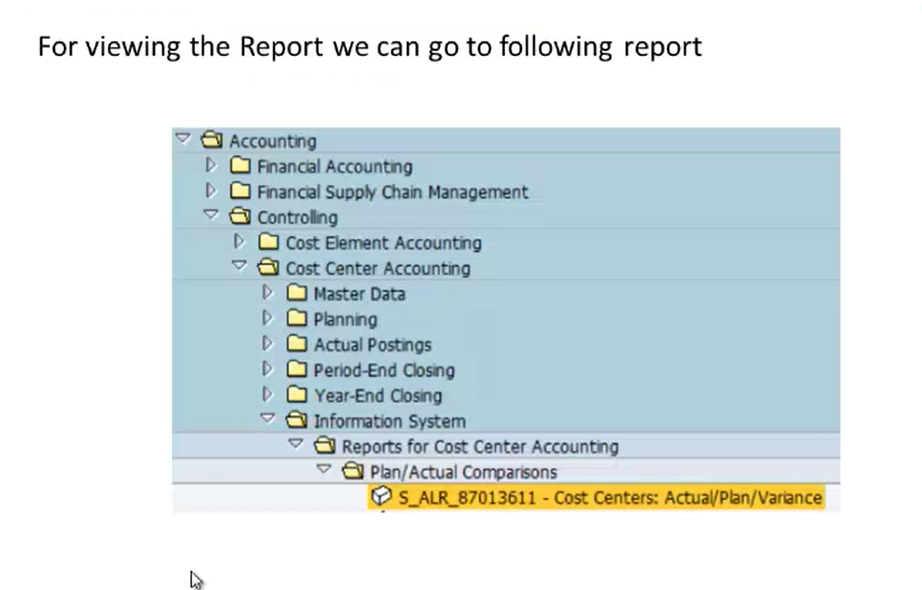
So we’ll go to controlling. Then under information system, we’ll have reports for plan and actual comparisons. So here, we’ll click on this particular report, that is for cost centers, that is actual planner variance. So we’ll click on this report and we’ll get this cost center screen.
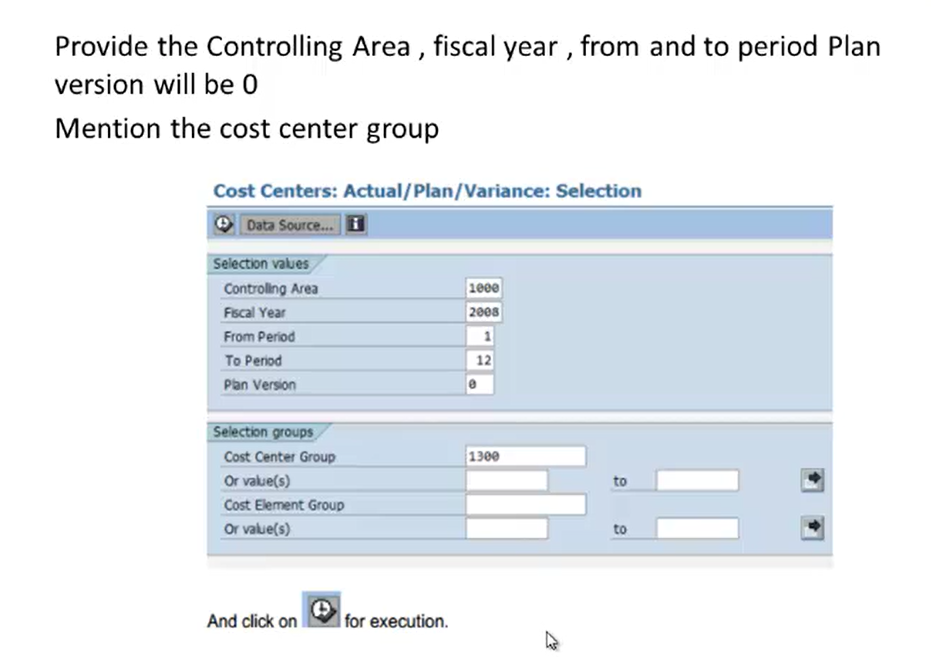
Now here, we’ll have to provide the controlling area, the fiscal year, then from and to period plan, and plan version will be 0. Then under the next part, we’ll have to provide the cost center group. So this is a cost center group in our case. Now after maintaining the settings, we’ll click on this execute button. So this is how we maintain the data for cost centers via a report. After that, we’ll get a screen where we’ll have the cost element wise details.
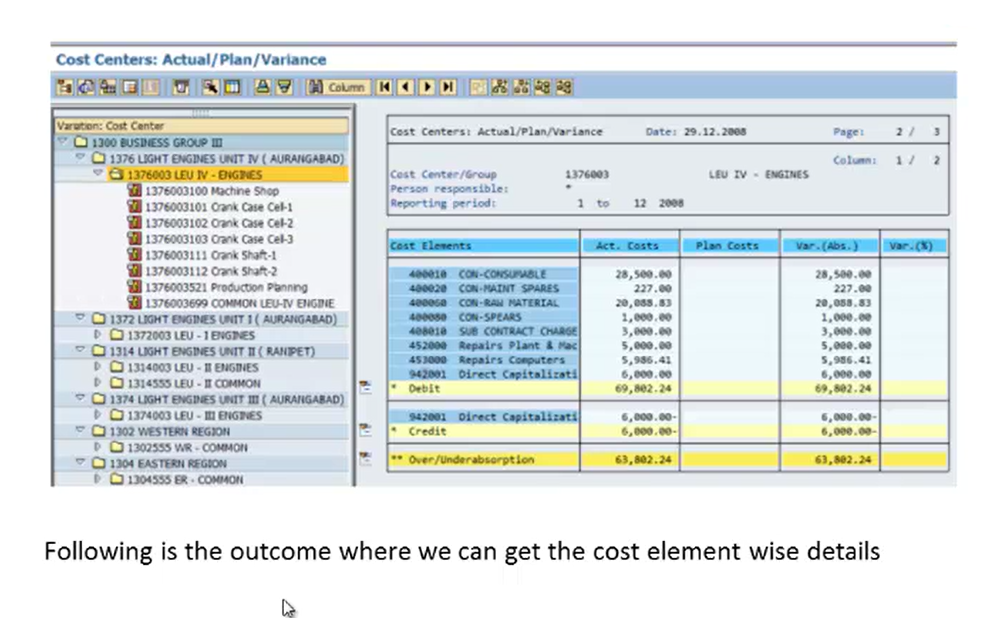
So this is the cost center element wise details. So this is the variation cost center screen and these are the details for that particular cost set. So this is how we generate a report while clicking on the cost center report transaction. So here we have seen how to execute the assessment cycle by using the transaction code KSU5 and how to generate an outcome report by using the SAP menu bar for cost centers.
Month end process WIP Calculation
Now next, we’ll see what is a month end process WIP calculation. For this, we’ll use a transaction code KKAO. Let us see what is month end process WIP calculation. Now here we’ll go via this SAP menu path.
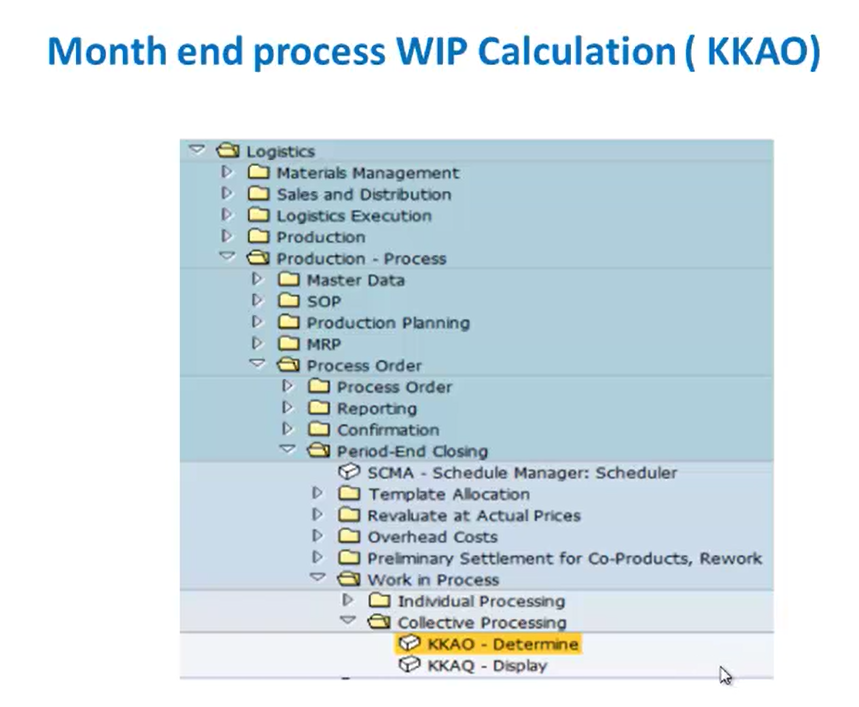
Under this navigation, we’ll go from logistics, then production process, then we’ll have to go to process order, then period end closing, since it is a month end process. Then under that, we’ll go to work in process, where we have collective processing. Then we’ll go to KKAO transaction, that is determine transaction. So after this we’ll have to maintain the controlling area. Now before going ahead with this, let me explain to you what WIP calculation is.
WIP is work in process. So here the WIP calculation function evaluates the unfinished products. Now here in the product cost by order component, the work in process is evaluated at actual cost. Work in process is the difference between the debit and credit of an order that has not been fully delivered. So, here we can calculate work in process at actual cost for production orders and process orders. So, this is the description of work in process, that is the calculation which we’ll do by this example.
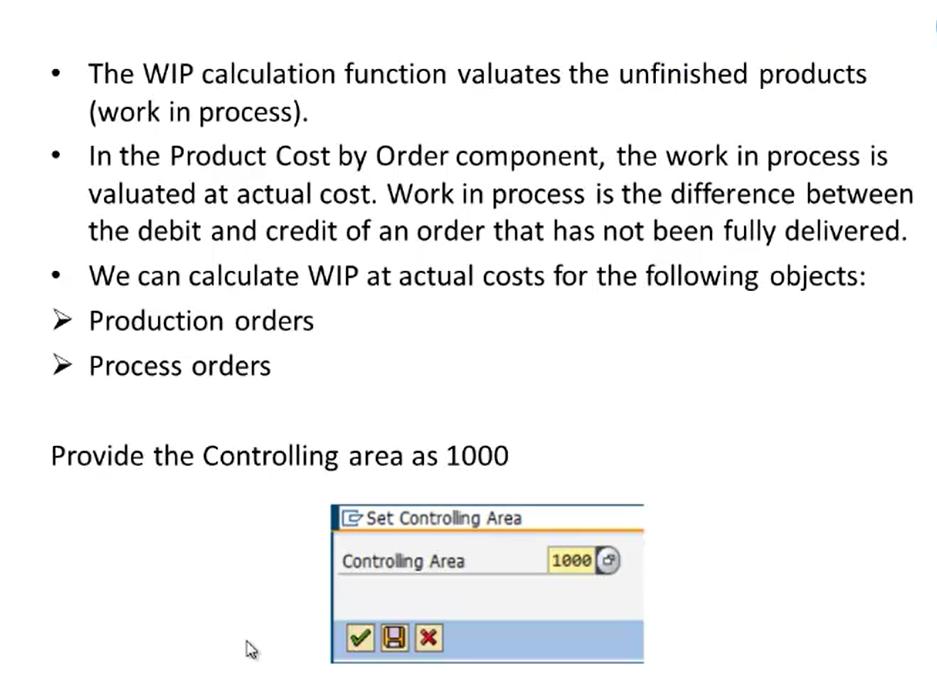
So here once we click on that path, we’ll have to provide a controlling area. So here we’ll set the controlling area as 1000. Then we’ll press on the continue button. After that we’ll get a screen which is a collective processing screen.
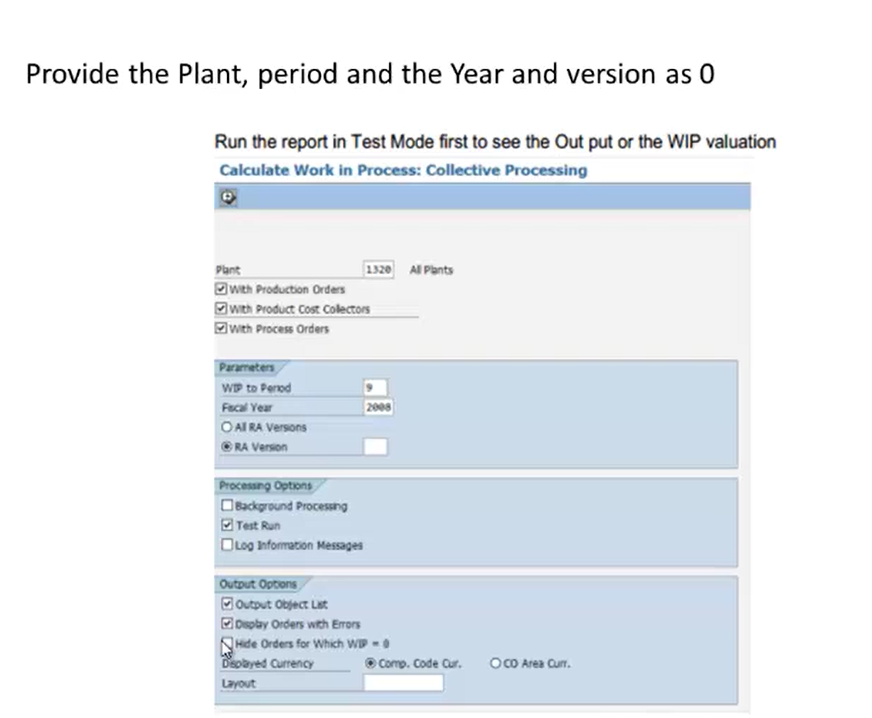
Now we’ll have to provide the plant, so here we have used the plant as 1320. Then we’ll have to provide the period, that is work in process period, the year, the fiscal year, and the version. So here we’ll use the version as 0. After maintaining the settings we’ll run the report in test mode. So we’ll have to check the checkbox test run. First, we’ll see the output or the WIP valuation. So after clicking the checkbox test run, we’ll click on this execute button. So once we click on the execute button, we’ll get this particular outcome, that is, the list of cost object list, where it will calculate the work in process, that is work in process details.
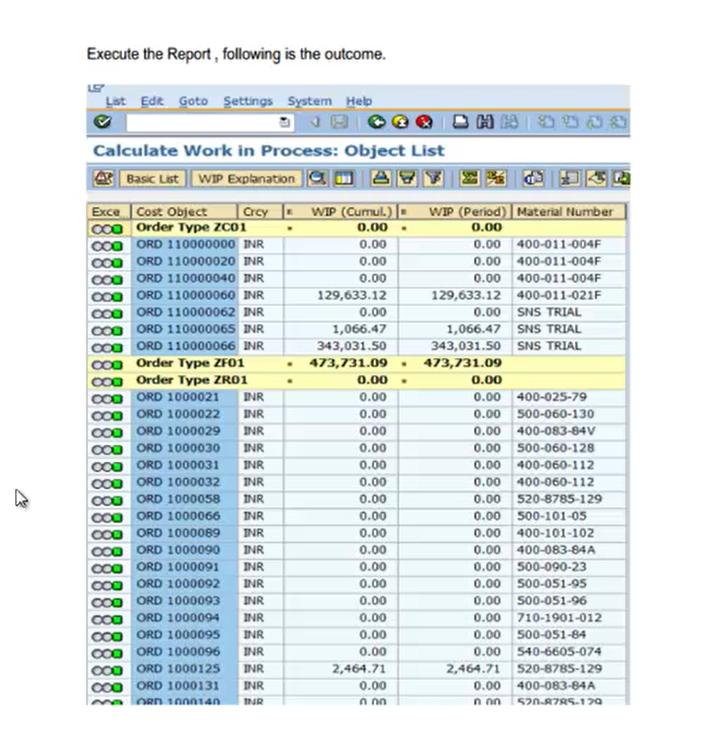
In this, we can see the total number of the open orders, which has not been settled during the period. So here we have the difference between the credit and the debit. Now if the production is complete and the order is not settled, then it will come with 0 value. Once we are satisfied with the results, we can run the application, the final mode, so the system will evaluate the work in process value. Now here we have to note that the system does not generate any accounting entry for work in process while executing this application. So for generating the finance entry, we have to settle the work in process material through CO88 or KO88 application. So this is the description for the outcome, which we have got from WIP, that is work in process execution. And here the system will not generate any accounting entry, that is for generation of that finance entry. We’ll have to use a transaction code CO88 or KO88 to settle the WIP materials.