
Purchase Order: Goods Receipt and Invoice Receipt
After creation of material and display using transaction code MM03, next we’ll see under purchase order goods receipts and invoice receipts. So here we’ll see how to create a goods receipt and an invoice receipt in and purchase orders. So here the accounting data for a material is managed at company code level or plant level. As we all know that when we enter the data for a material, we have to maintain a company code or a plant code for that material. So here the materials are managed at company code level or plant level. So for viewing the individual purchase order, we’ll go to transaction code ME23N, that is the display for purchase order.
Thank you for reading this post, don't forget to subscribe!
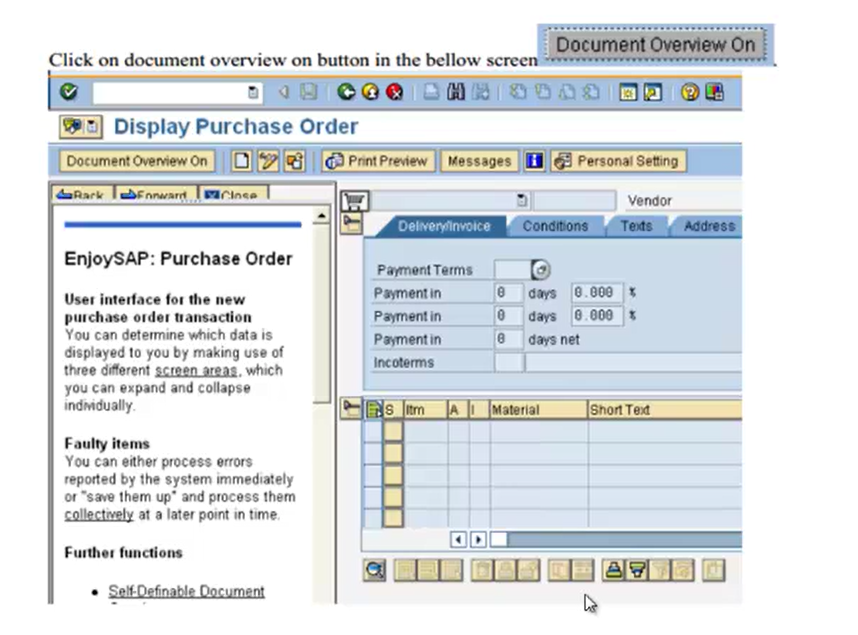
So this is the screen which we’ll get once we enter that particular transaction code for displaying the purchase order. So here, we’ll click on this document overview button for entering the purchase order. So once we click on this document overview button, we can enter the appropriate purchase order, which we want to display.
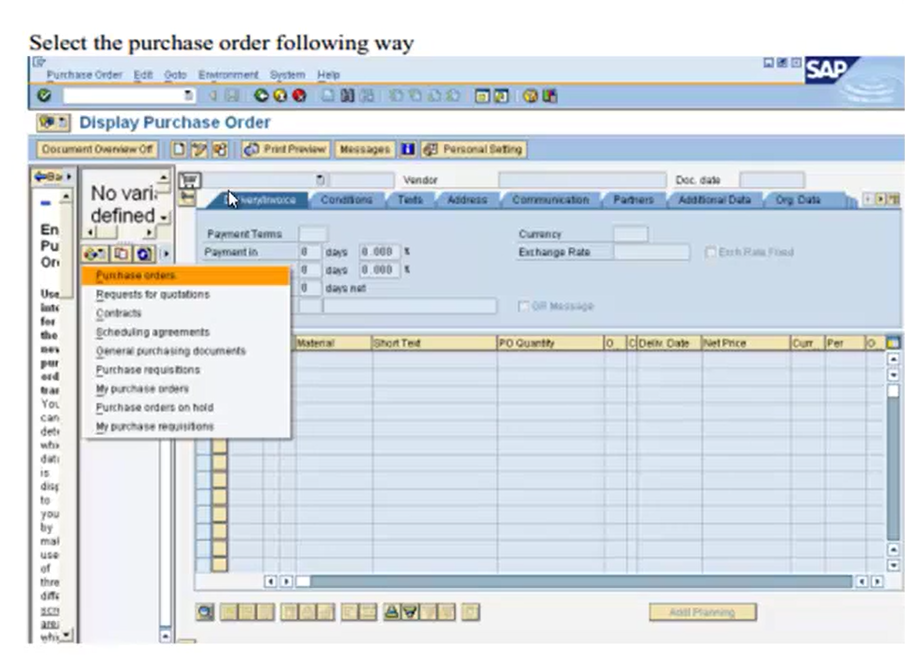
So here once we click on this document purchase order, we’ll get a list, like purchase orders, request for quotations, contracts, then scheduling agreements, and so on. So this is the list which we’ll get. So here we have to select the purchase orders according to our requirement. So here we’ll select purchase orders. So once we select the purchase orders button, we’ll get a screen where we have to maintain our purchasing documents.
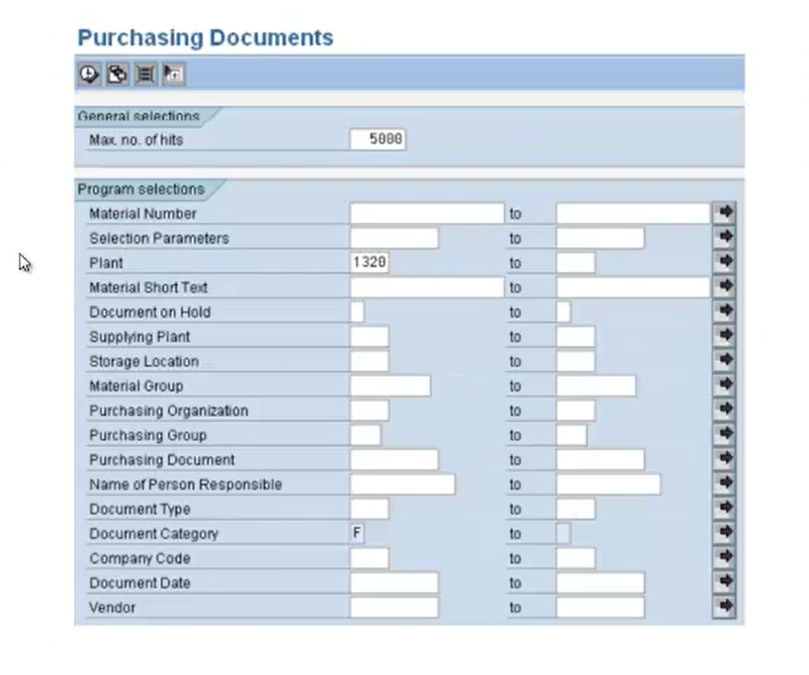
So here we’ll have to maintain the plant details. So here we have maintained the plant details. So here, we have maintained the plant as 1320. And we’ll click on this execute button. So after this, we’ll get the list of all the purchase orders under that particular plan. So this is the list of the purchase orders. So here, whichever purchase order we want, we need to double click on that, and we’ll get the history of that purchase order, like header data, the item level details. Here will be the description of the each items which we had created. This is the purchase order history. So this is how we get the list of all the purchase orders.
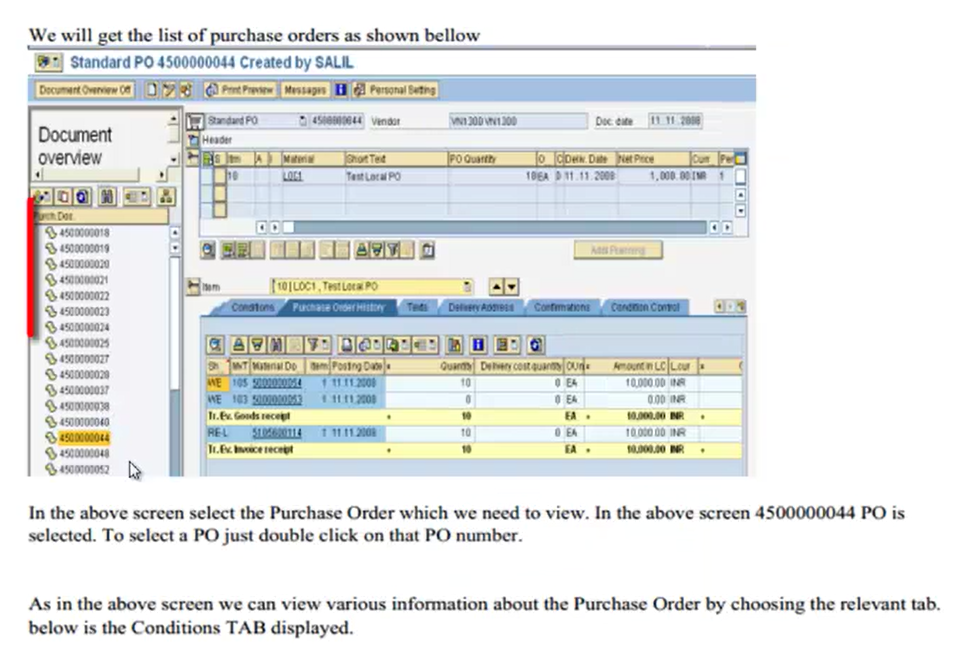
So here in the above screen, we’ll select the purchase order, which we need to view. And here we have selected this particular purchase order. And we can view various information about the purchase orders by selecting the relevant tab. Now here we have selected the conditions tab for this particular purchase order.

So here we are viewing the conditions for that particular purchase order, like pricing elements. So here we have the details for the pricing elements, like quantity, condition, value, the amount, the currency, etc. This is how we can view each of the tabs in the purchase orders. Now next, here we can see a purchase order history. So besides the conditions tab, we have a purchase order history tab.
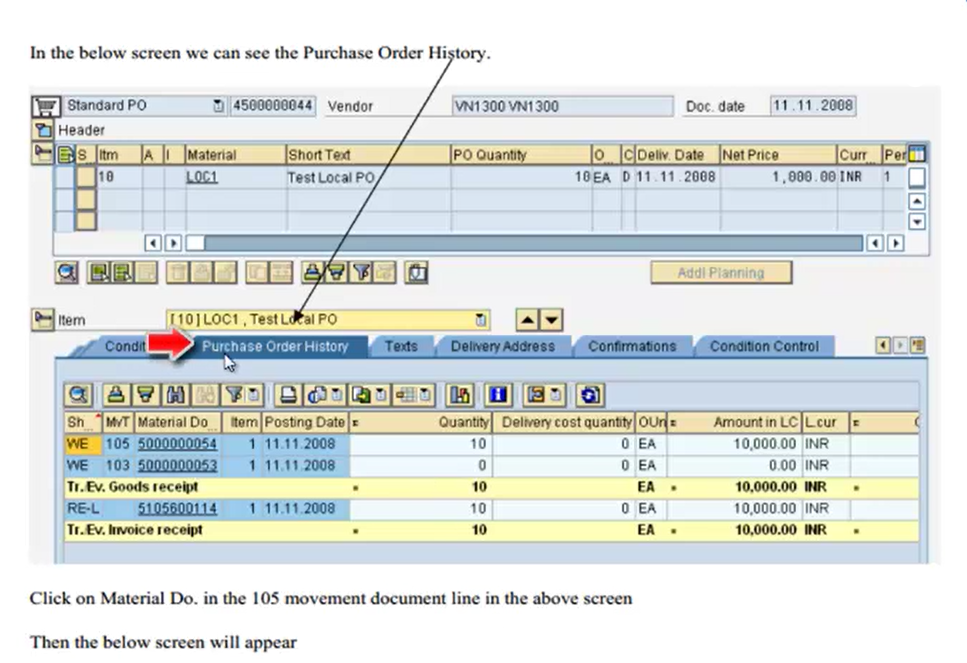
Here, we’ll click on the Material Do, that is 105 movement document line. So here, once we click on this particular material document, that is material do. So material document number. Once we click on this line, we’ll get this particular screen where it gives the information about that particular material. So here it is giving the information related to that particular material, which we have created for that purchase order.
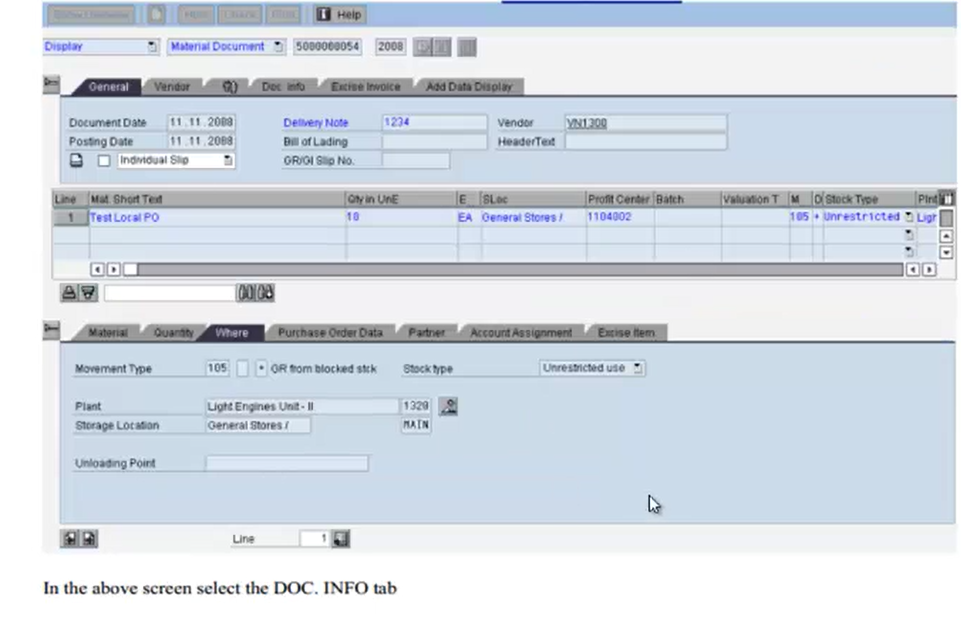
Now here we have to take care about goods receipts and invoice receipts. So here when we enter into this material, we’ll have to select the document info tab. Now here we’ll select this particular document info tab under this material. So once we click on this tab, we’ll get this particular screen. Now here, under this screen, we’ll click on this FI documents.
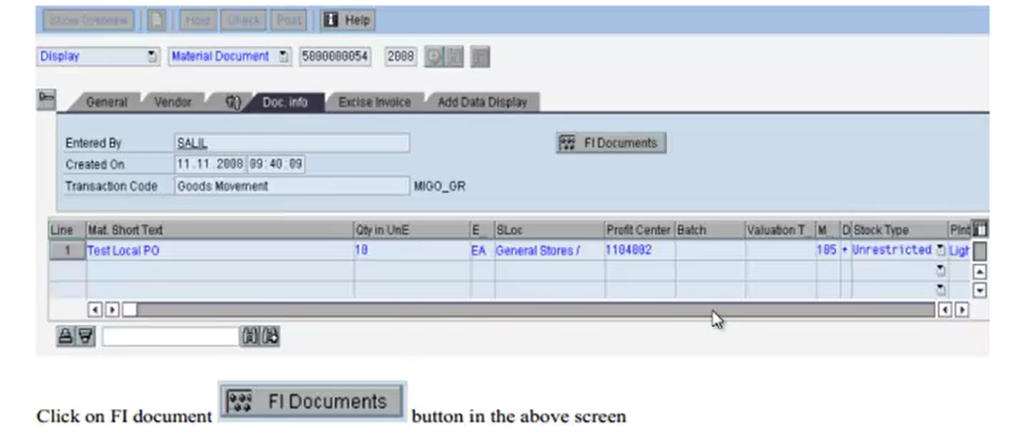
Since we are creating this purchase order with relation to finance, we have to maintain the settings which are required from finance point of view. So here, we’ll under purchase orders, we’ll go to document info and we’ll click on this FI documents. Under FI documents, we’ll get a screen where we have to maintain the settings. So here we’ll get the general ledger view and the data entry view which we were getting in our finance, sessions which we have seen earlier. So here we’ll get this FI view for this particular document.
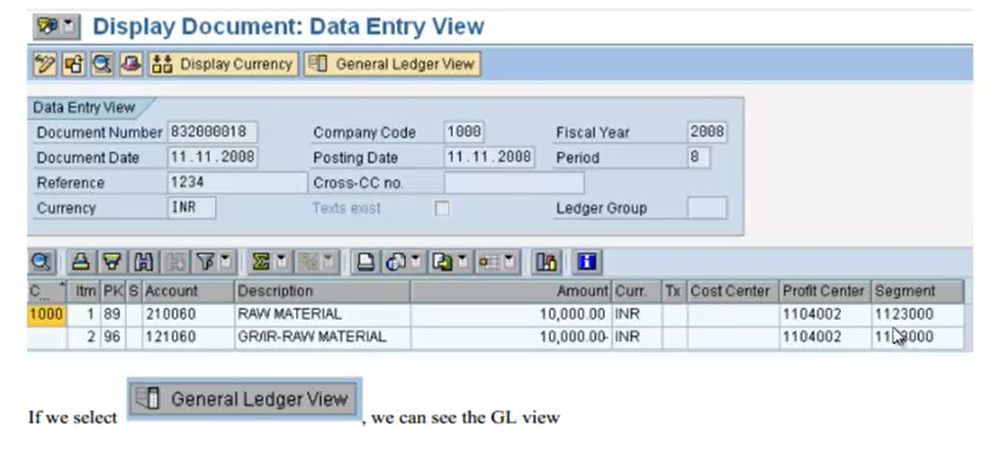
So here this is a data entry view. And if we select a general ledger view, we’ll get this particular general ledger view.
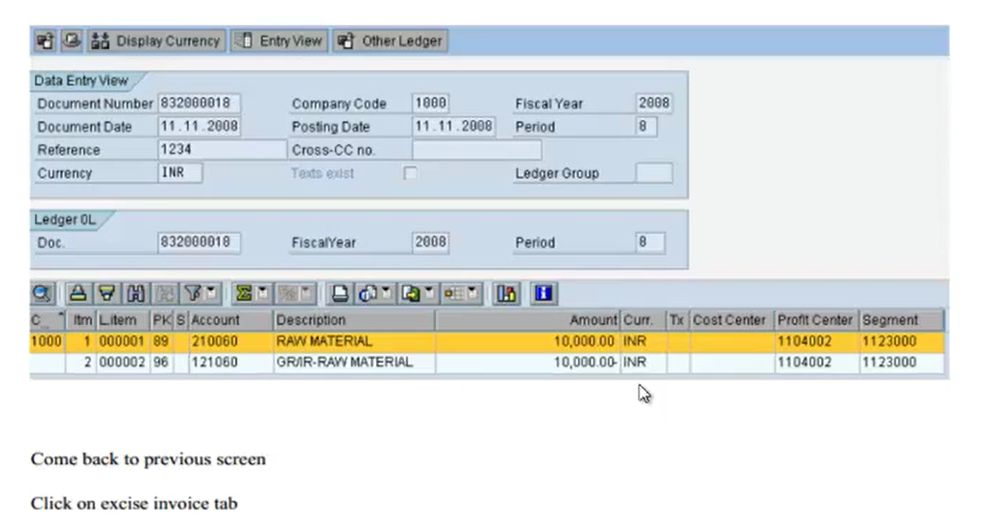
So here after this when we come back to the previous screen and that is when we go back to this previous screen, we can click on the excise invoice tab So here after viewing the data entry view and general ledger view, we can go back to check the excise invoice tab. So here we’ll click on the excise invoice tab and we’ll get this particular screen. This is the excise invoice tab.
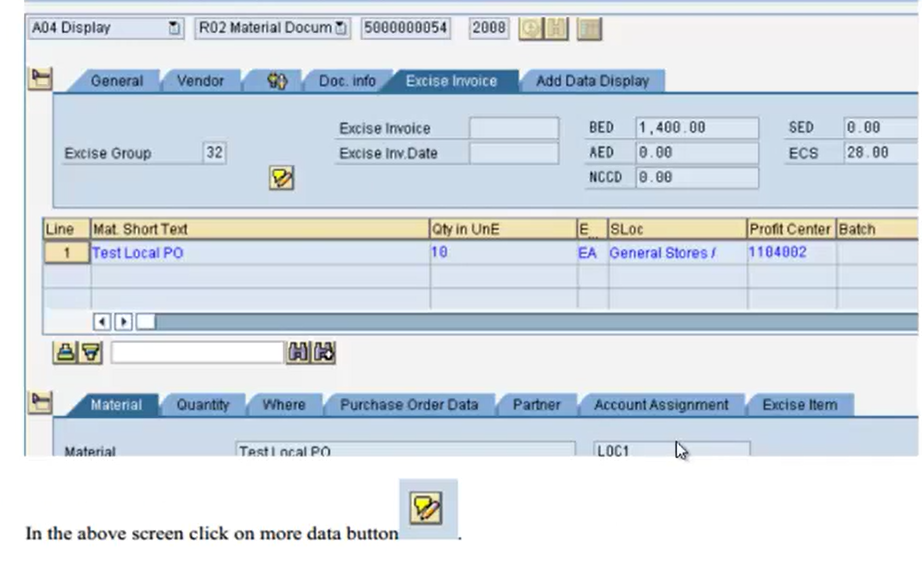
So all these things are related to finance. So here once we go to the excise invoice, we have to click on this button that is more data button. So once we click on this button, we’ll get this more data settings for this particular excise invoice. So here we’ll click on this excise invoice text. So once we click on this, we’ll get this miscellaneous screen.
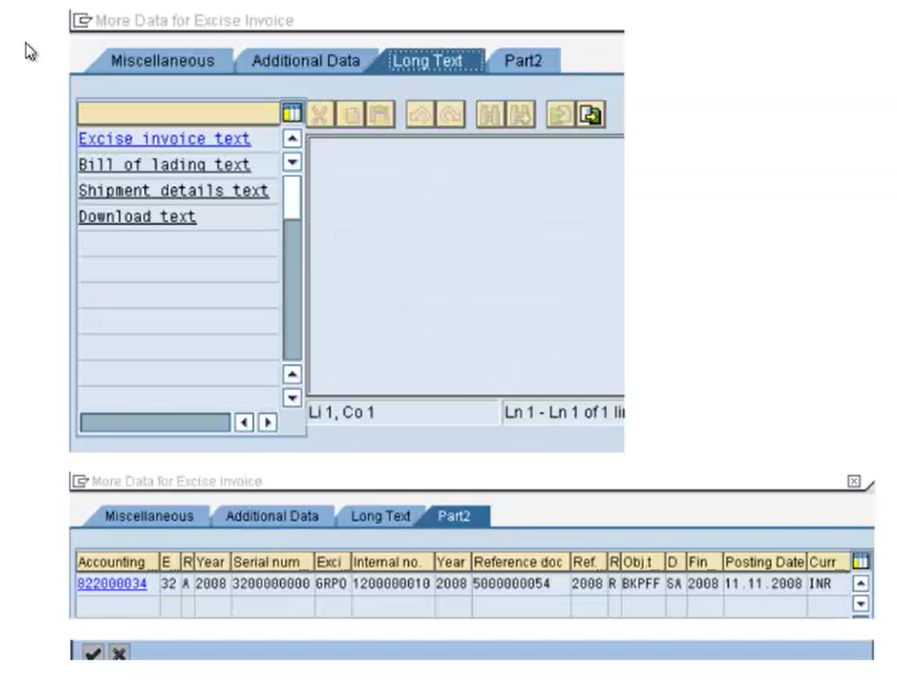
Now here under that, we’ll go to part 2 tab where we have the accounting information. So here we’ll click the number, this particular number in the accounting column. So once we click on this accounting number, we’ll get this particular screen which has the excise entries having this line items which we have created.
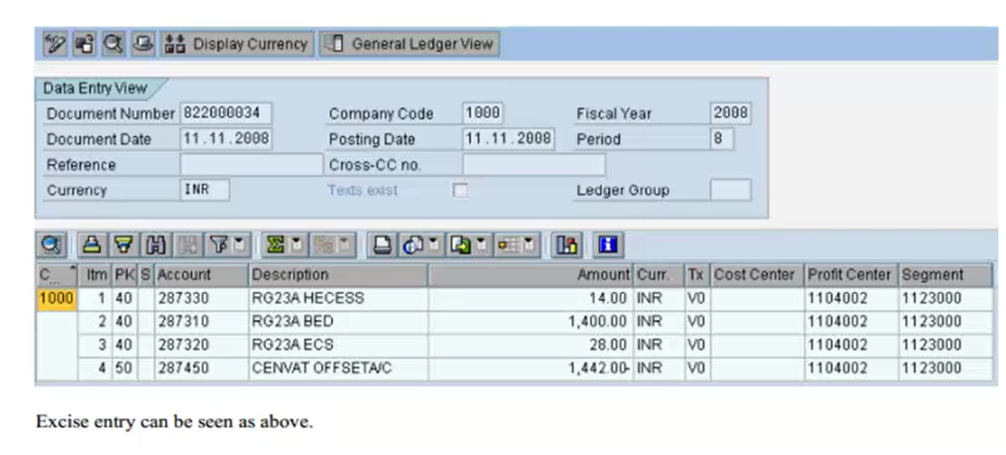
So this is how we see the goods receipts and invoice receipts details under a purchase order by clicking on the finance documents. So this is purchase order on the basis of goods receipts and invoice receipts and displayed in the data for that particular purchase order. This is how we can see the excise entry.